Treatment Plan
Introduction
The CharmHealth Treatment Plan feature assists Practices in tracking medical and therapeutic interventions designed to address patients' medical conditions with achievable goals and target dates.
The Treatment Plan provides a roadmap for healthcare providers to diagnose, manage, and treat patients' problems effectively. The Treatment Plan in CharmHeatlh comprises the following key components:
- Plan Description: A comprehensive overview of the Treatment Plan for a specific patient problem. It outlines the intended approach to the treatment.
- Patient Problems: A summary of the patient's primary diagnosis, secondary conditions, and the severity of each problem. It includes any risk factors, allergies, or contraindications.
- Goal: Outlines the expected treatment outcome. It should be specific, measurable, achievable, relevant, and time-bound.
- Objective: Breaking down the treatment goal into smaller objectives helps to track the progress and adjust the plan if needed.
- Intervention: This section captures the actions the healthcare providers take such as treatment provided, prescriptions, and other recommendations.
- Progress Notes: Helps to record the patient's progress such as observations, test results, and any changes in the patient's condition.
- Treatment Status: This option allows tracking the ongoing, completed, and canceled treatment plans of patients.
Members with necessary role privileges can access the treatment plans from the 'Patient Dashboard > Treatment Plan' section. Follow the steps below to create and use treatment plans in your practice.
Treatment Plan Templates
Based on your treatment needs, you can create multiple Treatment Plan templates from CharmHealth Settings. Members with the appropriate role privileges can create Treatment Plan templates by following the steps below:
- Go to the 'Settings > Health Trackers > Treatment Plan' section
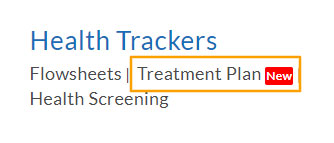
- Click on the '+ Plan Template' button
- Proceed to fill in the
- Plan Name
- Plan Description - Describe the treatment details
- Goal - Describe the treatment outcome you aim to accomplish and set an estimated duration (Days, Weeks, or Months) to achieve the goal.
- Objectives - If required, add multiple measurable sub-goals that assist in achieving the overall goal along with the estimated target duration (Days, Weeks, or Months)for each objective.
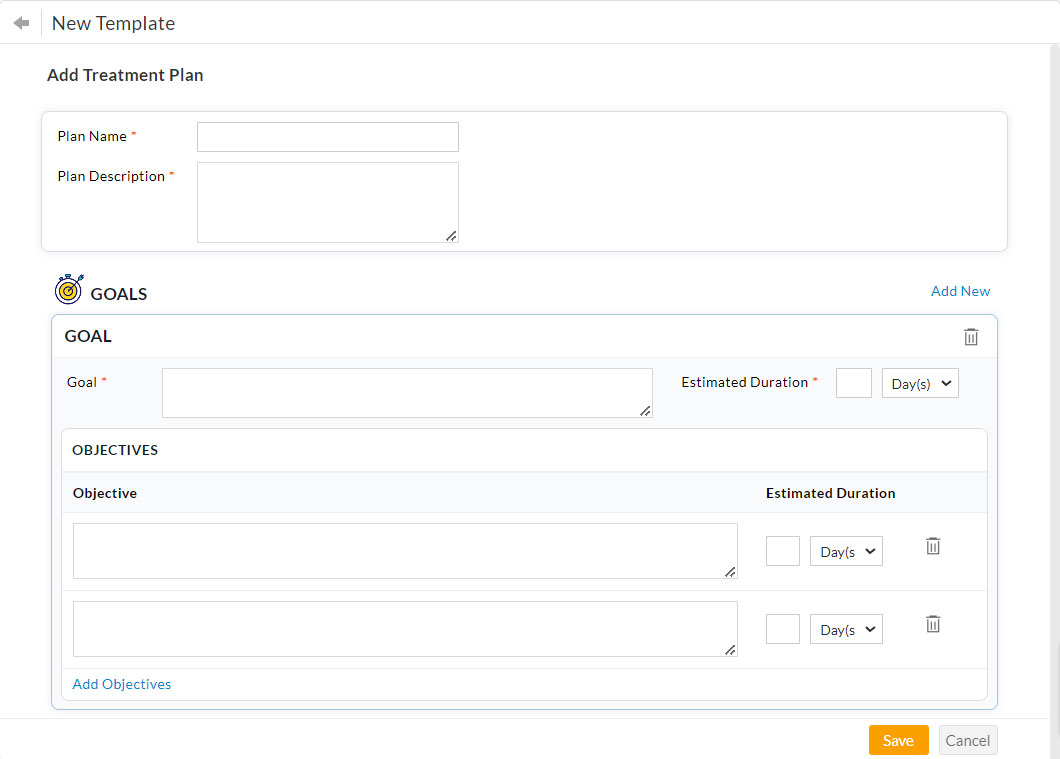
- The Provider and Patient signature fields are enabled by default for all the treatment plans created in your account. If required, you can remove the signature fields of a treatment plan.

- You can click on the 'Add New' link to add multiple goals to the treatment plan.
- Then, click on the 'Save' button.
Repeat these steps to add multiple Templates based on your Practice needs.
Treatment Plan on Patient Dashboard
After configuring the template, follow the steps below to add the Treatment Plan to the Patient:
- Go to Patient Dashboard > Treatment Plan section
- Click on the 'Add Now' link

- Select the Treatment Plan Template from the drop-down list.
- Choose the 'Start Date' of the treatment and click on the 'Add' button.
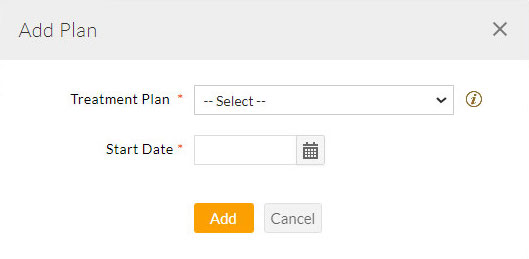
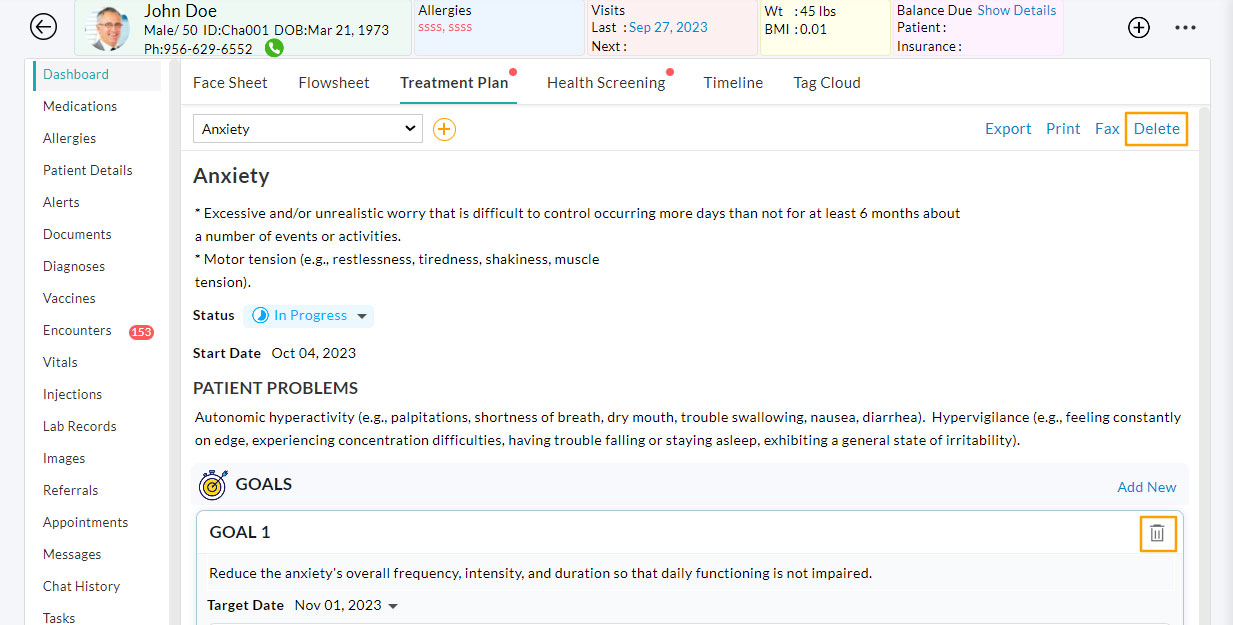
Once you add a Treatment Plan template for a patient, all its content including the plan description, goals, and objectives gets filled. Also, the target dates of the goal and objectives are auto-populated based on the duration configured in the template.If required, you can make further changes to the Treatment Plan specific to that patient. For example, you can change the existing goals, add new goals, etc.
The view provides inline editing so that you can click on any field in the view and make changes. Once done, the data gets auto-saved.
- Click on the 'Add Patient Problem' link to fill in the Patient's medical condition.

- If required, you can use the 'Add New' link to add additional goals that are not available in your default template.
- Click on the 'Add Intervention' link to record the interventions provided over the treatment period. Then, click on the 'Save' button.
- Click on the 'Add Progress Notes' link to record the Patient's progress during the treatment period.

If the treatment involves multiple providers, all of them can access the Treatment Plan and add the interventions provided and the patient's progress. The notes display the member's name and date at the bottom. - You can update the Treatment Plan status from In Progress to either:
- Mark as Completed - After achieving the treatment goal. (or)
- Mark as Cancelled - When the Patient or Practice cancels an ongoing Treatment.
The '+' icon against the Plan Name allows adding a new Treatment Plan for the patient. Providers can add and use multiple Treatment Plans for a Patient simultaneously. The drop-down menu lists all the Treatment Plans mapped to the Patient.
The 'Export', 'Print', and 'Fax' options allow members with the necessary role privileges to share the Treatment Plan outside the Practice.
You cannot edit treatment plans marked as Completed or Canceled. If you want to make any changes, click on the 'Edit Plan' link to change the plan status to 'In Progress'. This enables you to make modifications if any.
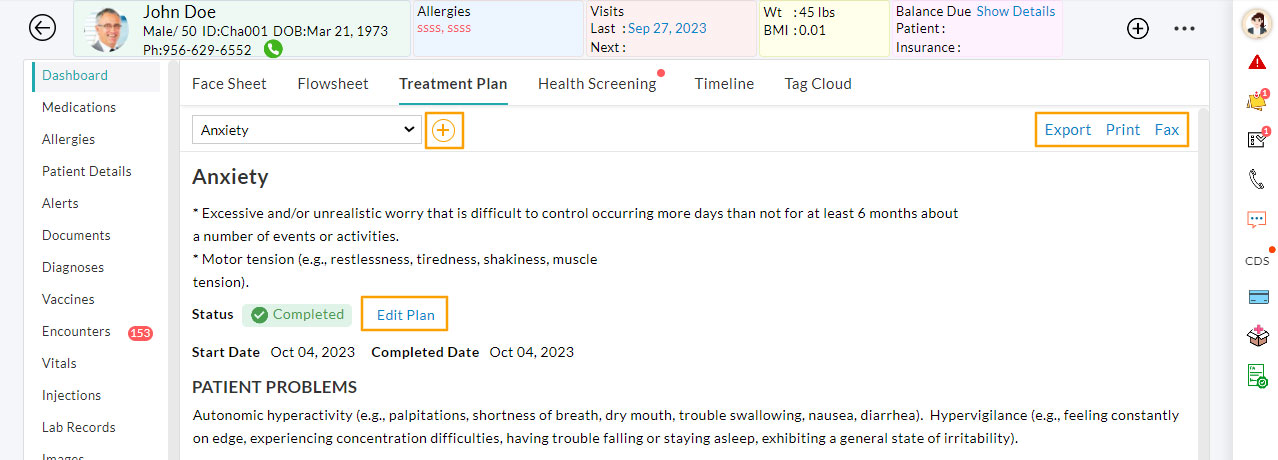
Note: Clicking on the 'Delete' link deletes the entire Treatment Plan record permanently, leaving no option for retrieval. The 'Trash Bin' icon against each row item deletes that particular item permanently.
Treatment Plan on Charting 360
In addition to the Patient Dashboard, you can also view and edit the treatment plans from the Charting 360 view. The 'Clinical Alerts' section displays a notification if the patient has any treatment plans with the In-progress status.
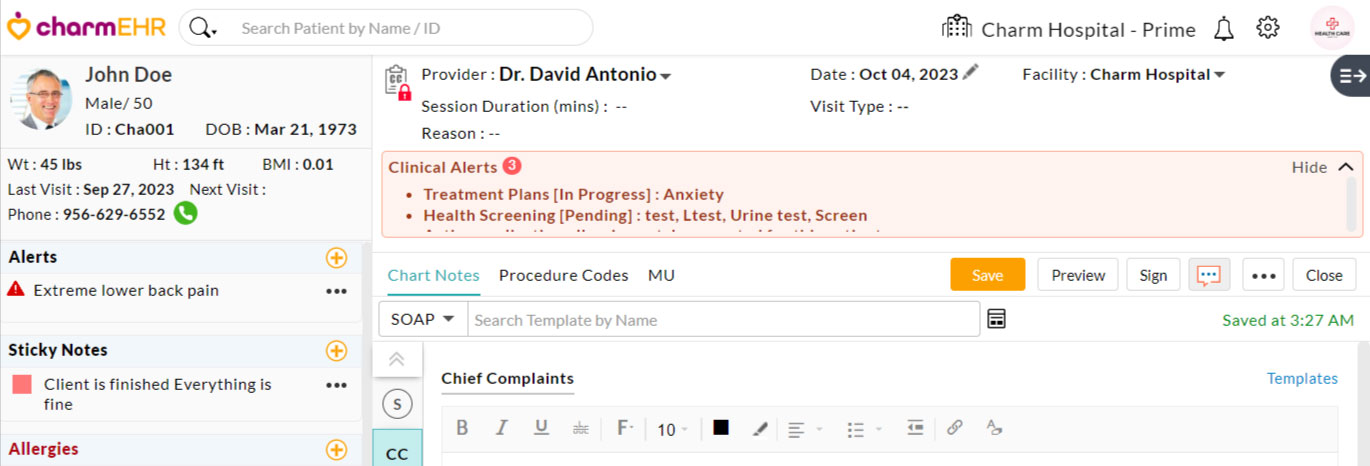
Follow the steps below to access the Treatment Plan from the Charting 360 view:
- Click on the 'Treatment Plan' icon in the middle pane to view the associated Treatment Plans. You can also add a new Treatment Plan to the patient from this section.
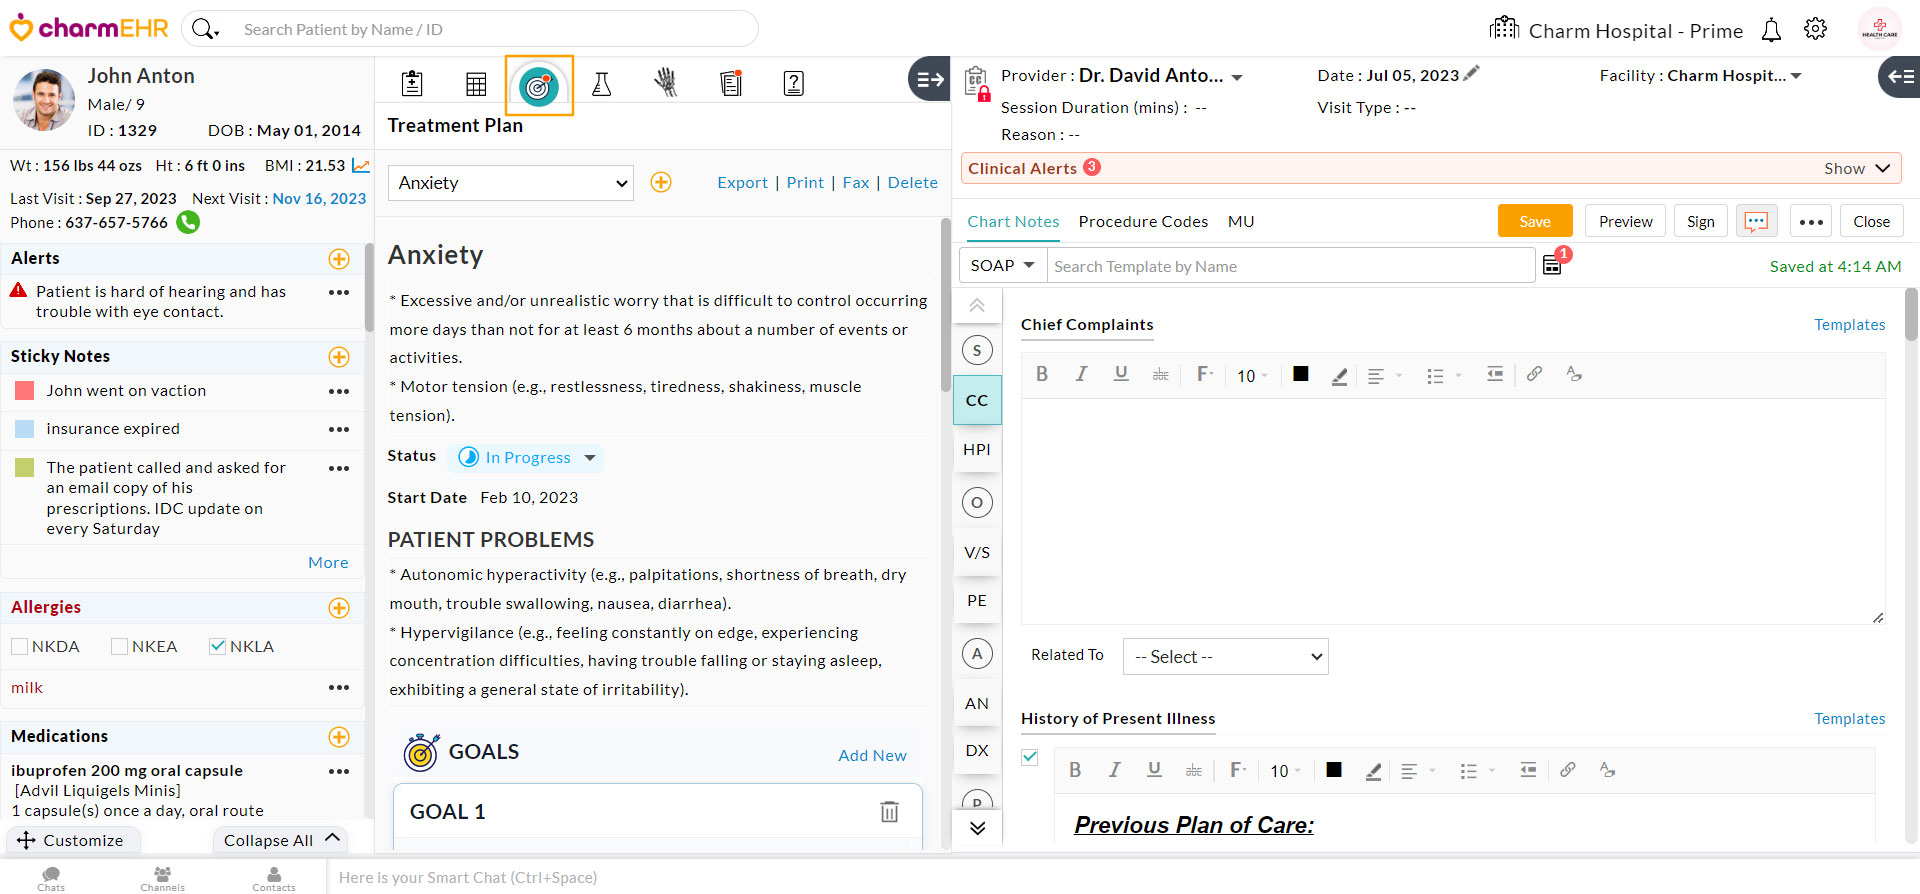
- You can go through the existing notes added to the Treatment Plan and also review the patient's progress.
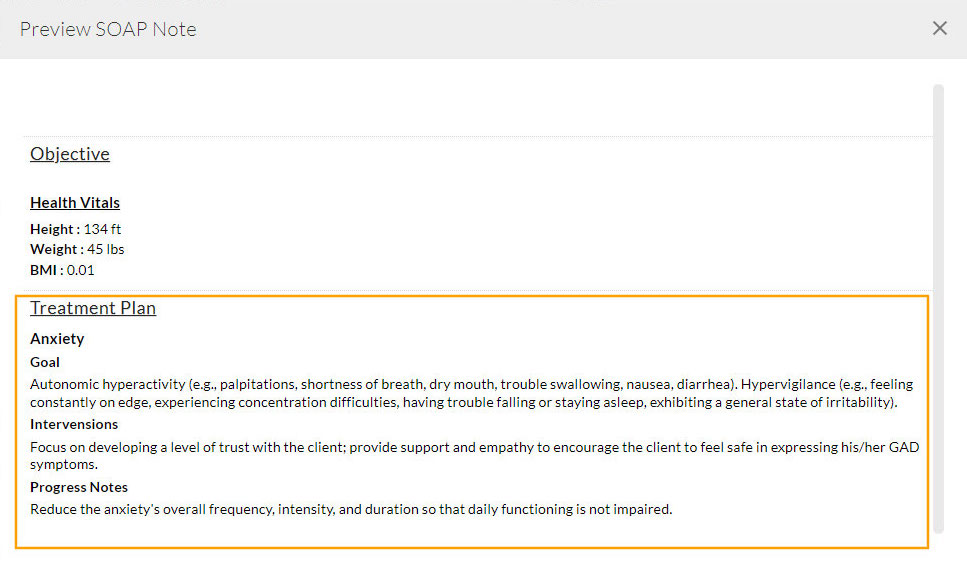
- You can also add new interventions and progress notes to the treatment plan. The notes added to the Treatment Plan are automatically included in the Chart Note.
Provider Signature on Treatment Plan
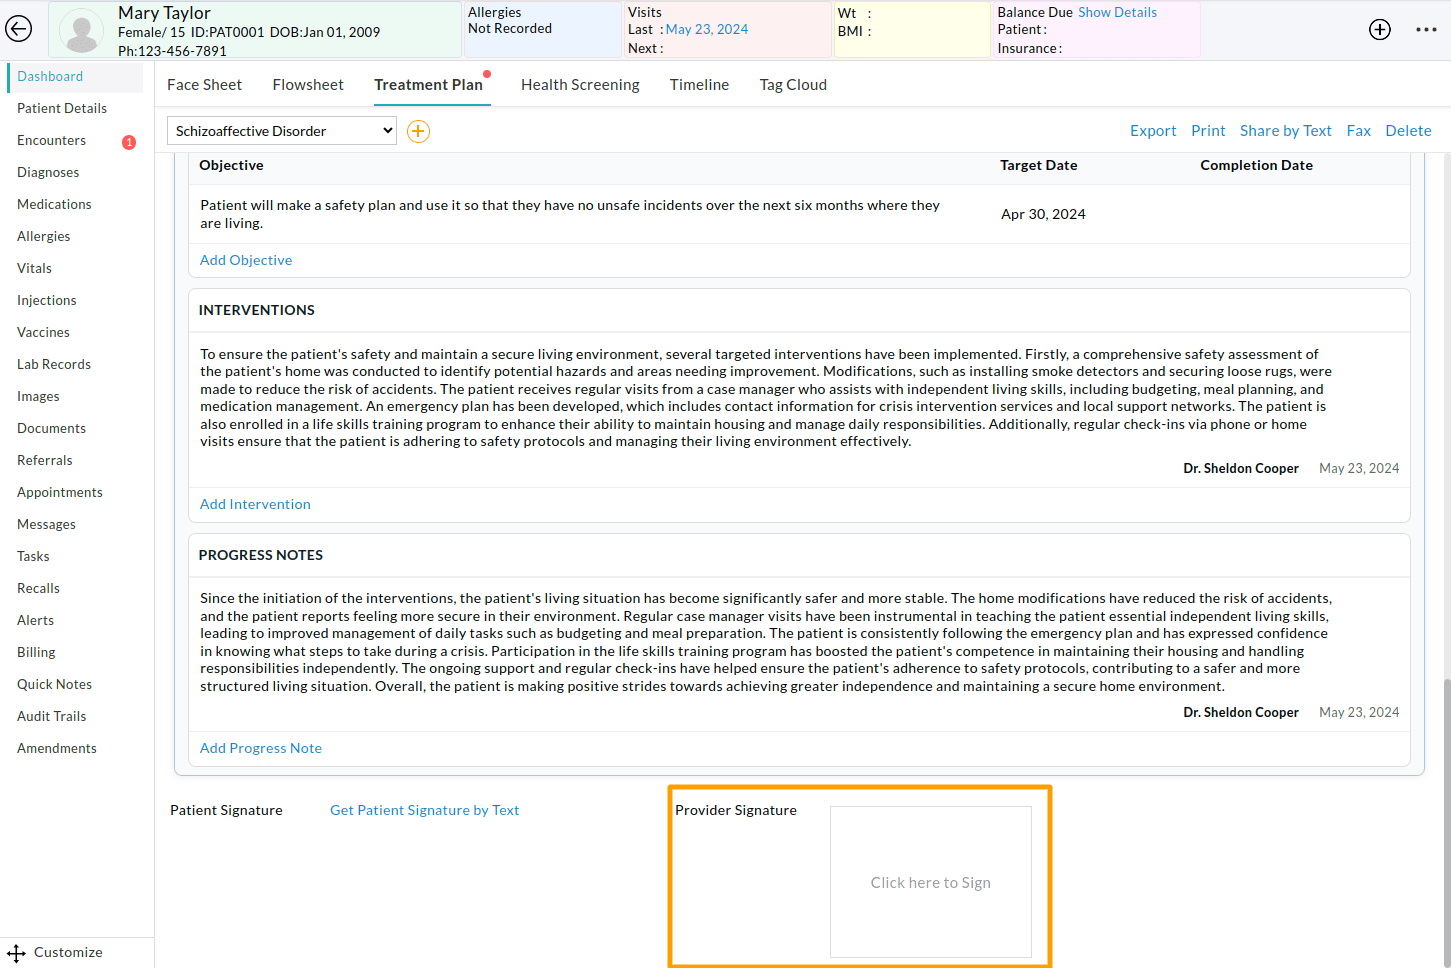
The Provider signature pad is available at the bottom of each Treatment Plan. Providers with the required role privilege can click on the Signature Pad to sign the treatment plan.
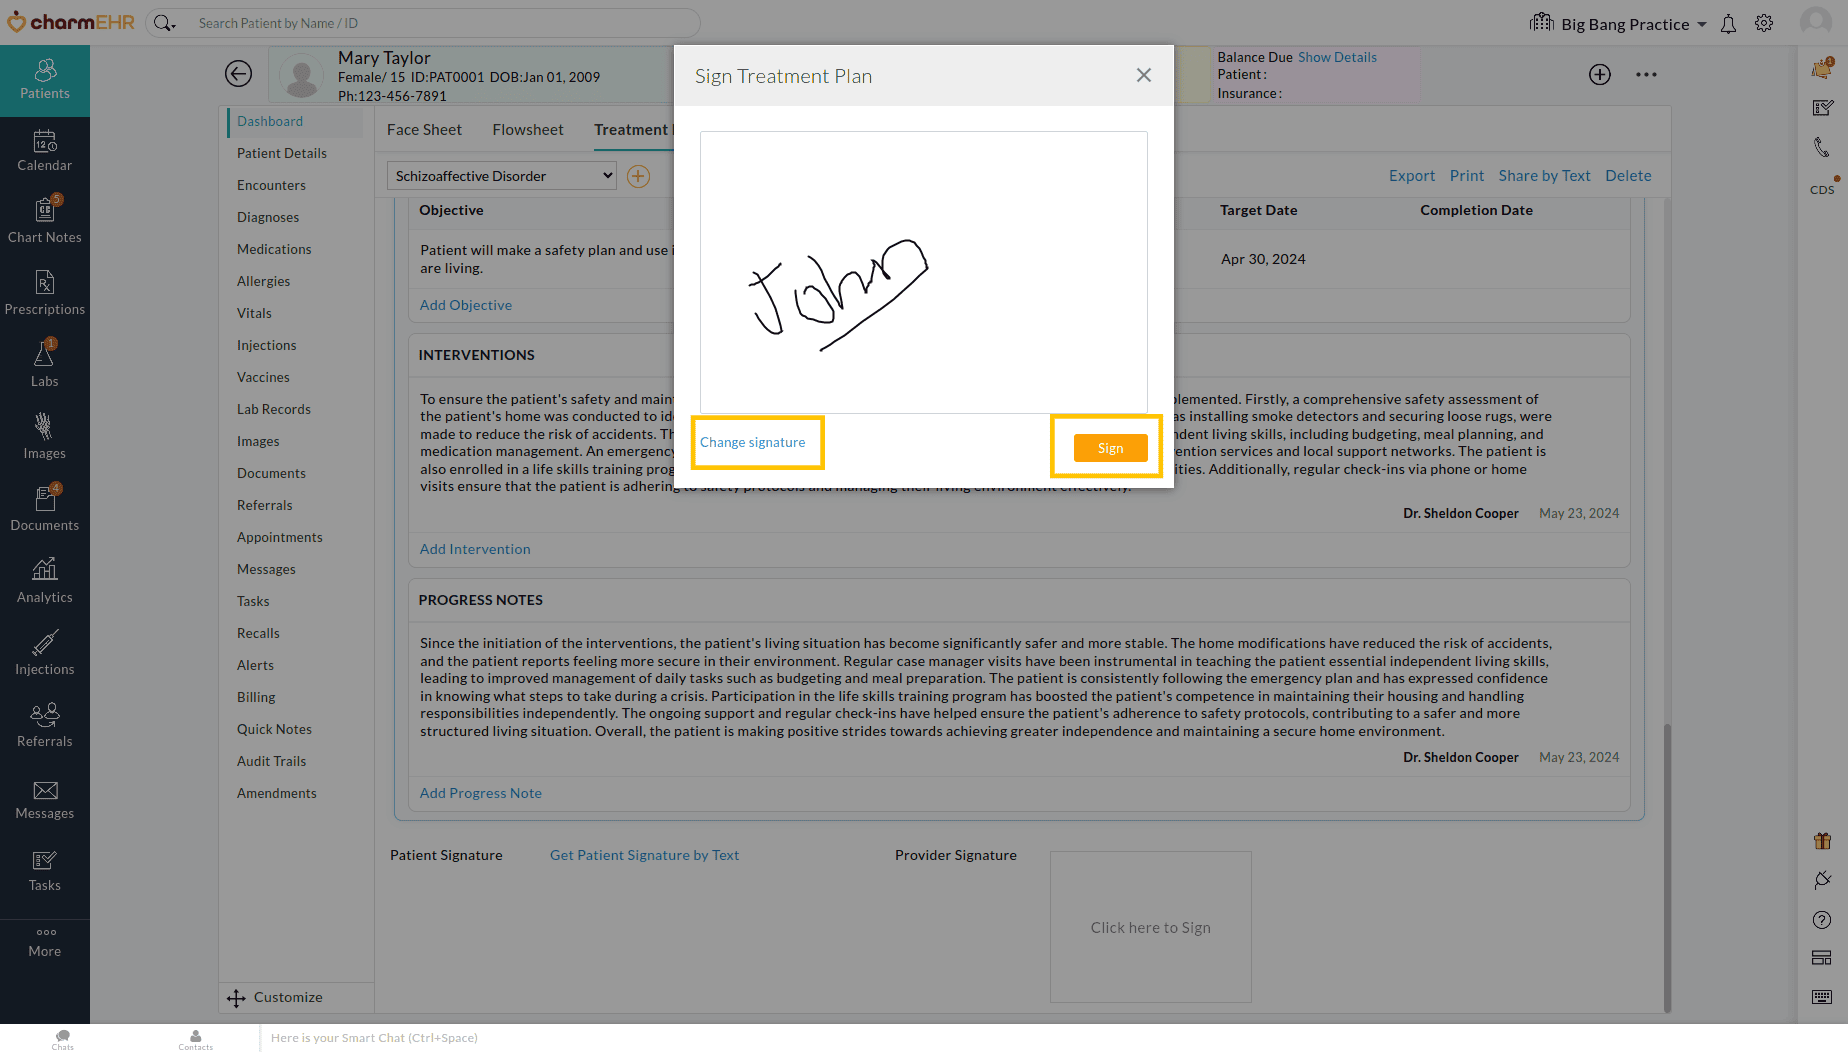
If the provider's signature is stored in the Settings > Encounter > Signature section, it can be used here. If not, Providers can draw their signature directly on the signature pad.
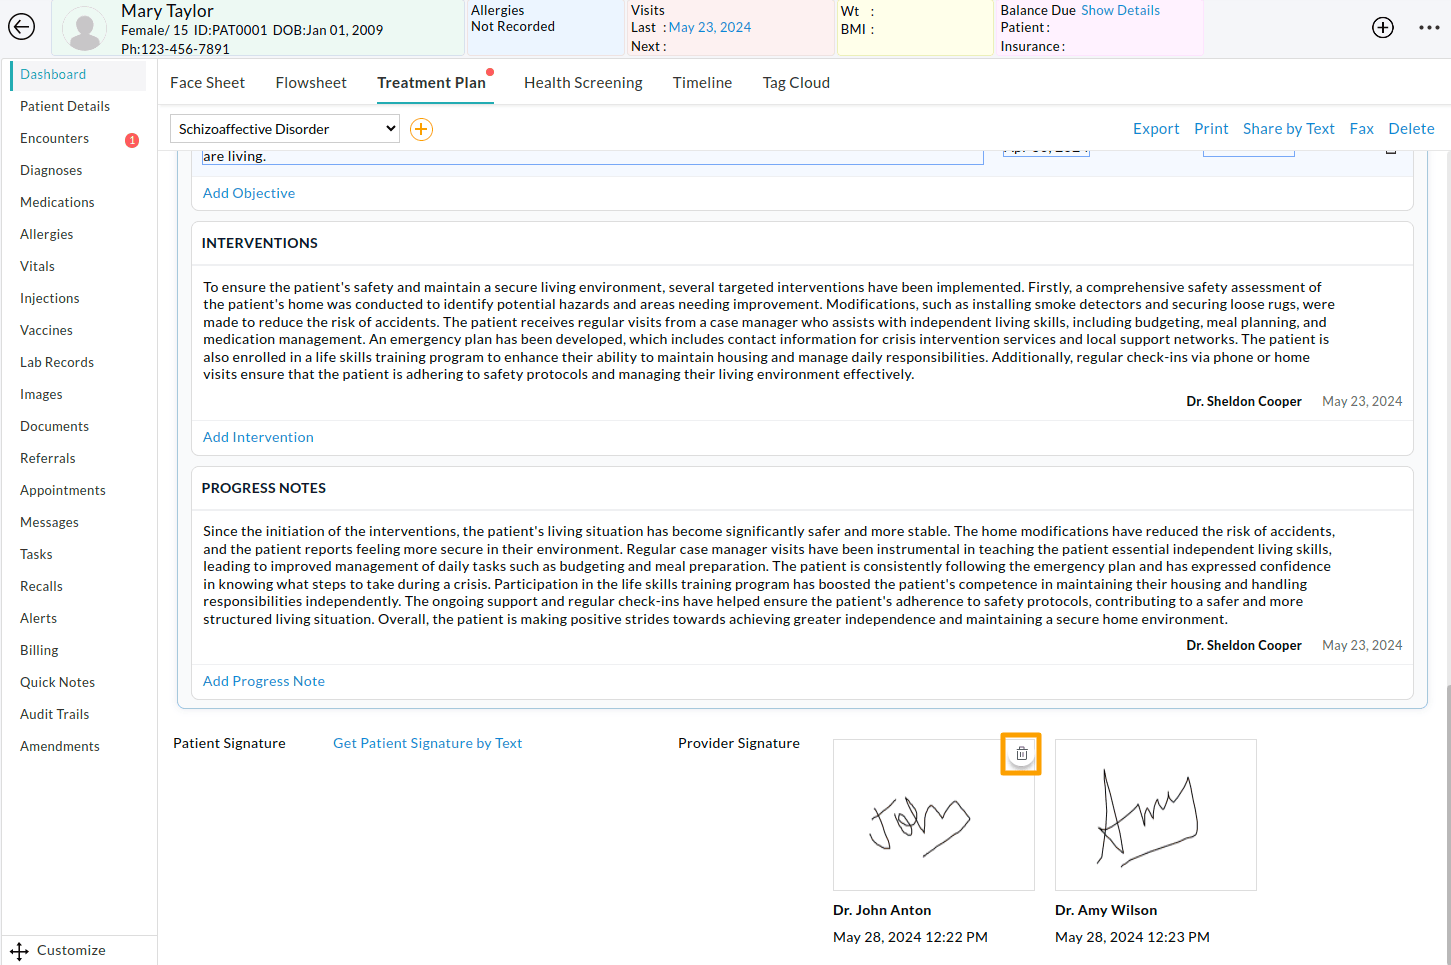
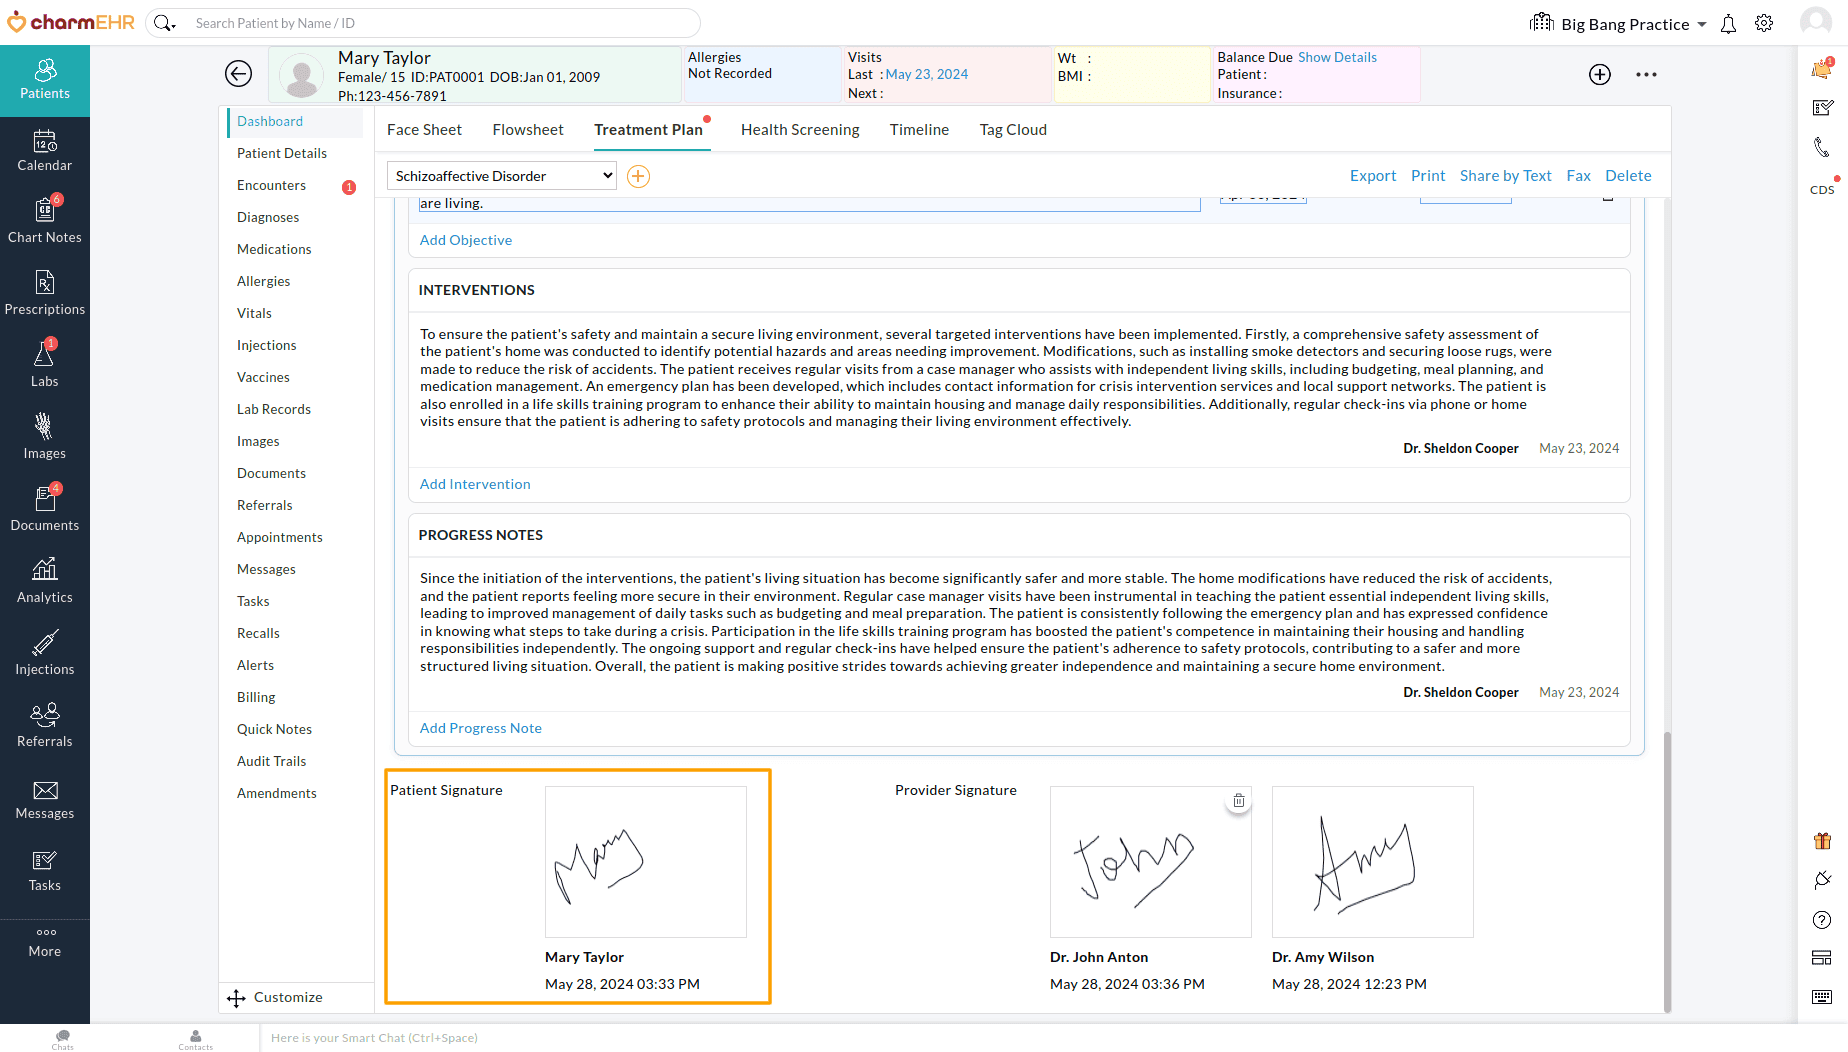
A maximum of five Providers can sign the Treatment Plan of a Patient. You can view the signatures of other Providers here. The 'Delete' button allows you to delete your signature.
Note - Only Providers with Encounter > Enter SOAP Notes, Prescribe Medications and Order Labs/Images, and Edit Treatment Plan role privileges can sign the treatment plan. Subsequent changes to the treatment plan will not revoke any existing signatures.
Patient Signature on Treatment Plan
If you need to get the patient's signature on the treatment plan, click on the 'Get Patient Signature by Text' button.

Patients will get a secure link to access the treatment plan and an OTP by text to their registered mobile number. They can click on the link, enter the OTP, and confirm their date of birth to view the treatment plan. The OTP is valid for 30 days.
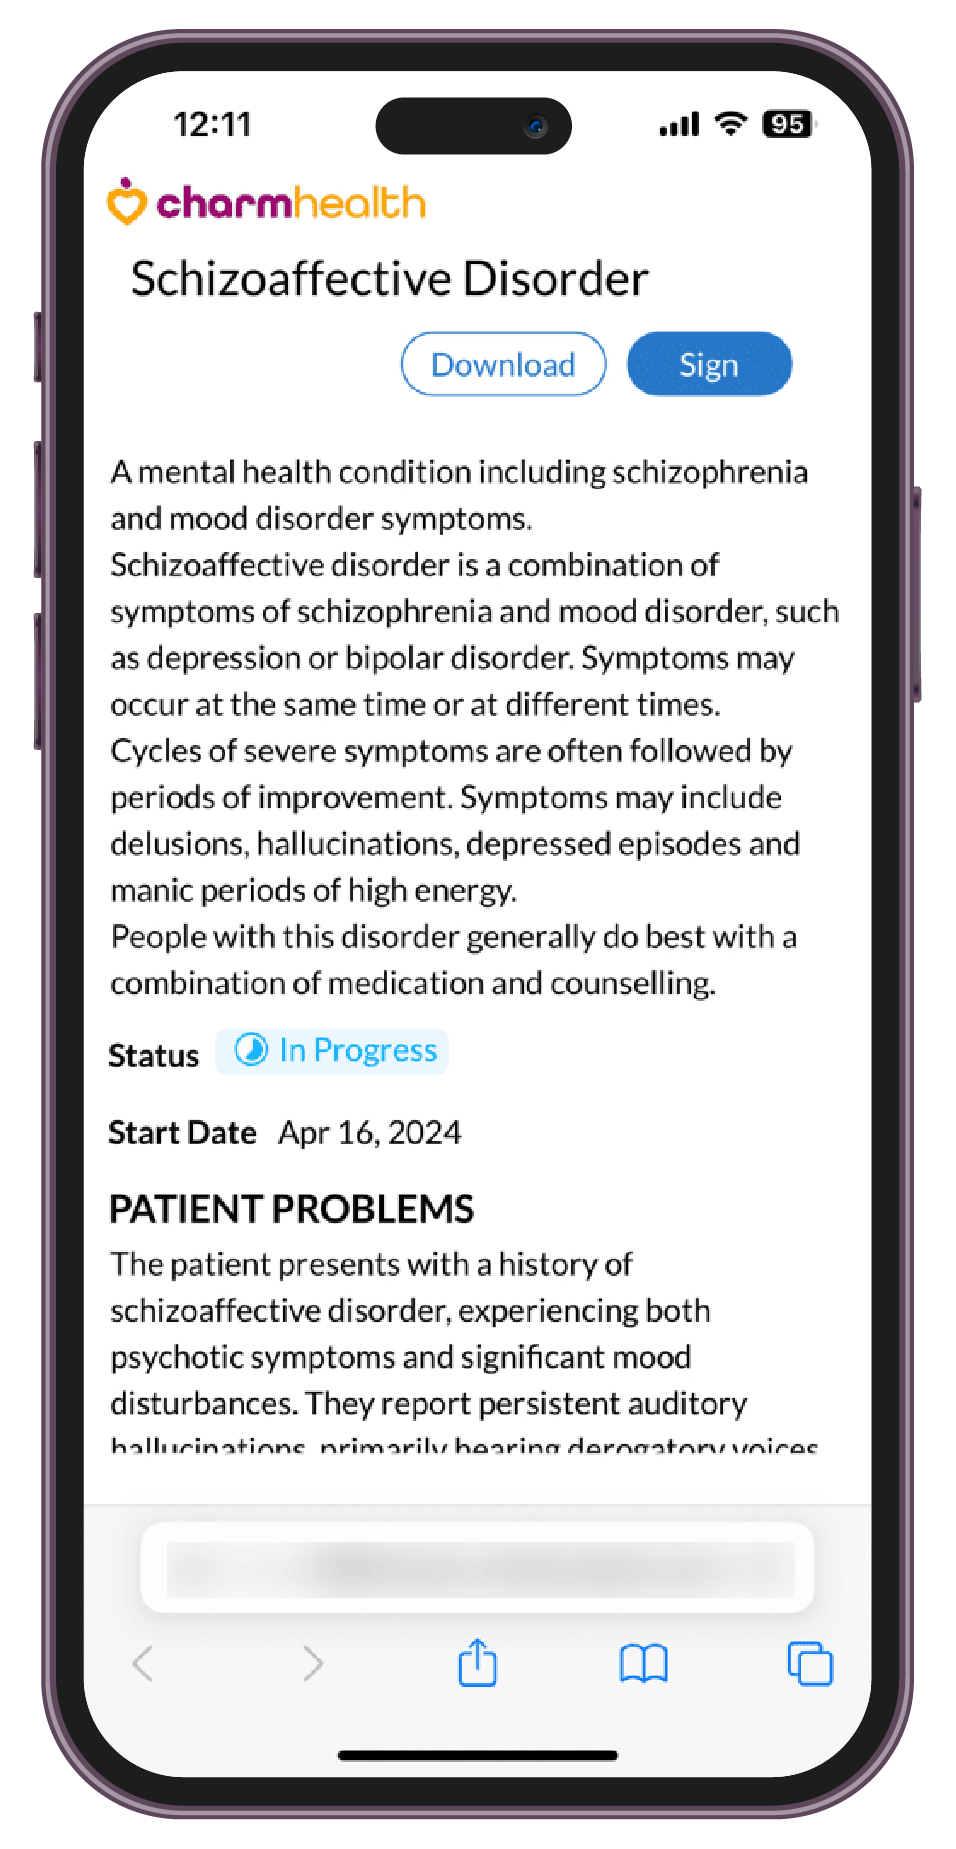
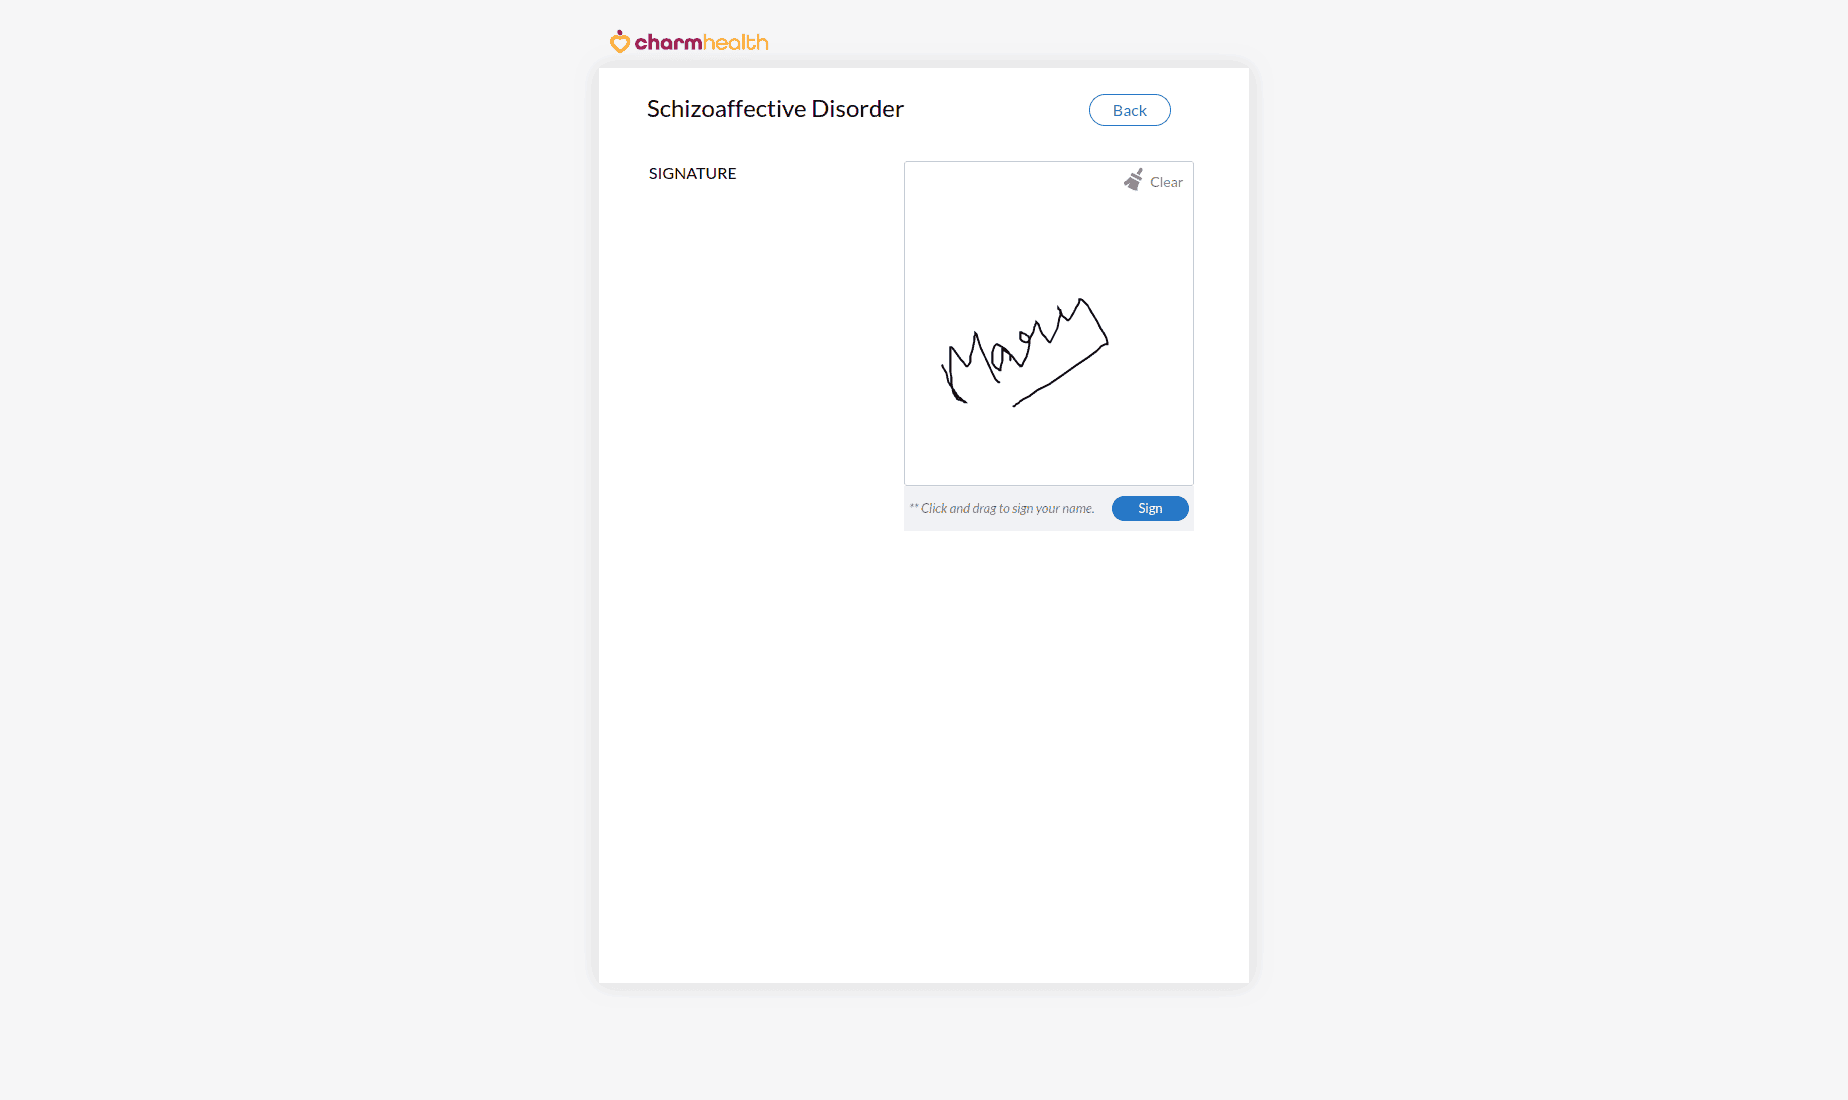
The Patient can click on the 'Sign' button to draw their signature on the signature pad.
Once signed, the patient's signature is included in the respective treatment plan in CharmHealth EHR.
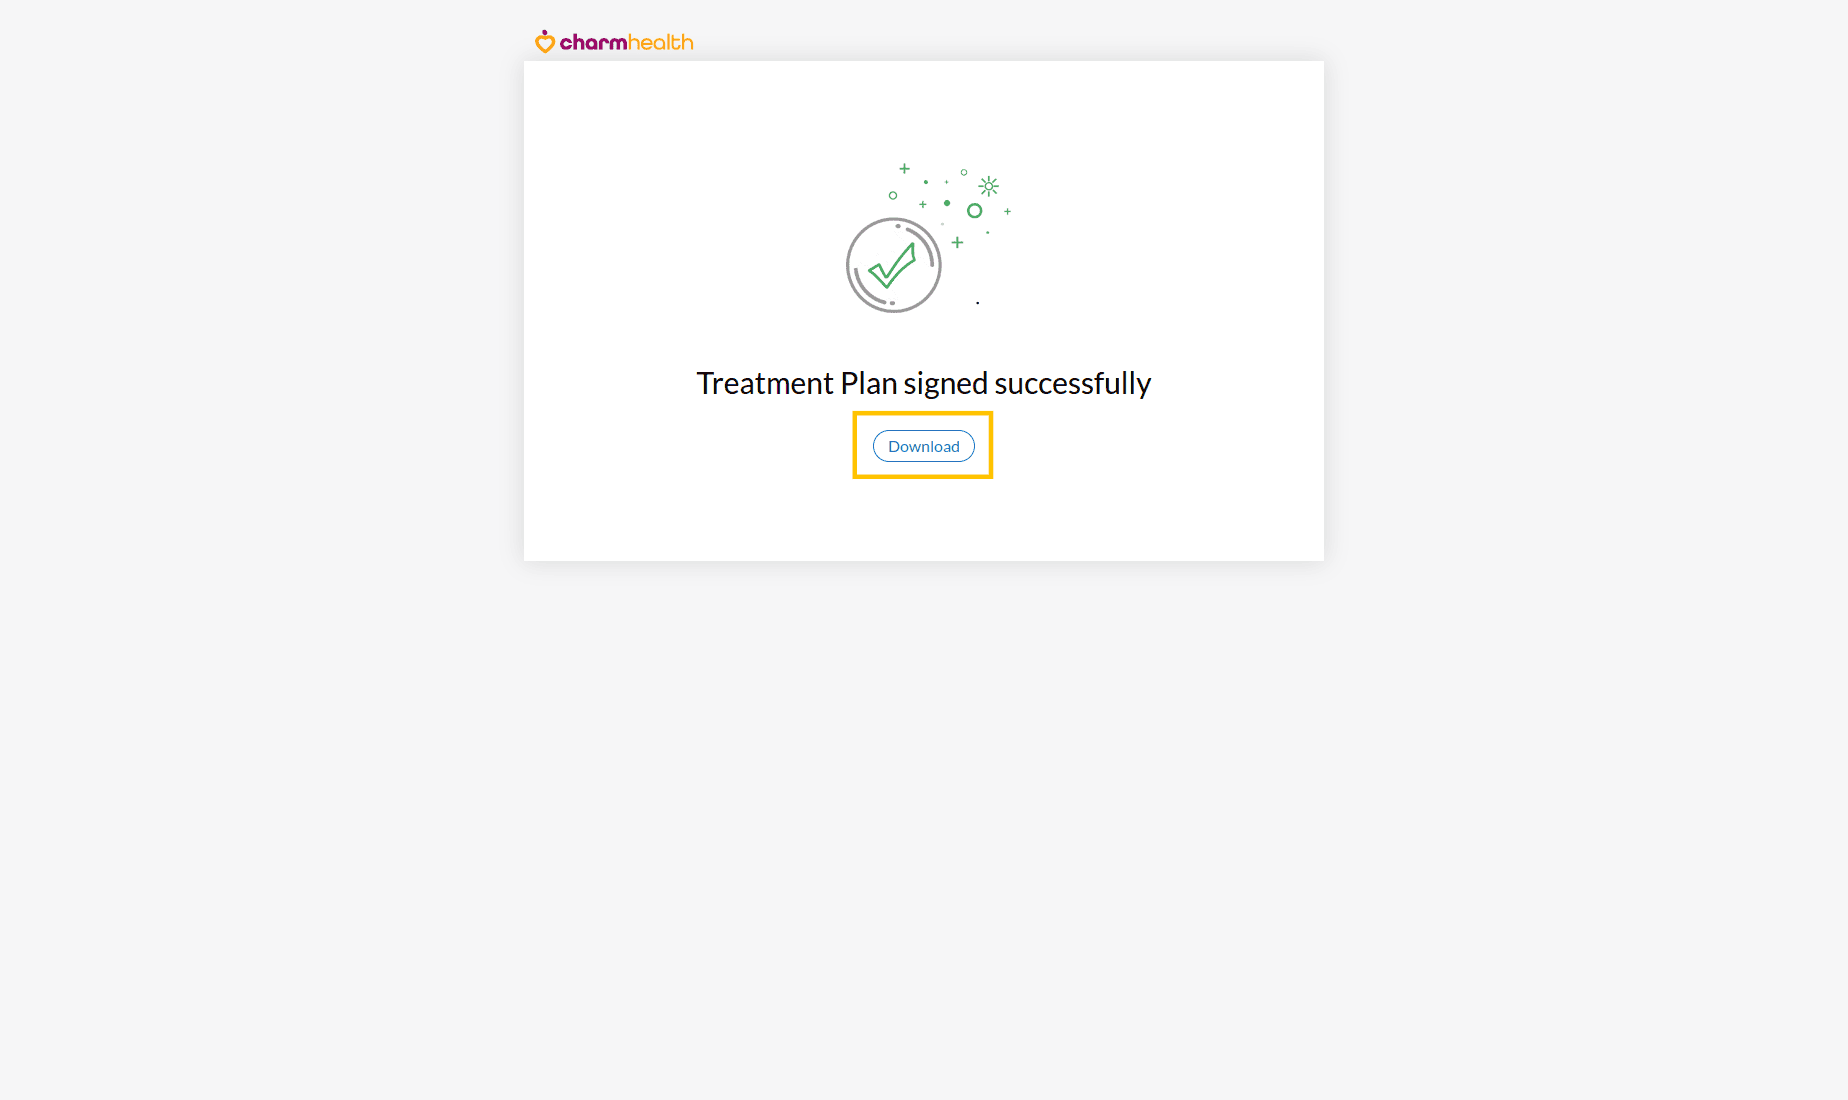
Note - Since the Treatment Plan is shared with Patients for their signature, the secure link becomes invalid once the patient signs it. Patients can download the treatment plan after signing if needed.
Share the Treatment Plan with Patient
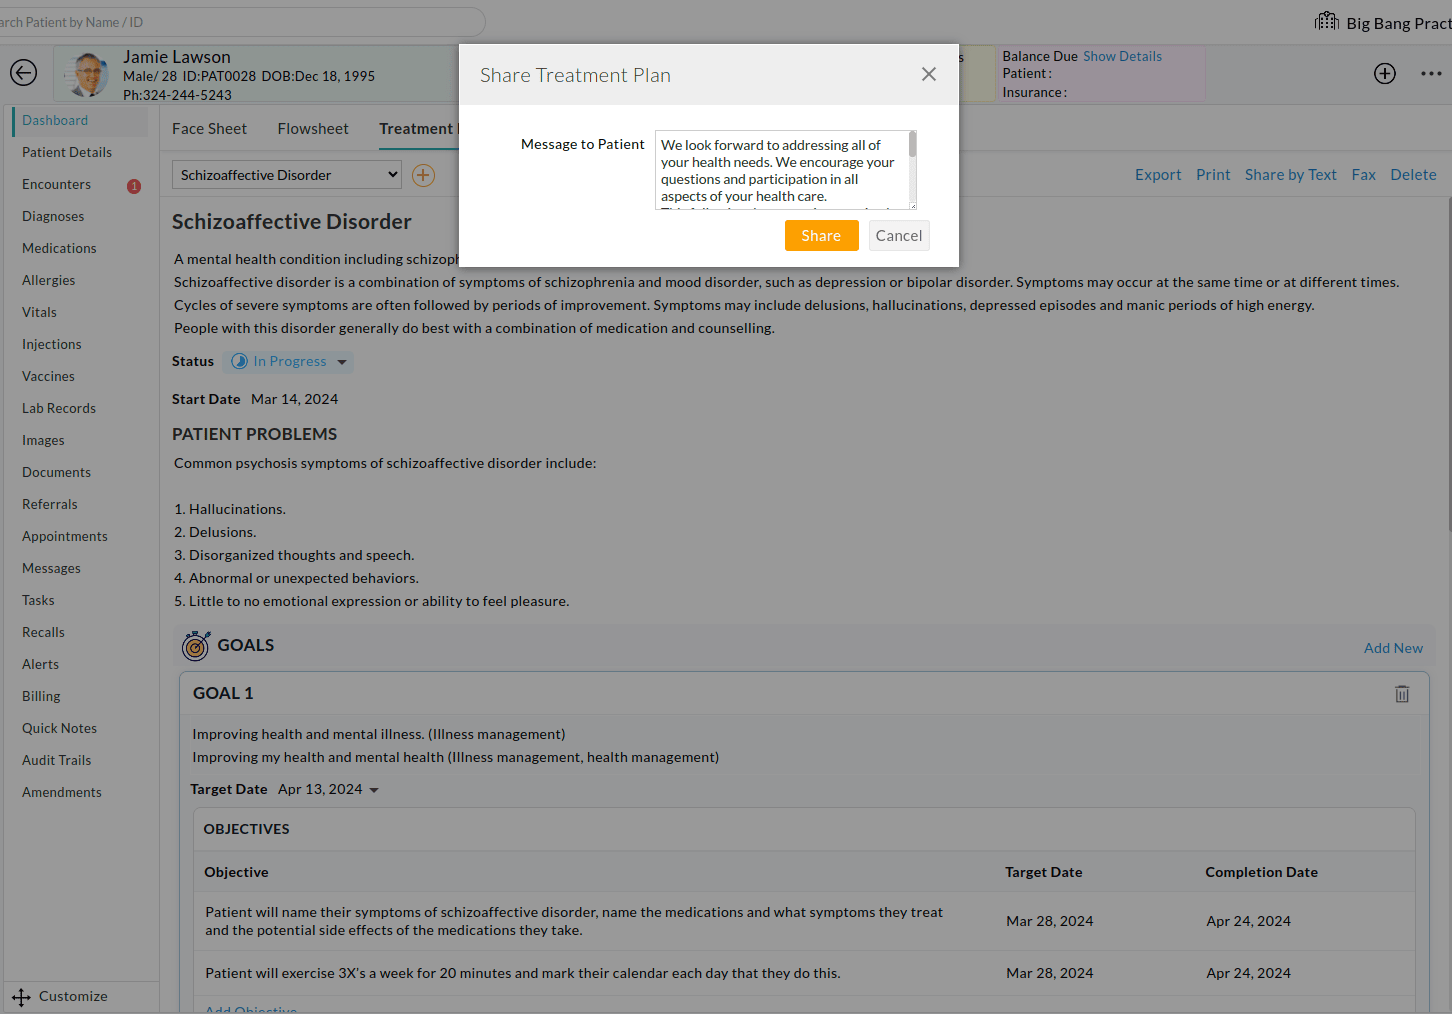
You can share a treatment plan with a patient by using the 'Share by Text' option.
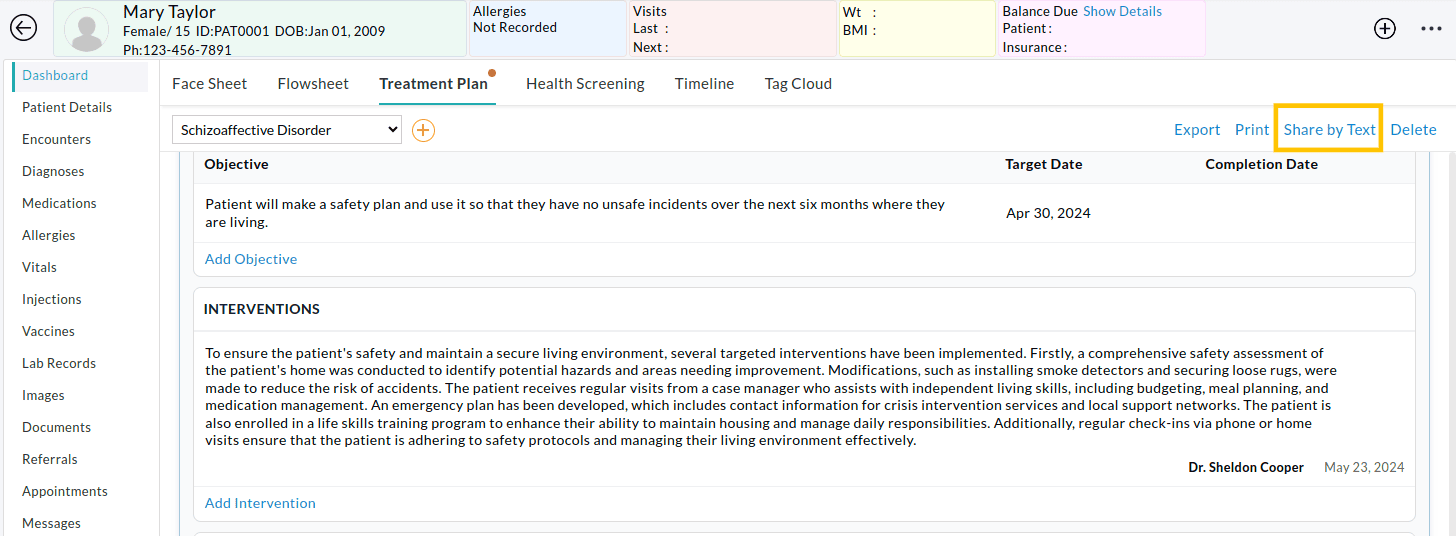
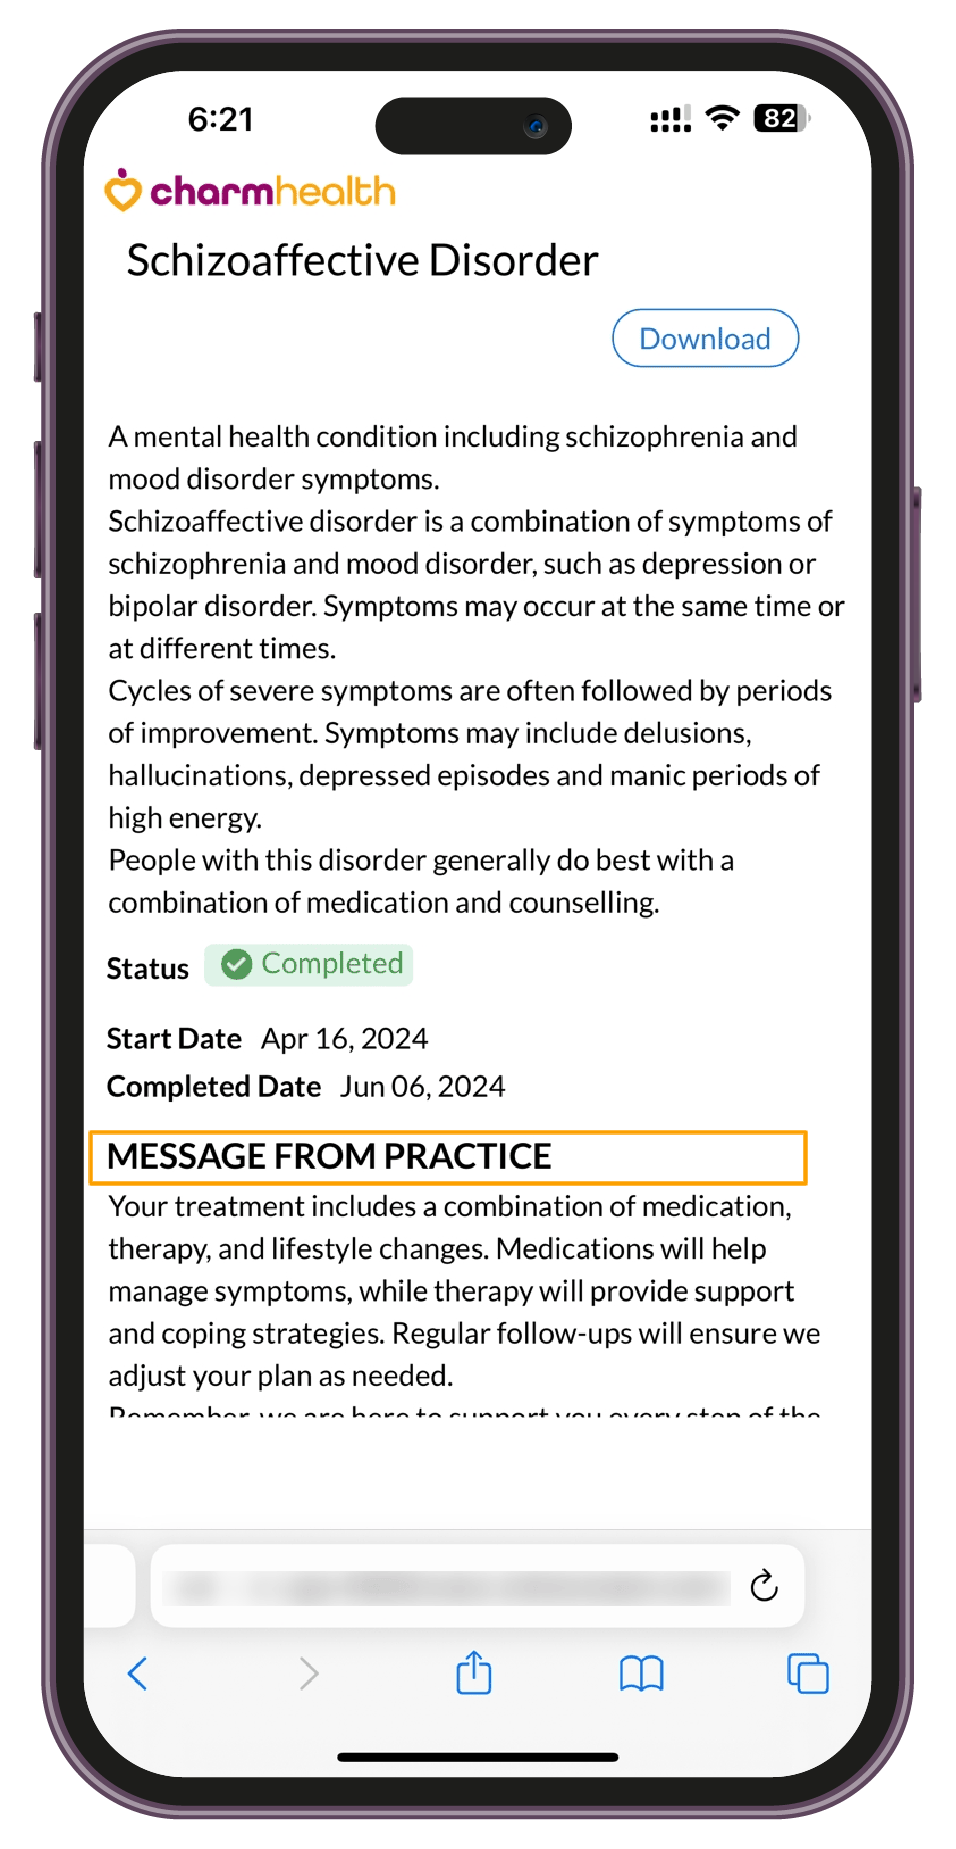
While sharing the treatment plan, you can send an additional message to patients. Patients can view this message within the treatment plan shared with them.
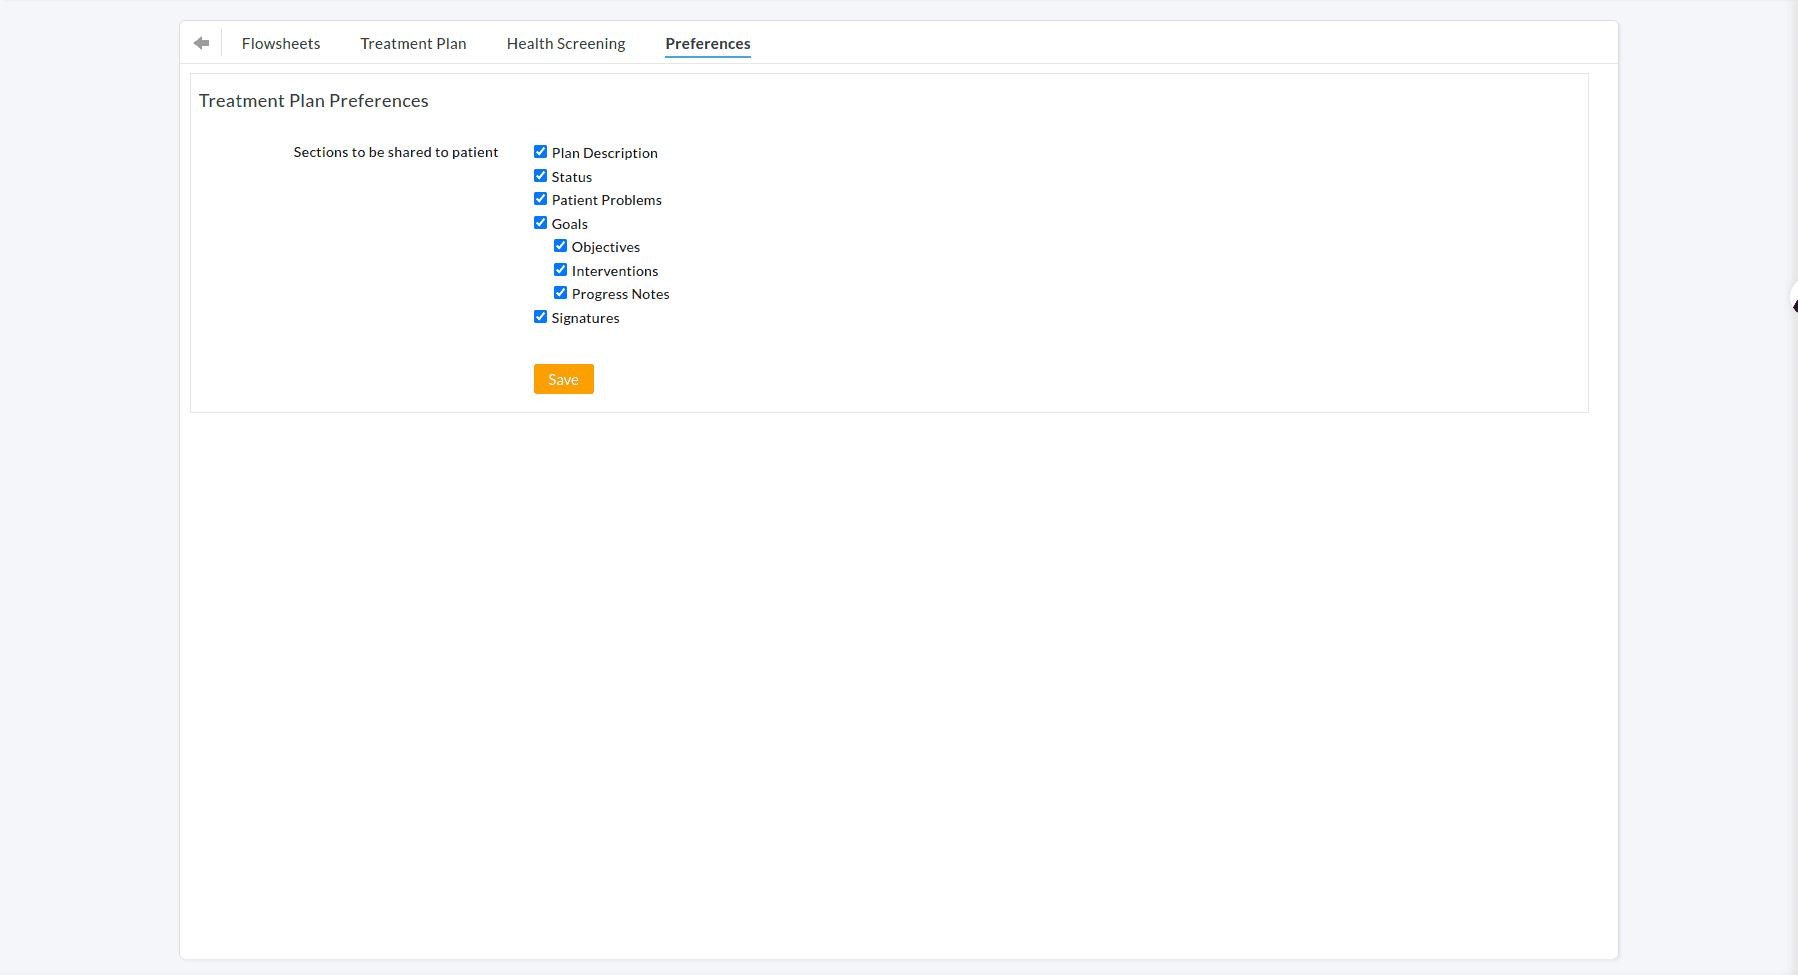
By default, all the sections of the treatment plan are shared with patients. If you do not want to share some sections, you can remove them from the 'Health Trackers > Preferences' section.
Patients get a secure link to access the treatment plan and an OTP by text to their registered mobile number. They can click on the link, enter the OTP, and confirm their date of birth to view the Treatment Plan and additional Provider message. The secure link to access the treatment plan is valid for 30 days.
Analytics
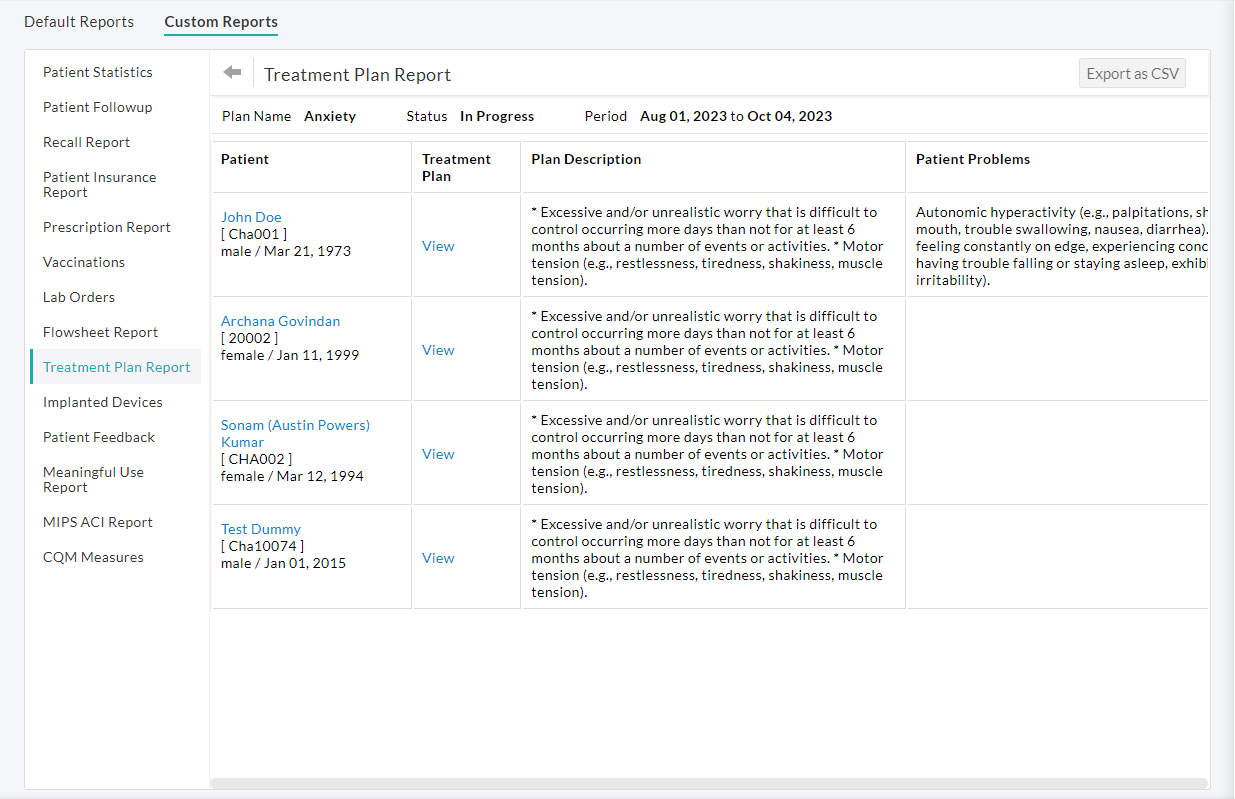
The Analytics section includes a new report to fetch the list of patients with treatment plans. You can filter the patients by the plan status (In-progress, Completed, or Canceled) and time using the Filter option.
Members with the 'Analytics > Treatment Plan Report' role privilege can generate the Treatment Plan report using the steps below:
- Go to the 'Analytics > Custom Reports > Treatment Plan' section.
- Choose the Plan Name and Status from the drop-down list.
- Enter the 'Period' (Maximum 3 months).
- Click on the 'Generate' button.
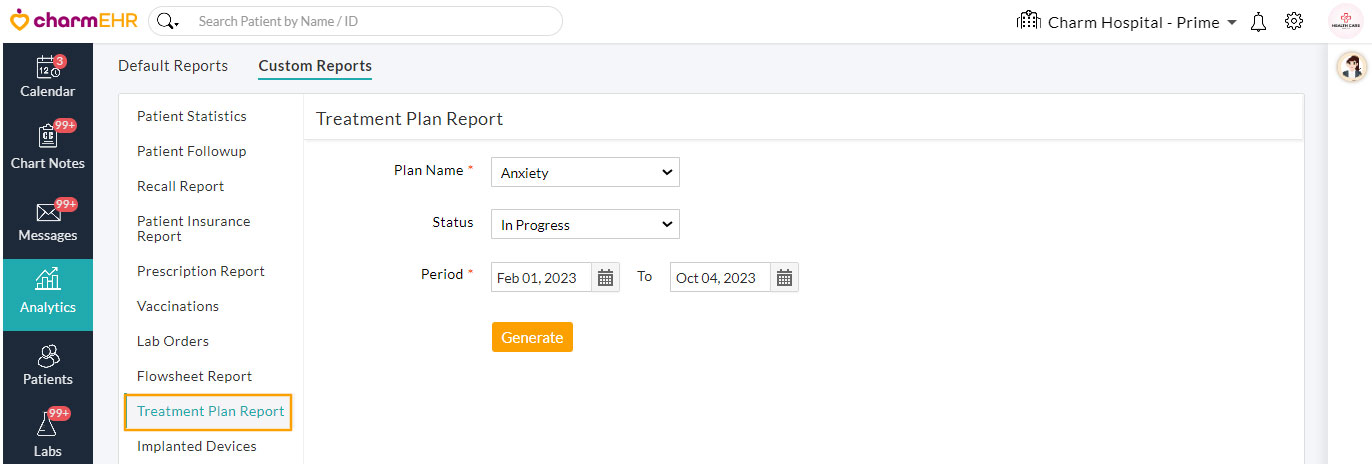
Click on the 'View' link to see the Treatment Plan details of that patient.
Role Privileges
Practice Members with the required role privileges can create, access, and manage the treatment plan. The Admin can grant the role privileges using the steps below:
- Go to the 'Settings > Facility > Roles' section
- Edit an existing role or create new member roles.
- Enable the following role privileges for the chosen member based on your Practice requirements:
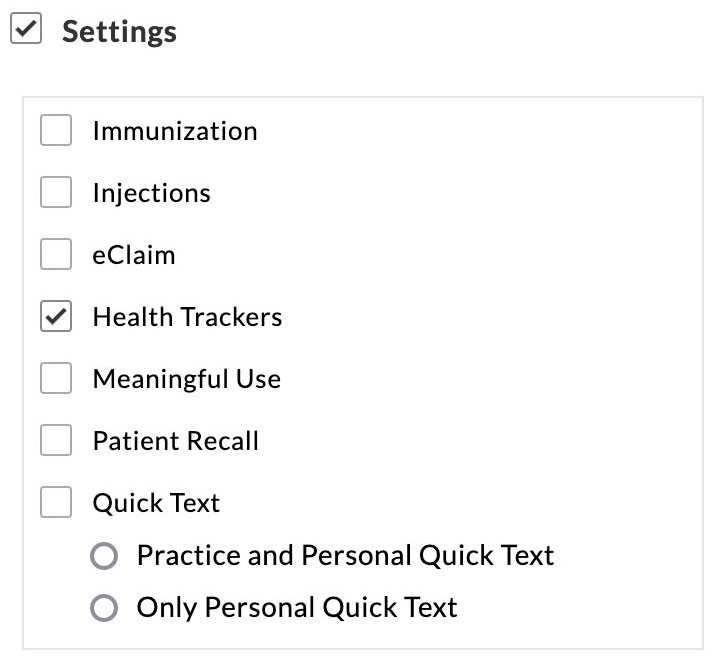
- Create Treatment Plan template - Enable the 'Health Trackers' checkbox under Settings.
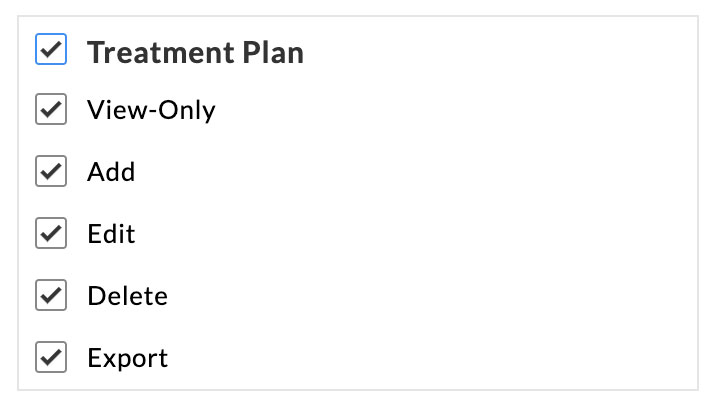
- Manage treatment plans for patients - Enable the required checkboxes under 'Patient Record > Treatment Plan' section.
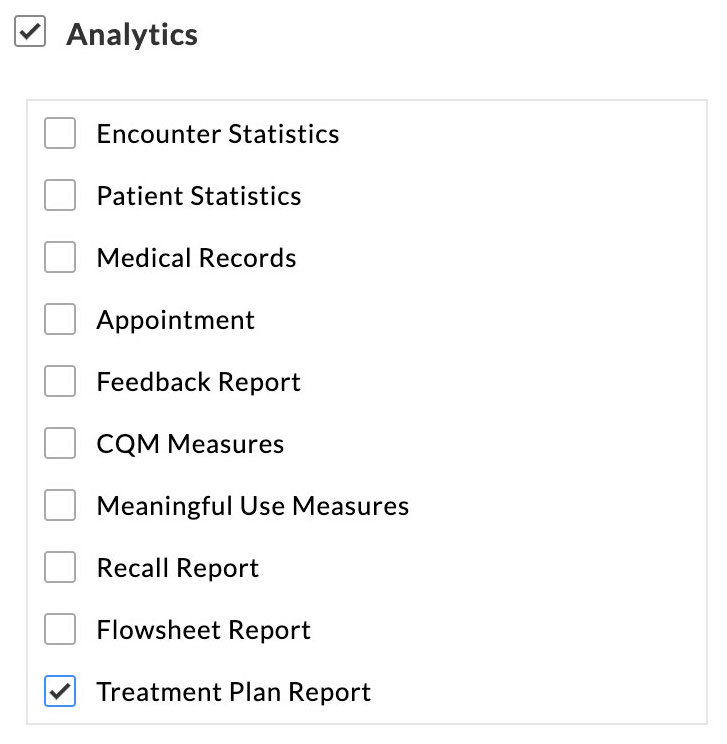
- Analytics - Enable the 'Treatment Plan Report' checkbox under Analytics.
- Create Treatment Plan template - Enable the 'Health Trackers' checkbox under Settings.
Treatment plans are crucial in coordinating care amongst healthcare professionals and ensuring that patients receive appropriate and quality treatment. We believe this feature helps you in better collaboration and improved patient care.