Waiting List Appointments
You can add Patients to the waiting list and accommodate them when some existing slots get canceled.
From Calendar > Waiting List
- Go to Calendar > Waiting List.
- Click on the '+ Waiting List' button.
- Select the Patient and Provider.
- Select the Visit Type and Resource.
- Choose the 'Date Preference' - If the waiting list has to be created for a specific date, select the 'Specific Date(s)' option. Use options to indicate your preferred date.

- You can also create a waiting list for a period. To do this, select the 'Period' option in the 'Date Preference' field and enter the 'From and 'To' dates. By doing so, whenever an Appointment gets canceled during this period, the wait-listed Appointment will take up that slot.
- Select the 'Time Preference' option and provide a reason for the Appointment.
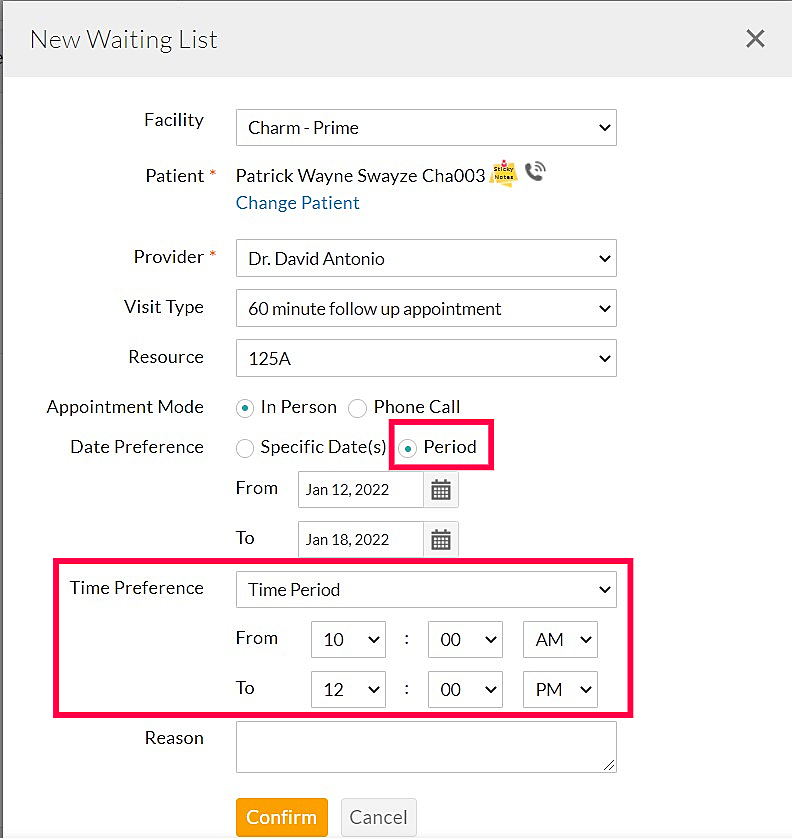
- Click on the 'Confirm' button
You can also click on a date from the 'Waiting List > Week or Month' view to add the waiting list for that date.
From Calendar > Appointments
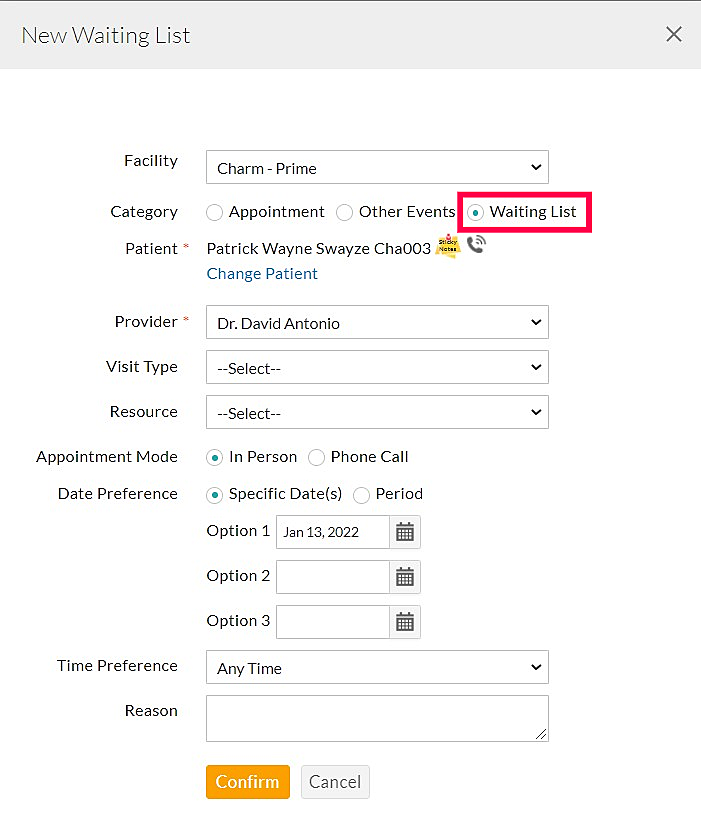
If the Provider has already booked a slot on the Patient's preferred date/time, you can add the Patient to the waiting list from the 'Calendar > New Appointment' section.
Select the 'Category' as 'Waiting List'. Choose the Provider, date, and time preference and click on the 'Confirm' button.
From Calendar > Appointment Requests
You can also add Patients to the waiting list while processing the Appointment requests received from the PHR and Calendar Web Embed.

From Calendar Web Embed and PHR
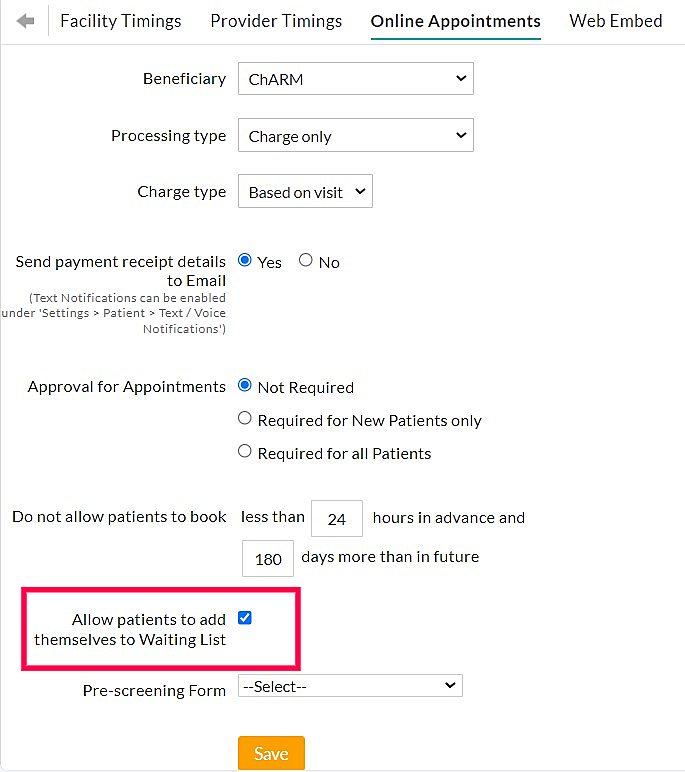
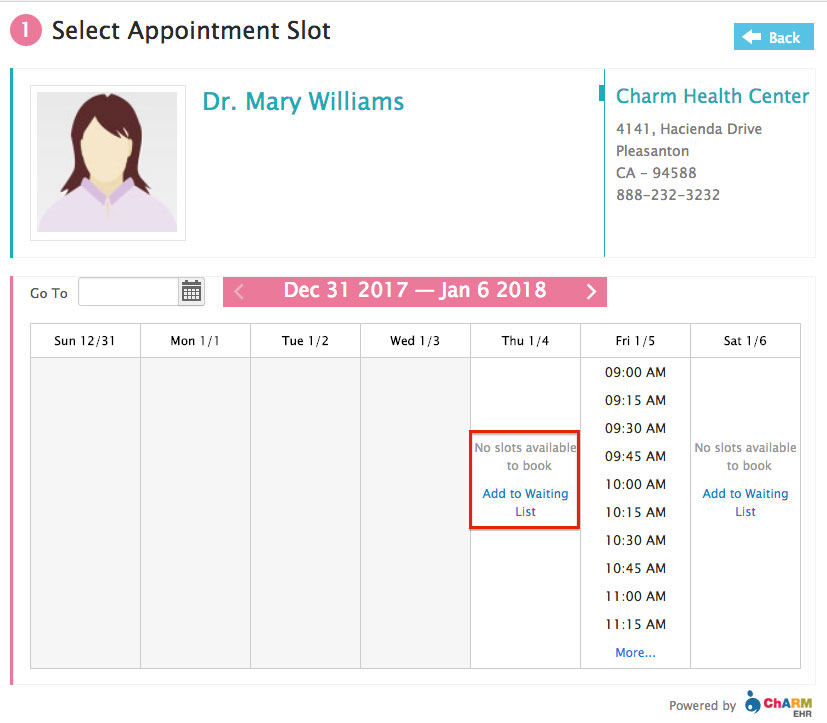
The Patients can also add themselves to the Waiting List from the Practice Website and PHR if there is no slot available for a date. You can enable this option from the 'Settings > Calendar > Online Appointments' section.
Email/Text Notifications
Email and text notifications are sent automatically to the Patients once they get added to the waiting list.
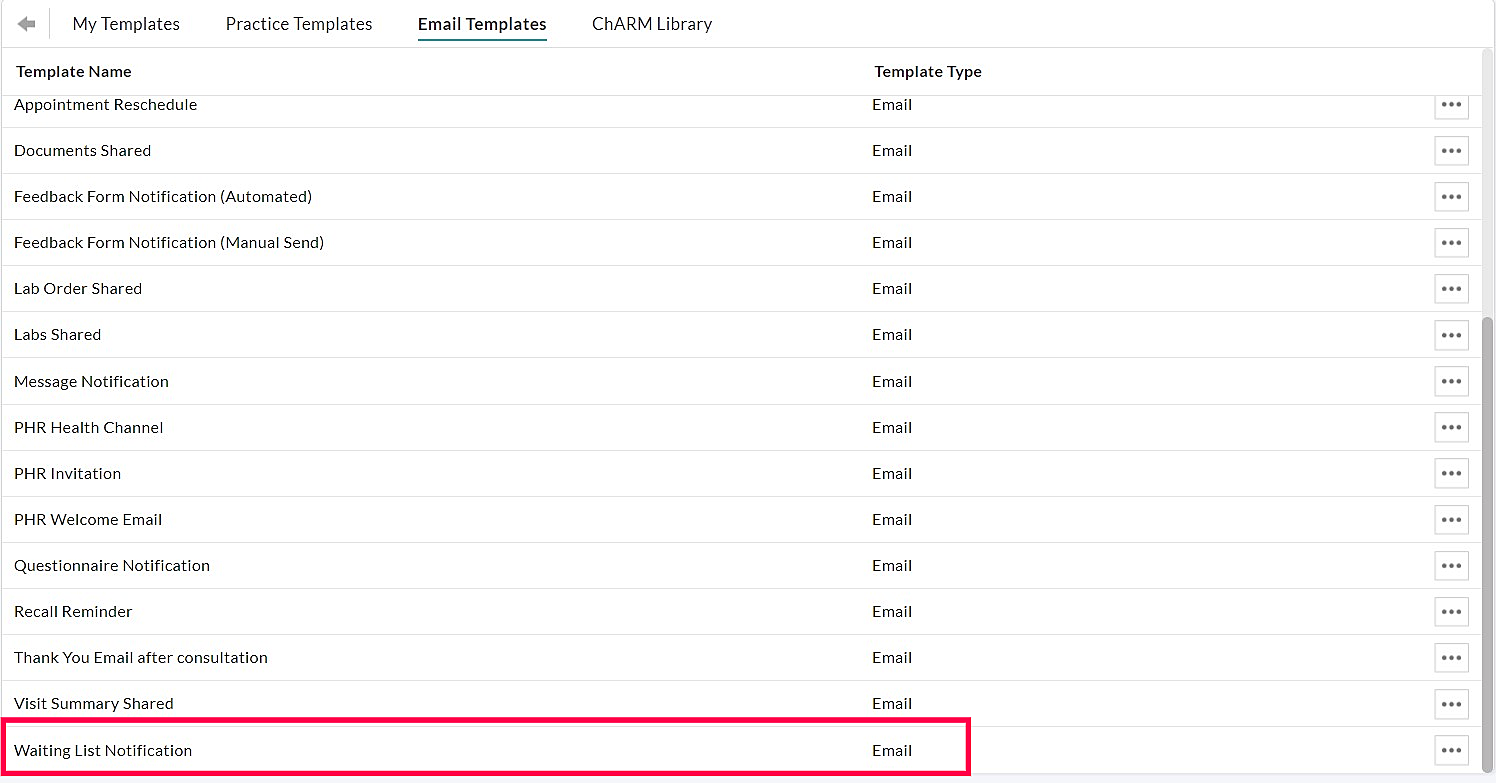
The Practice Administrators can turn on email notifications from the 'Settings > Patient > Email Notifications' section. You can also customize the email content from the 'Settings > Templates > Email Templates' section.

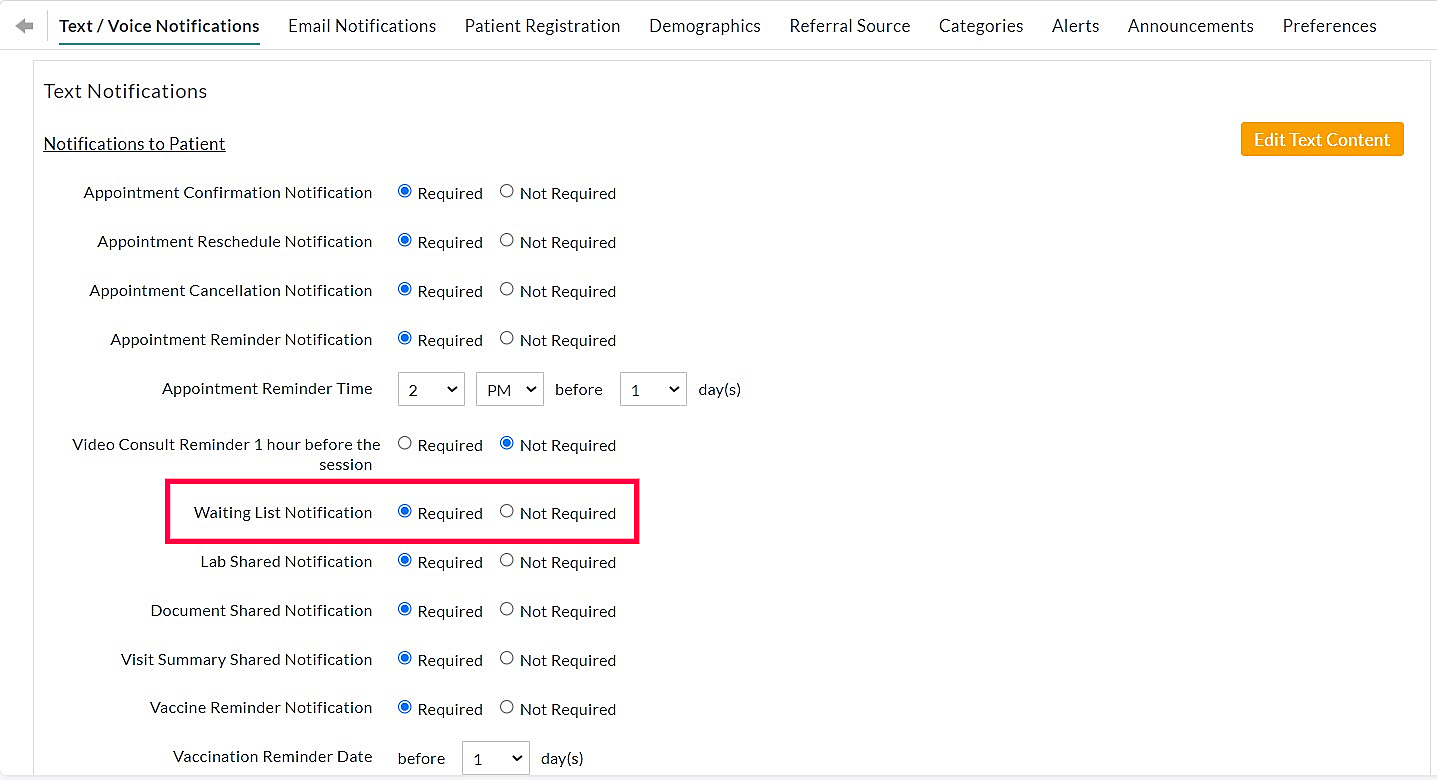
The text notification for the waiting list can be enabled from the 'Settings > Patient > Text/Voice Notifications' section.
Process Waiting List
You can view the Patients listed on the waiting list by date from the 'Calendar > Waiting List' section and confirm or cancel them.

In addition, you can view the waiting list count for the Day/Week/Month from the default Calendar. Click on the notification link to view the list of Patients.

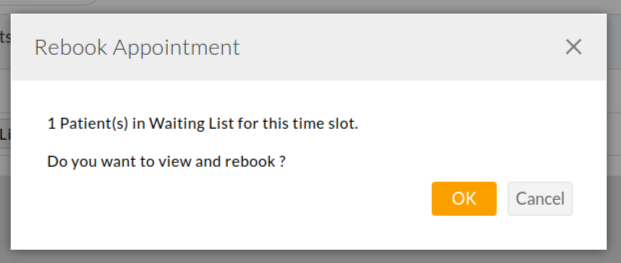
Upon cancellation of the Appointment, users get notified if there are Patients on the waiting list for that slot. This notification helps to rebook the canceled slot of the Patients on the waiting list.
Role Privileges
The new role privileges provide control over user access to the waiting list.
The Practice Administrator can assign these privileges to the Practice members from the 'Settings > Facility > Roles' section.

Waiting List Report
Similar to Appointments, you can generate the reports for the waiting list from the 'Calendar > Reports' section.
Select the 'Report Type' as 'Waiting List'. Choose the date range and Providers and click on the 'Show Report' button.
You can also export the generated report as a CSV file.
