Phone Calls
The Phone Calls feature enables Practice members to make and receive phone calls to/from patients within CharmHealth EHR.
Prerequisites
The Phone Calls feature is available for Practices with CharmHealth Paid plan in the US and Canada. Practices can enable this feature after fulfilling the following prerequisites:
- An active 'Text/Phone Calls' Add-on subscription.
- A 10DLC registered phone number
You can fulfill the Prerequisites from the 'Settings > Patient > Phone Calls' section by following the steps below.
- Click the 'Subscribe' button to activate the 'Text/Phone Calls' add-on. Visit this link to learn more.
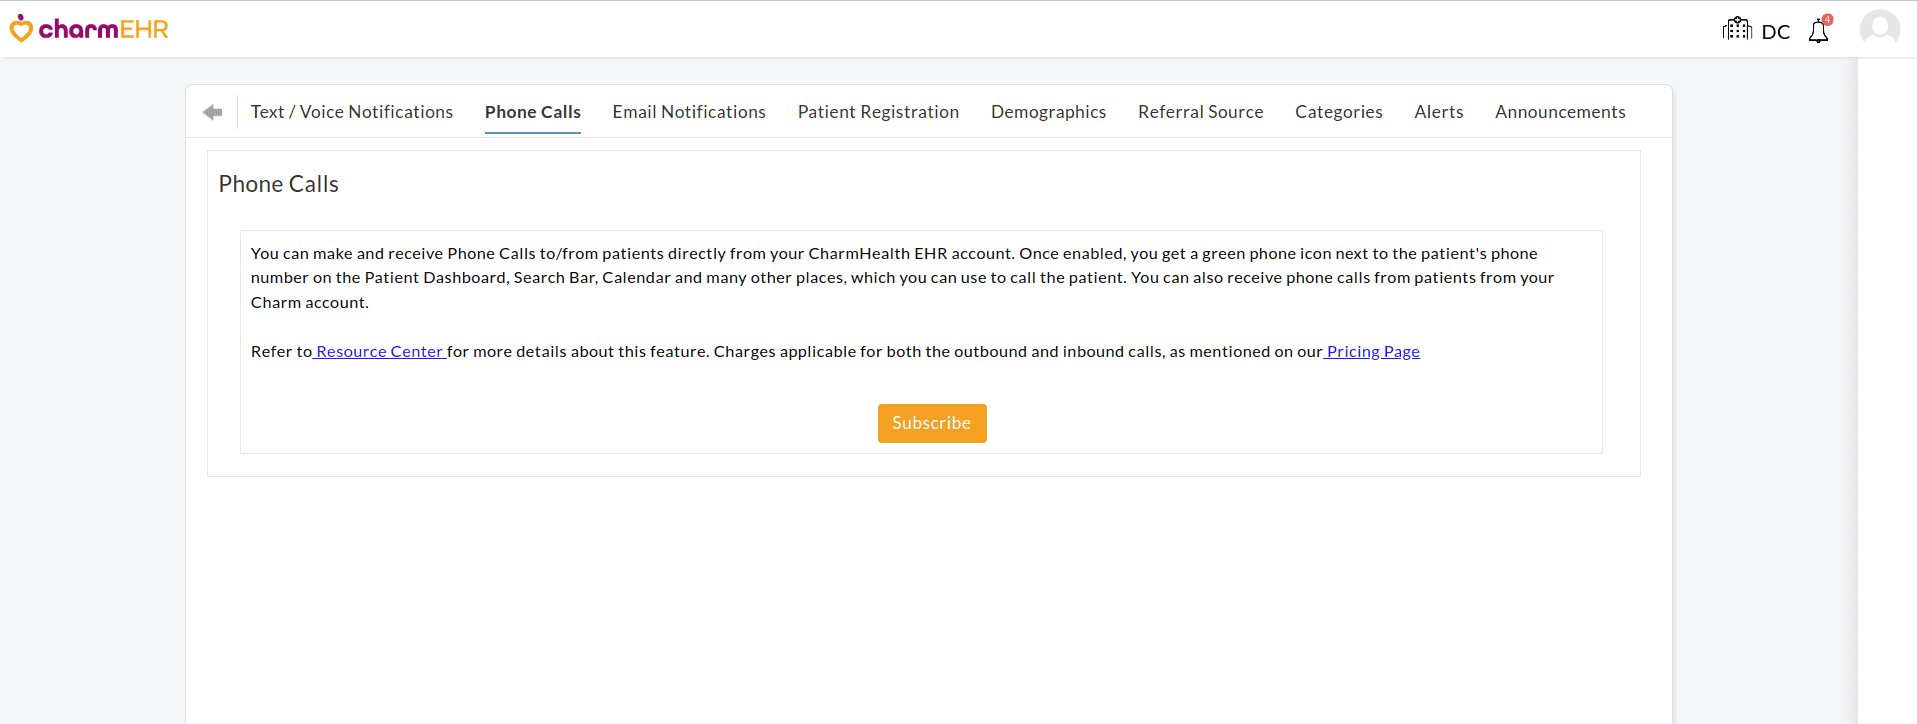
You will get an email from CharmHealth EHR within a few days confirming the 'Text/Phone Calls' add-on activation. - Once activated, go to the 'Settings > Patient > Phone Calls' section again and click the 'Enable Phone Calls' button.
- If you have not registered for 10DLC already, click the 'Register Now' button to select and register a new phone number for your Practice.
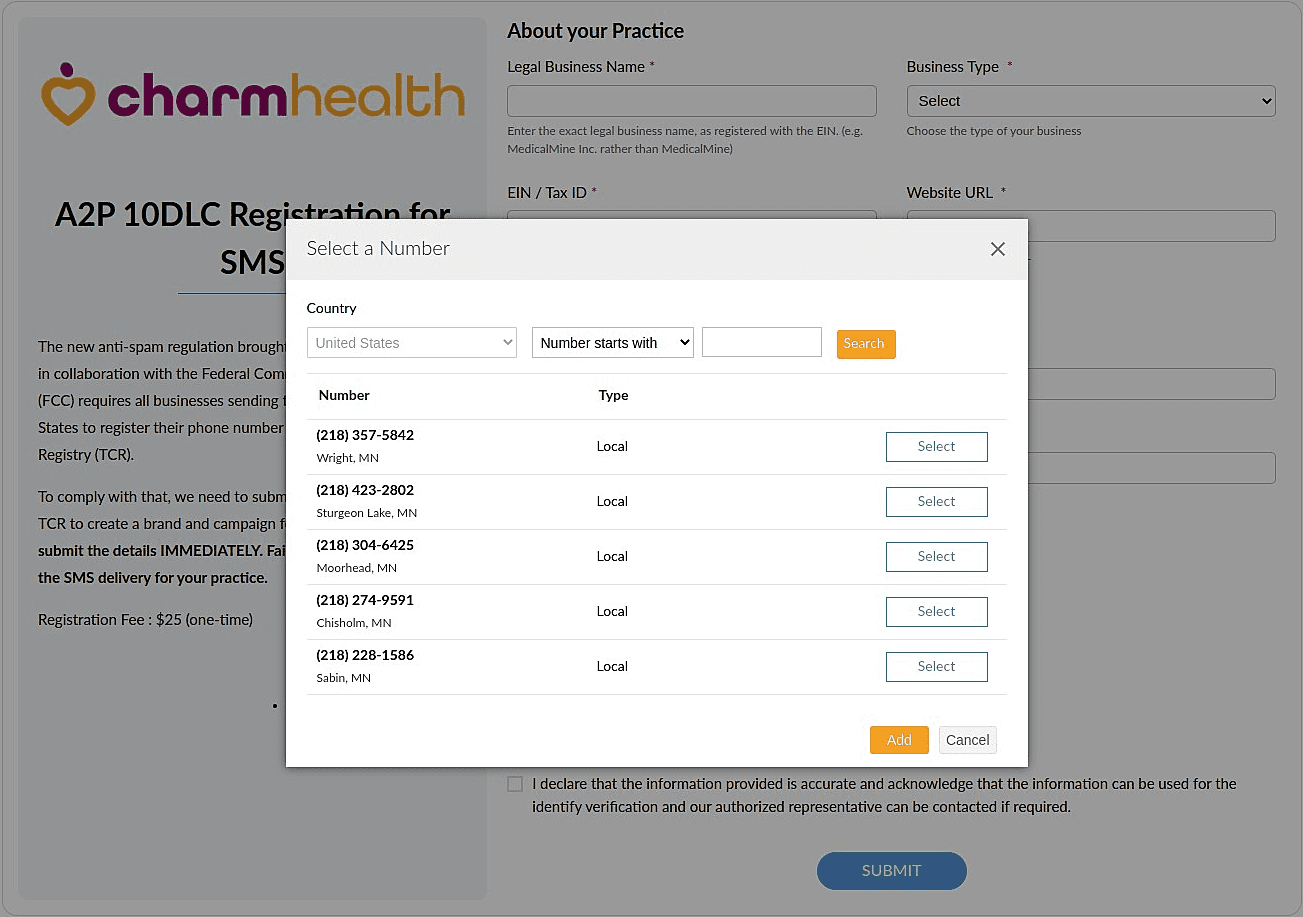
The 10DLC registration approval process takes around 1 to 2 weeks. You will get notified once the registration is complete.
Note: Steps listed above get automatically skipped if you have already completed them while configuring other features.
Enable Phone Calls
After fulfilling the prerequisites, the Practice Admin can follow the steps below to enable the Phone Calls feature.
- Go to the 'Settings > Patient > Phone Calls' section.
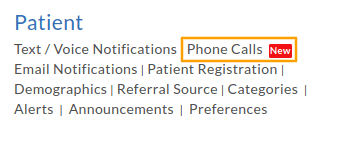
- Click on the 'Enable Phone Calls' button.
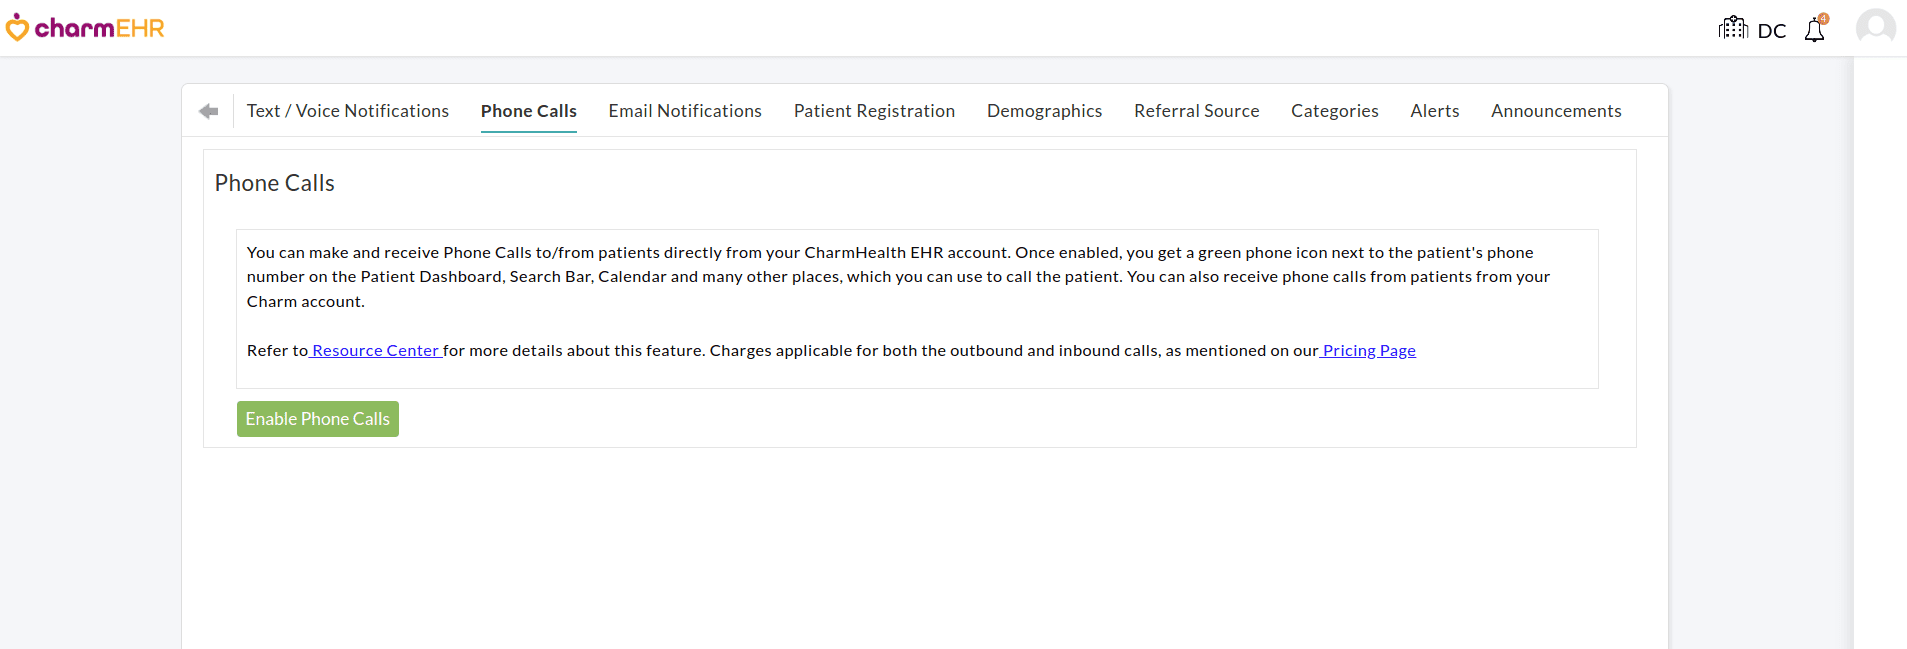
- Once enabled, the outgoing calls are turned on by default. For the incoming calls, you can choose any one of the three options 'Reject', 'Receive', or 'Forward'.
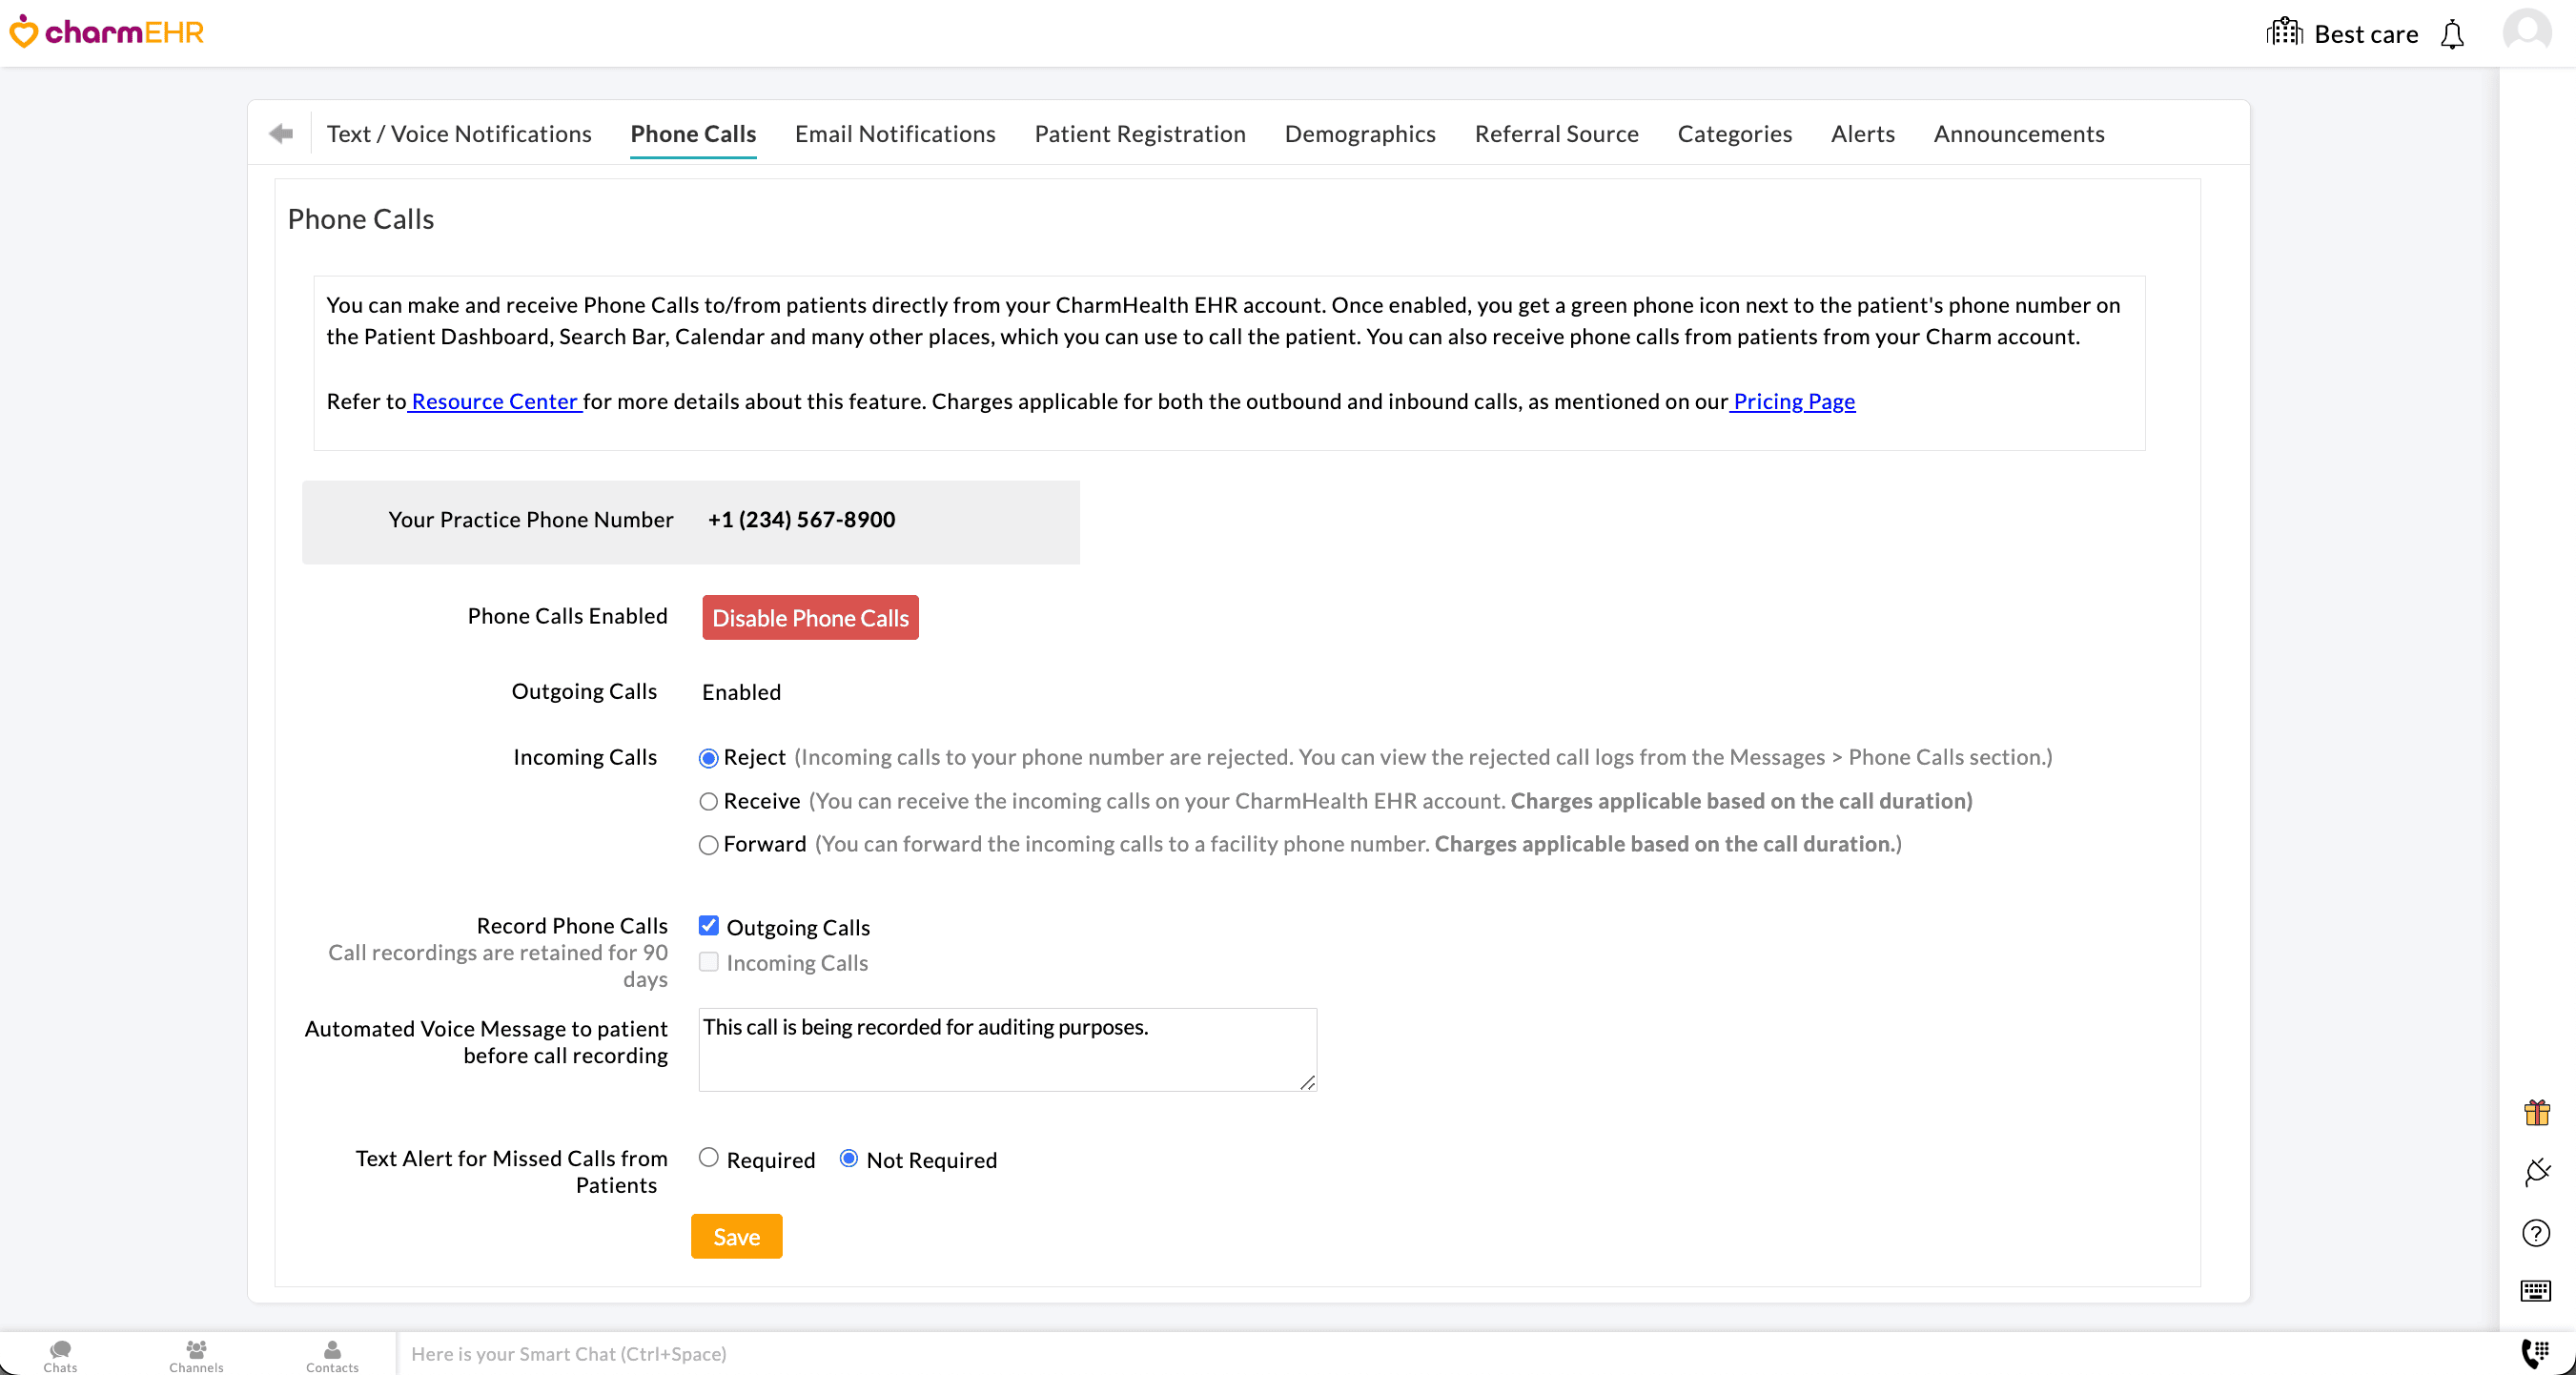
- Reject - This option rejects all incoming patient calls. You can view the rejected call logs from the 'Messages > Phone Calls' section. (The practice will not be charged for this option.)
- Receive - This option enables Practice Members to attend patient calls directly from their CharmHealth EHR account. (The practice will be charged based on the call duration.)
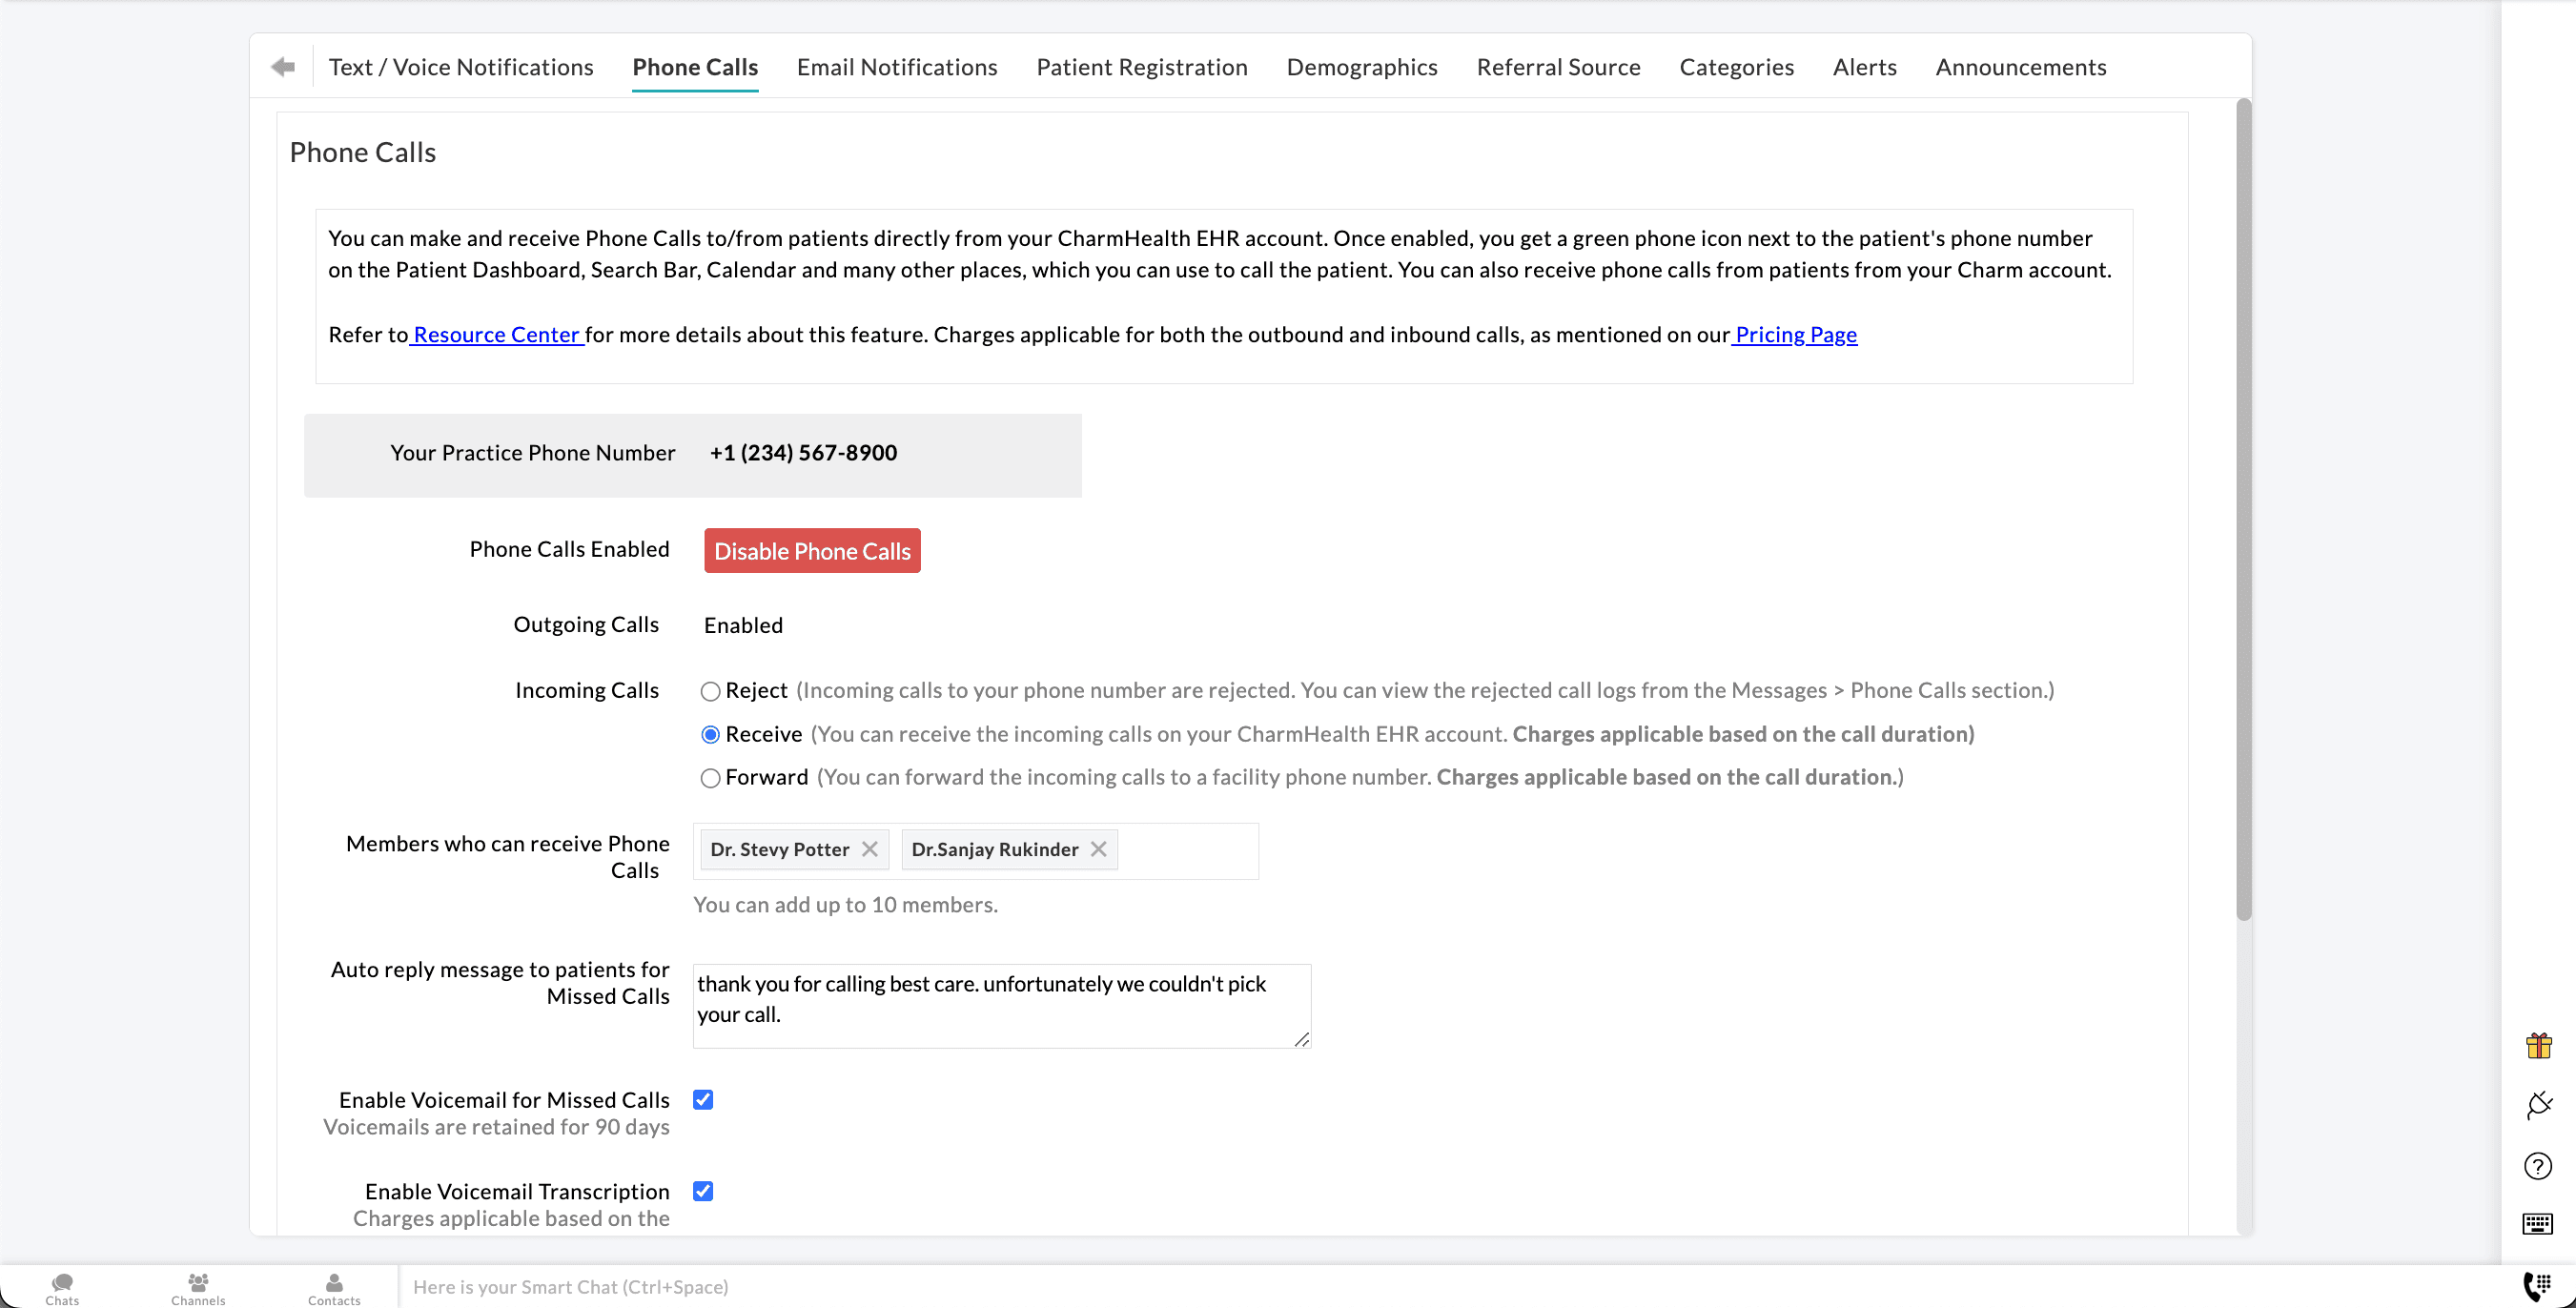
You can configure a maximum of ten Practice Members to attend the patient's phone calls. These members will receive call notifications based on their EHR login status as mentioned below.
- Online - Members logged into CharmHealth EHR get a call notification along with the patient's name. Members can attend the call directly from their Charm account.
- Offline - If none of the configured members are online, the incoming call is recorded as missed. Members can view all the missed calls from the 'Messages > Phone Calls' section. If voice mail is enabled, Patients can leave a message.
- Forward - You can use this option to forward all the incoming calls from patients to another Practice number configured in the 'Forward to' field. (The practice will be charged based on the call duration.)
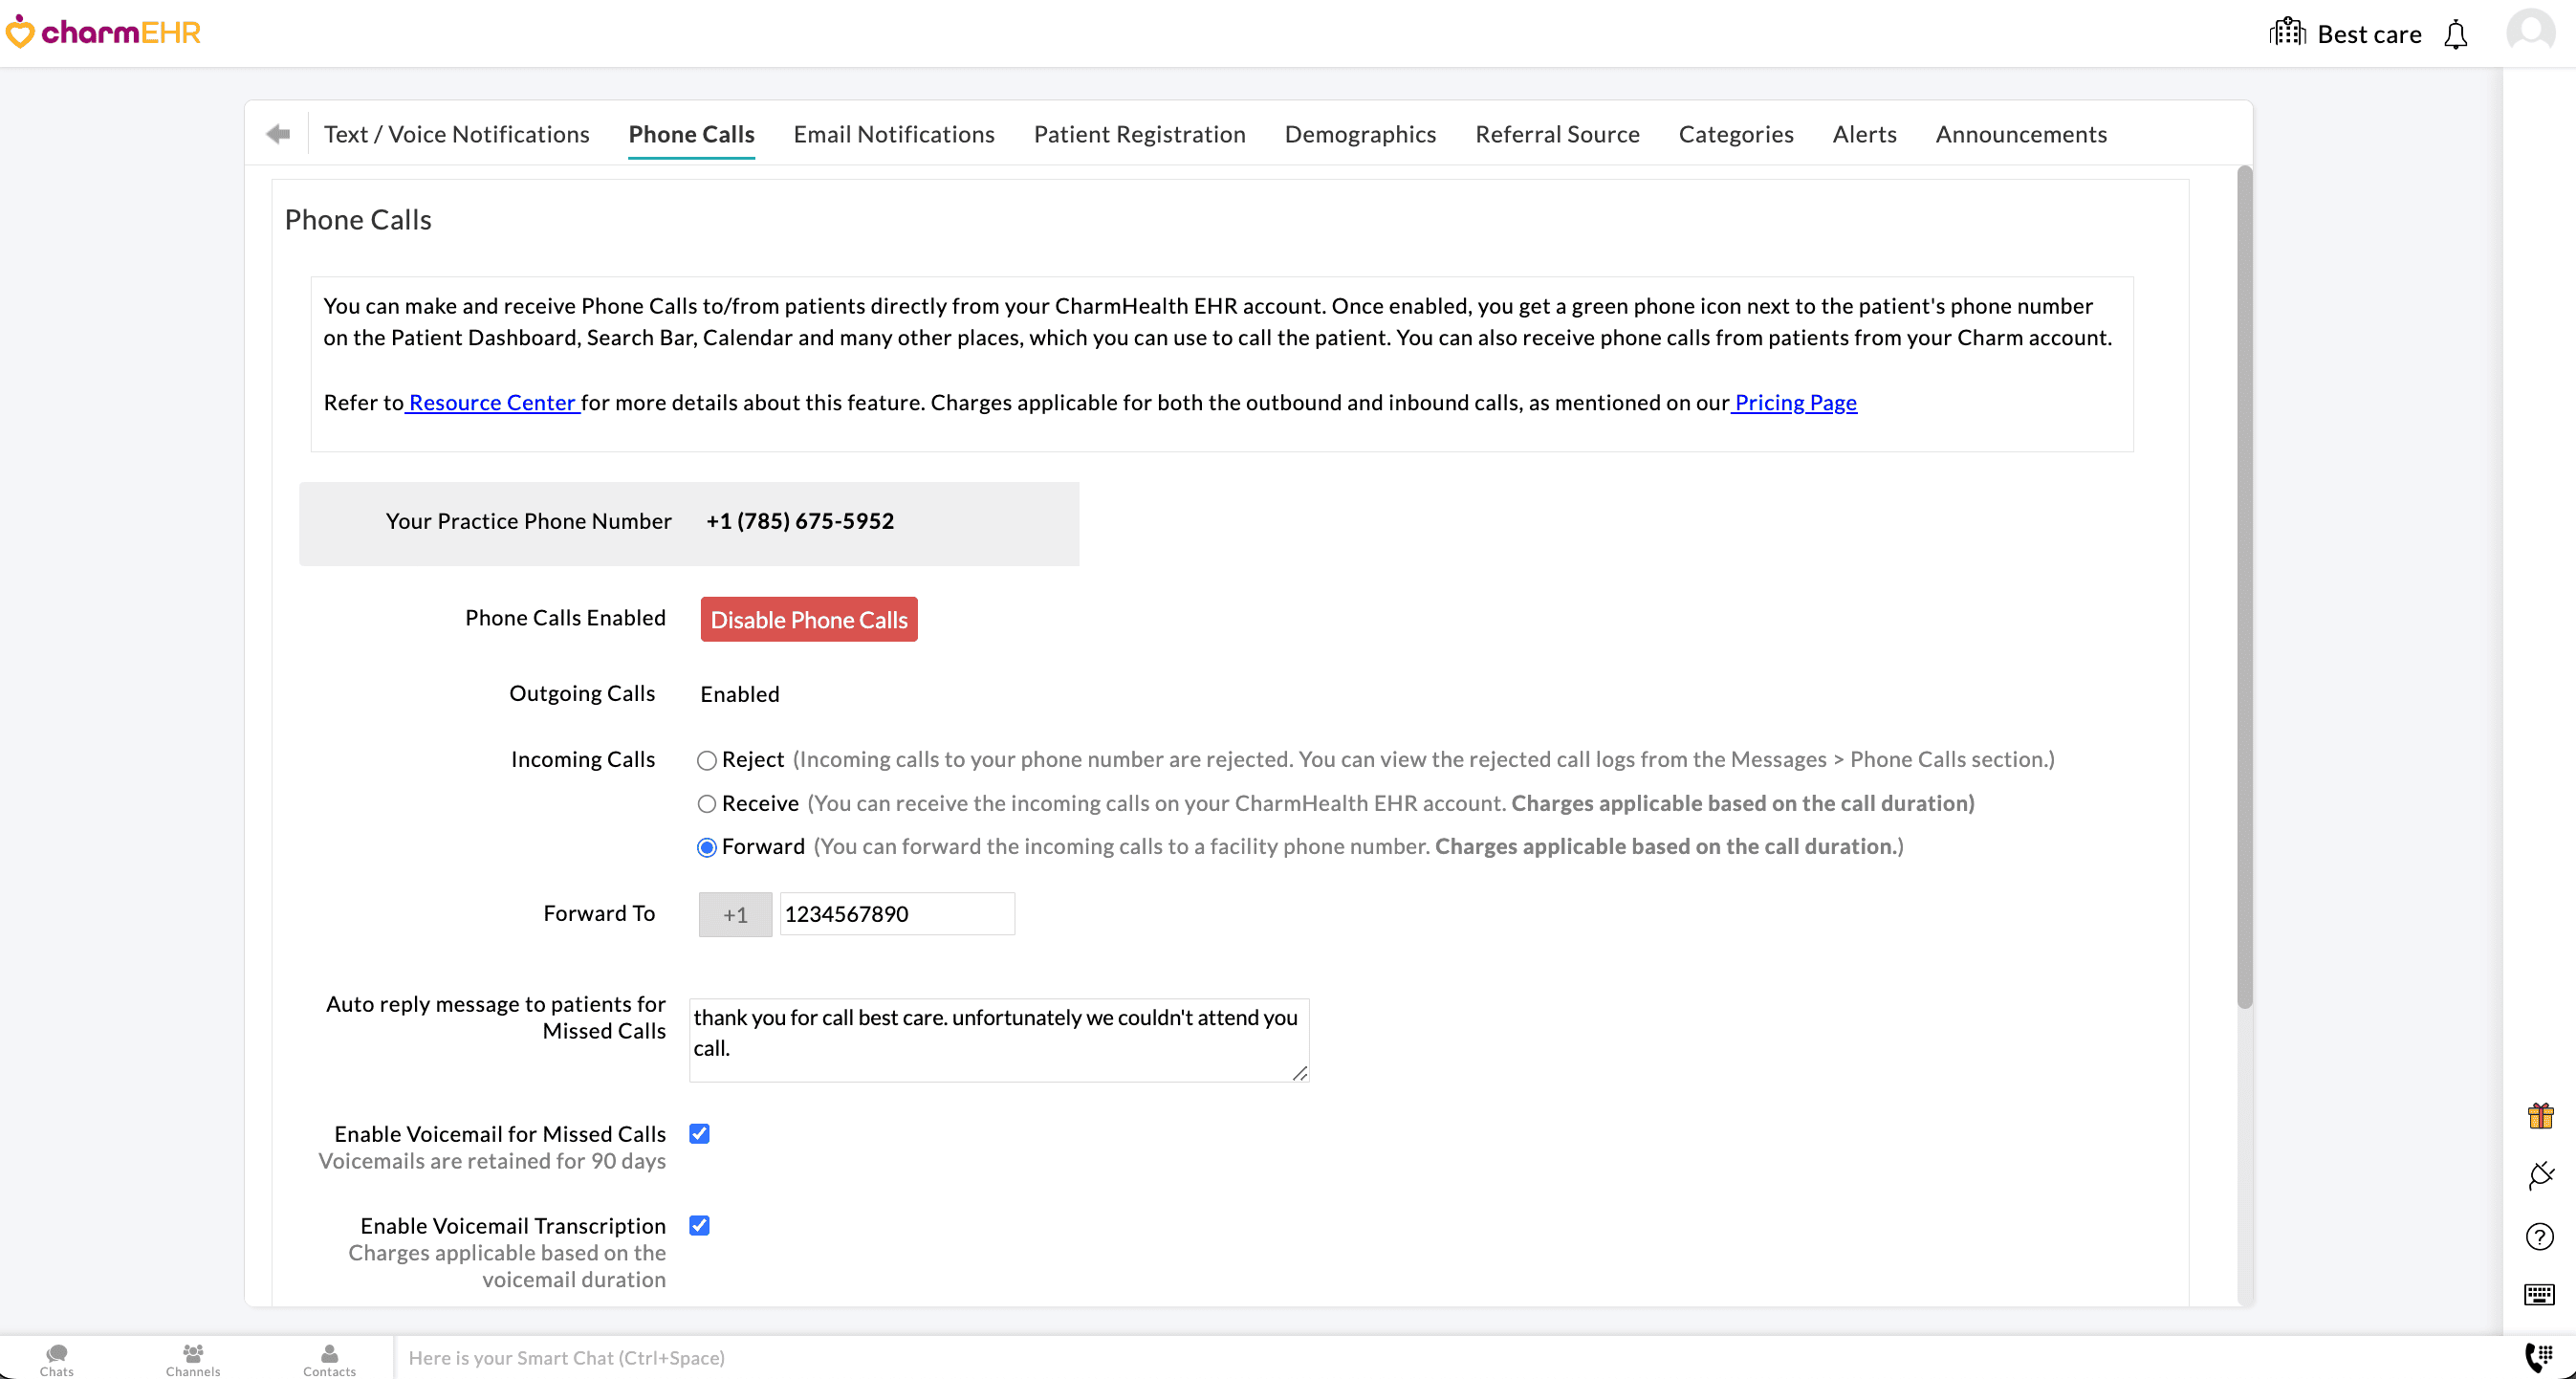
- If you choose the 'Receive' or 'Forward' option for incoming calls, use the default 'Auto-reply' response or configure the message to be played to Patients for unanswered calls.
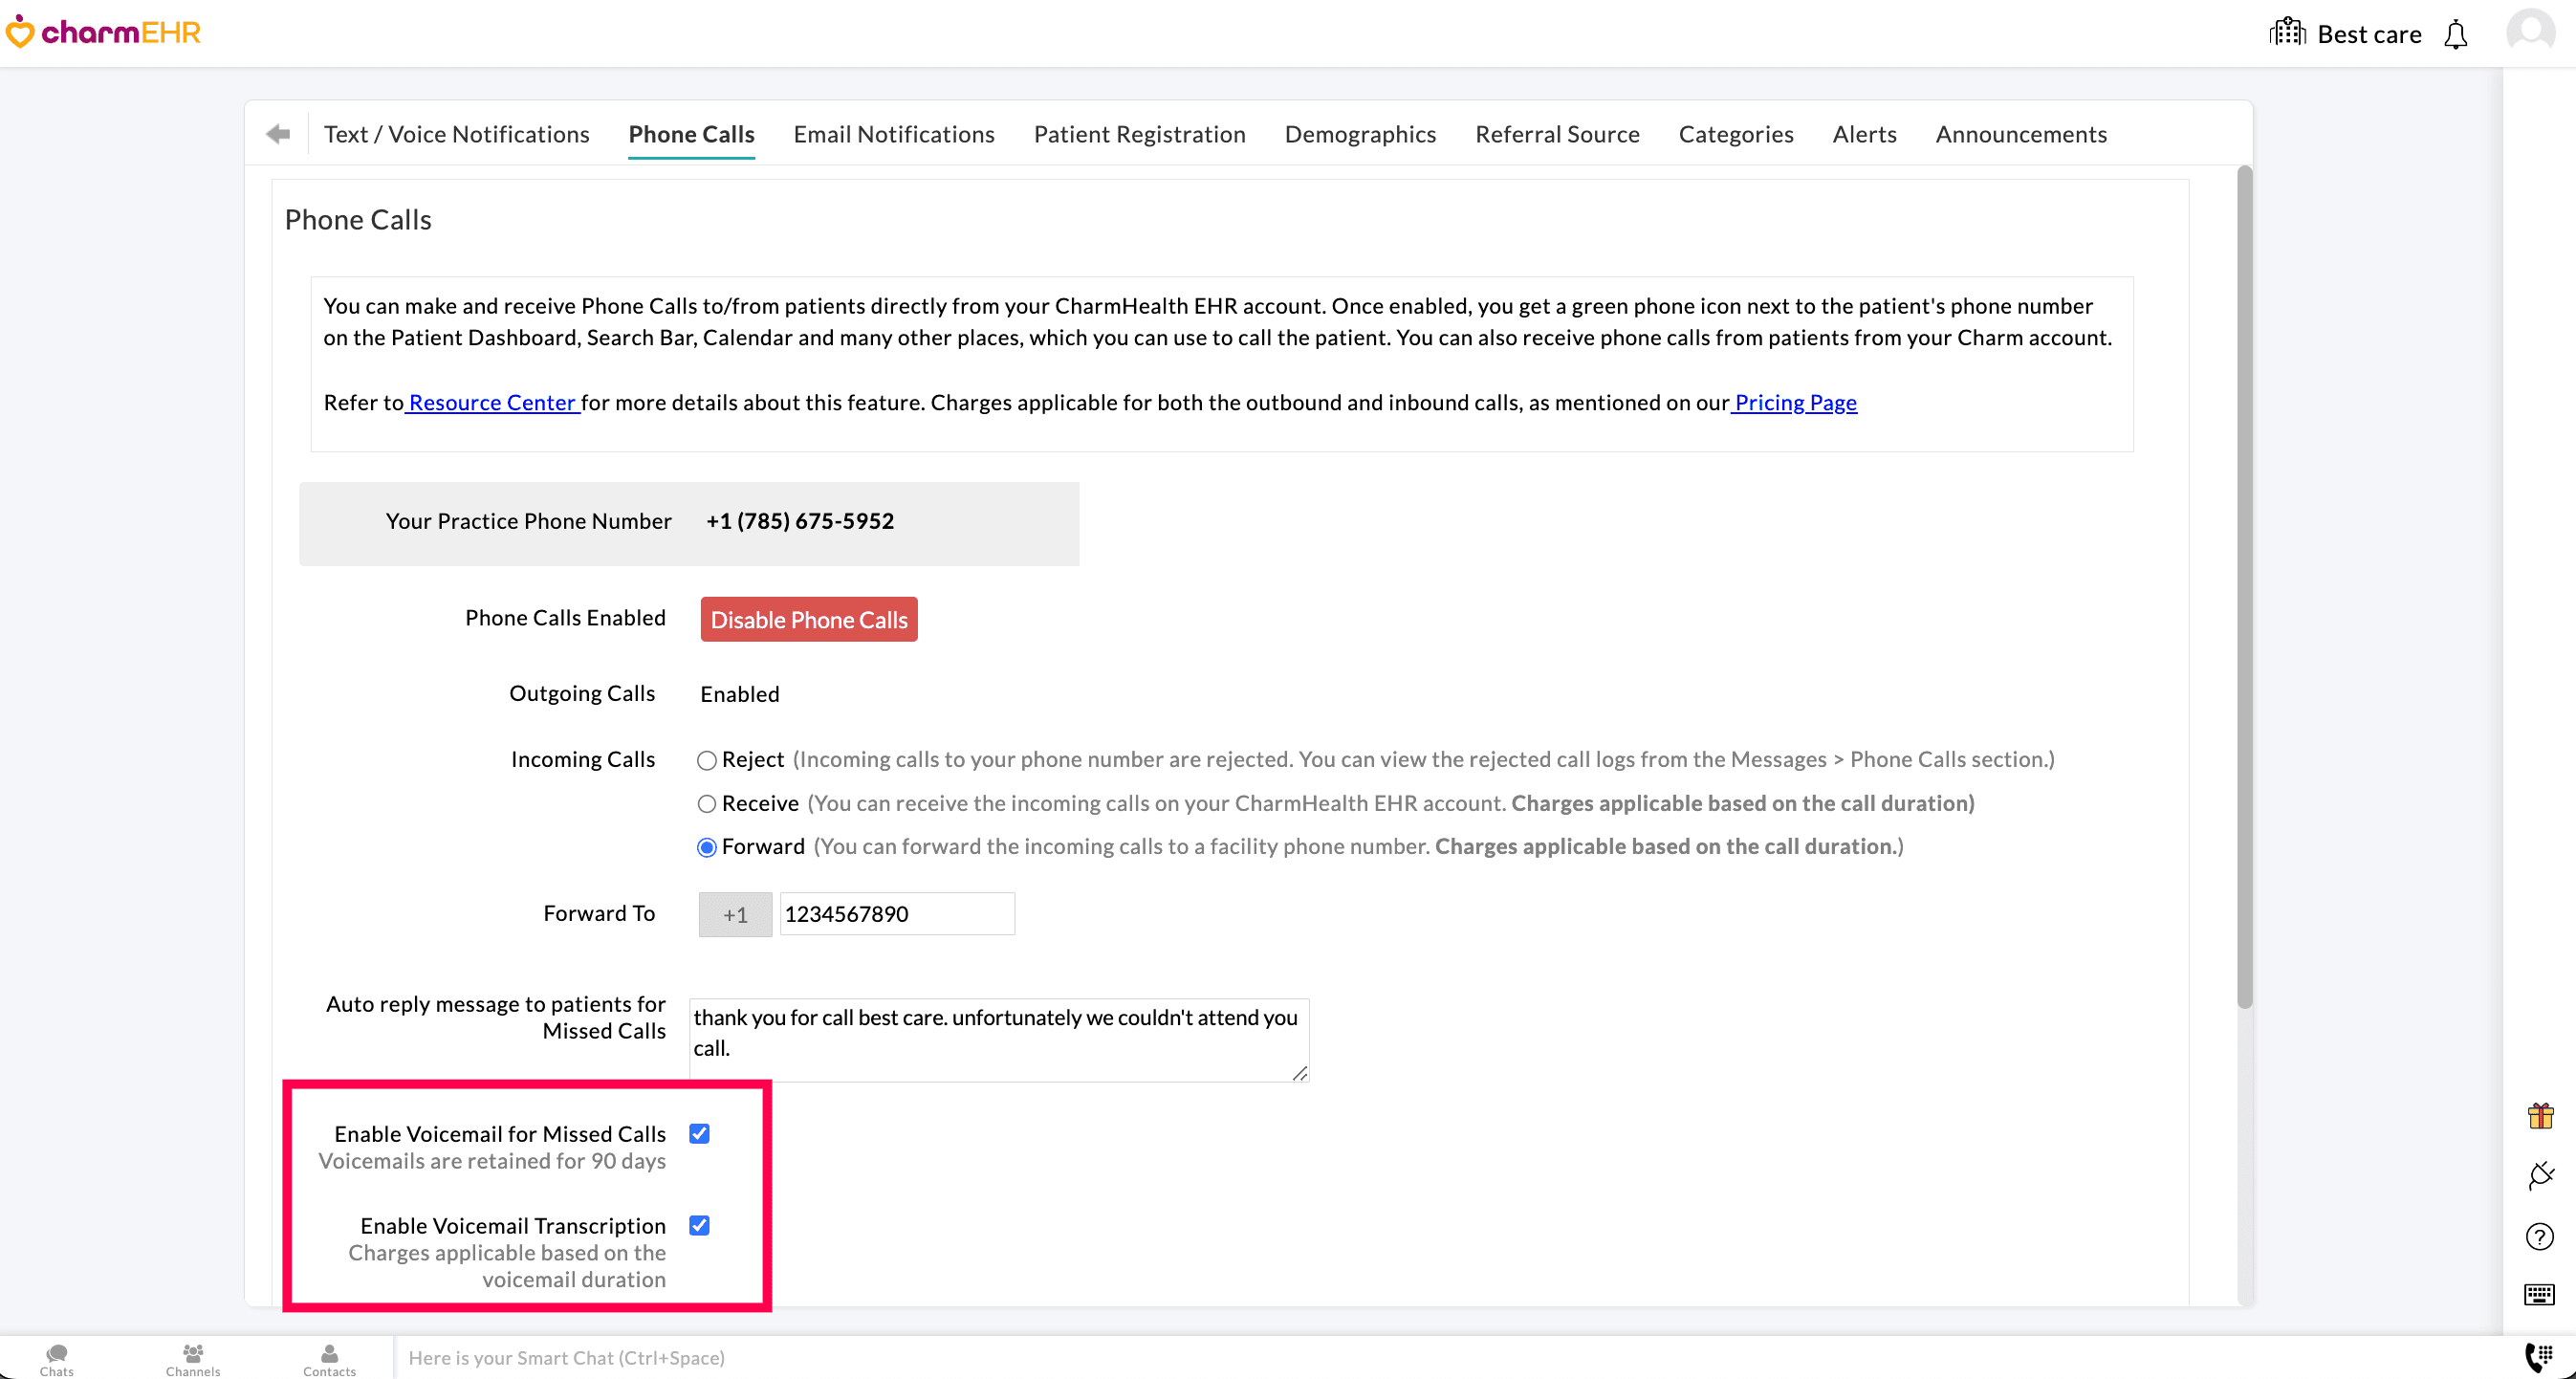
Additionally, click on the 'Enable VoiceMail' checkbox for missed calls if you wish to allow the patients to leave voice messages. You can access and listen to Patient voicemails from the 'Messages > Phone Calls' section for up to 90 days. The voicemails are auto-deleted after 90 days.
You can enable the option to view the Voicemail Transcriptions, making it easier to review the missed calls without listening to the audio recordings. The transcriptions can be viewed near the Voicemail in the 'Messages > Phone Calls' section. The Practice will be charged based on the duration of the voicemail.
- You can also configure to get text alerts for missed calls from patients. To turn on this feature, choose the 'Required' option for text alerts and enter the phone number to be notified. If required, you can include the Patient Name and Record ID in the missed call text message.
- Click on the 'Save' button.
Make Phone Calls
Practice Members with the necessary role privileges can initiate a phone call from the following places on their EHR account.
Patient Search Bar

Patient Dashboard
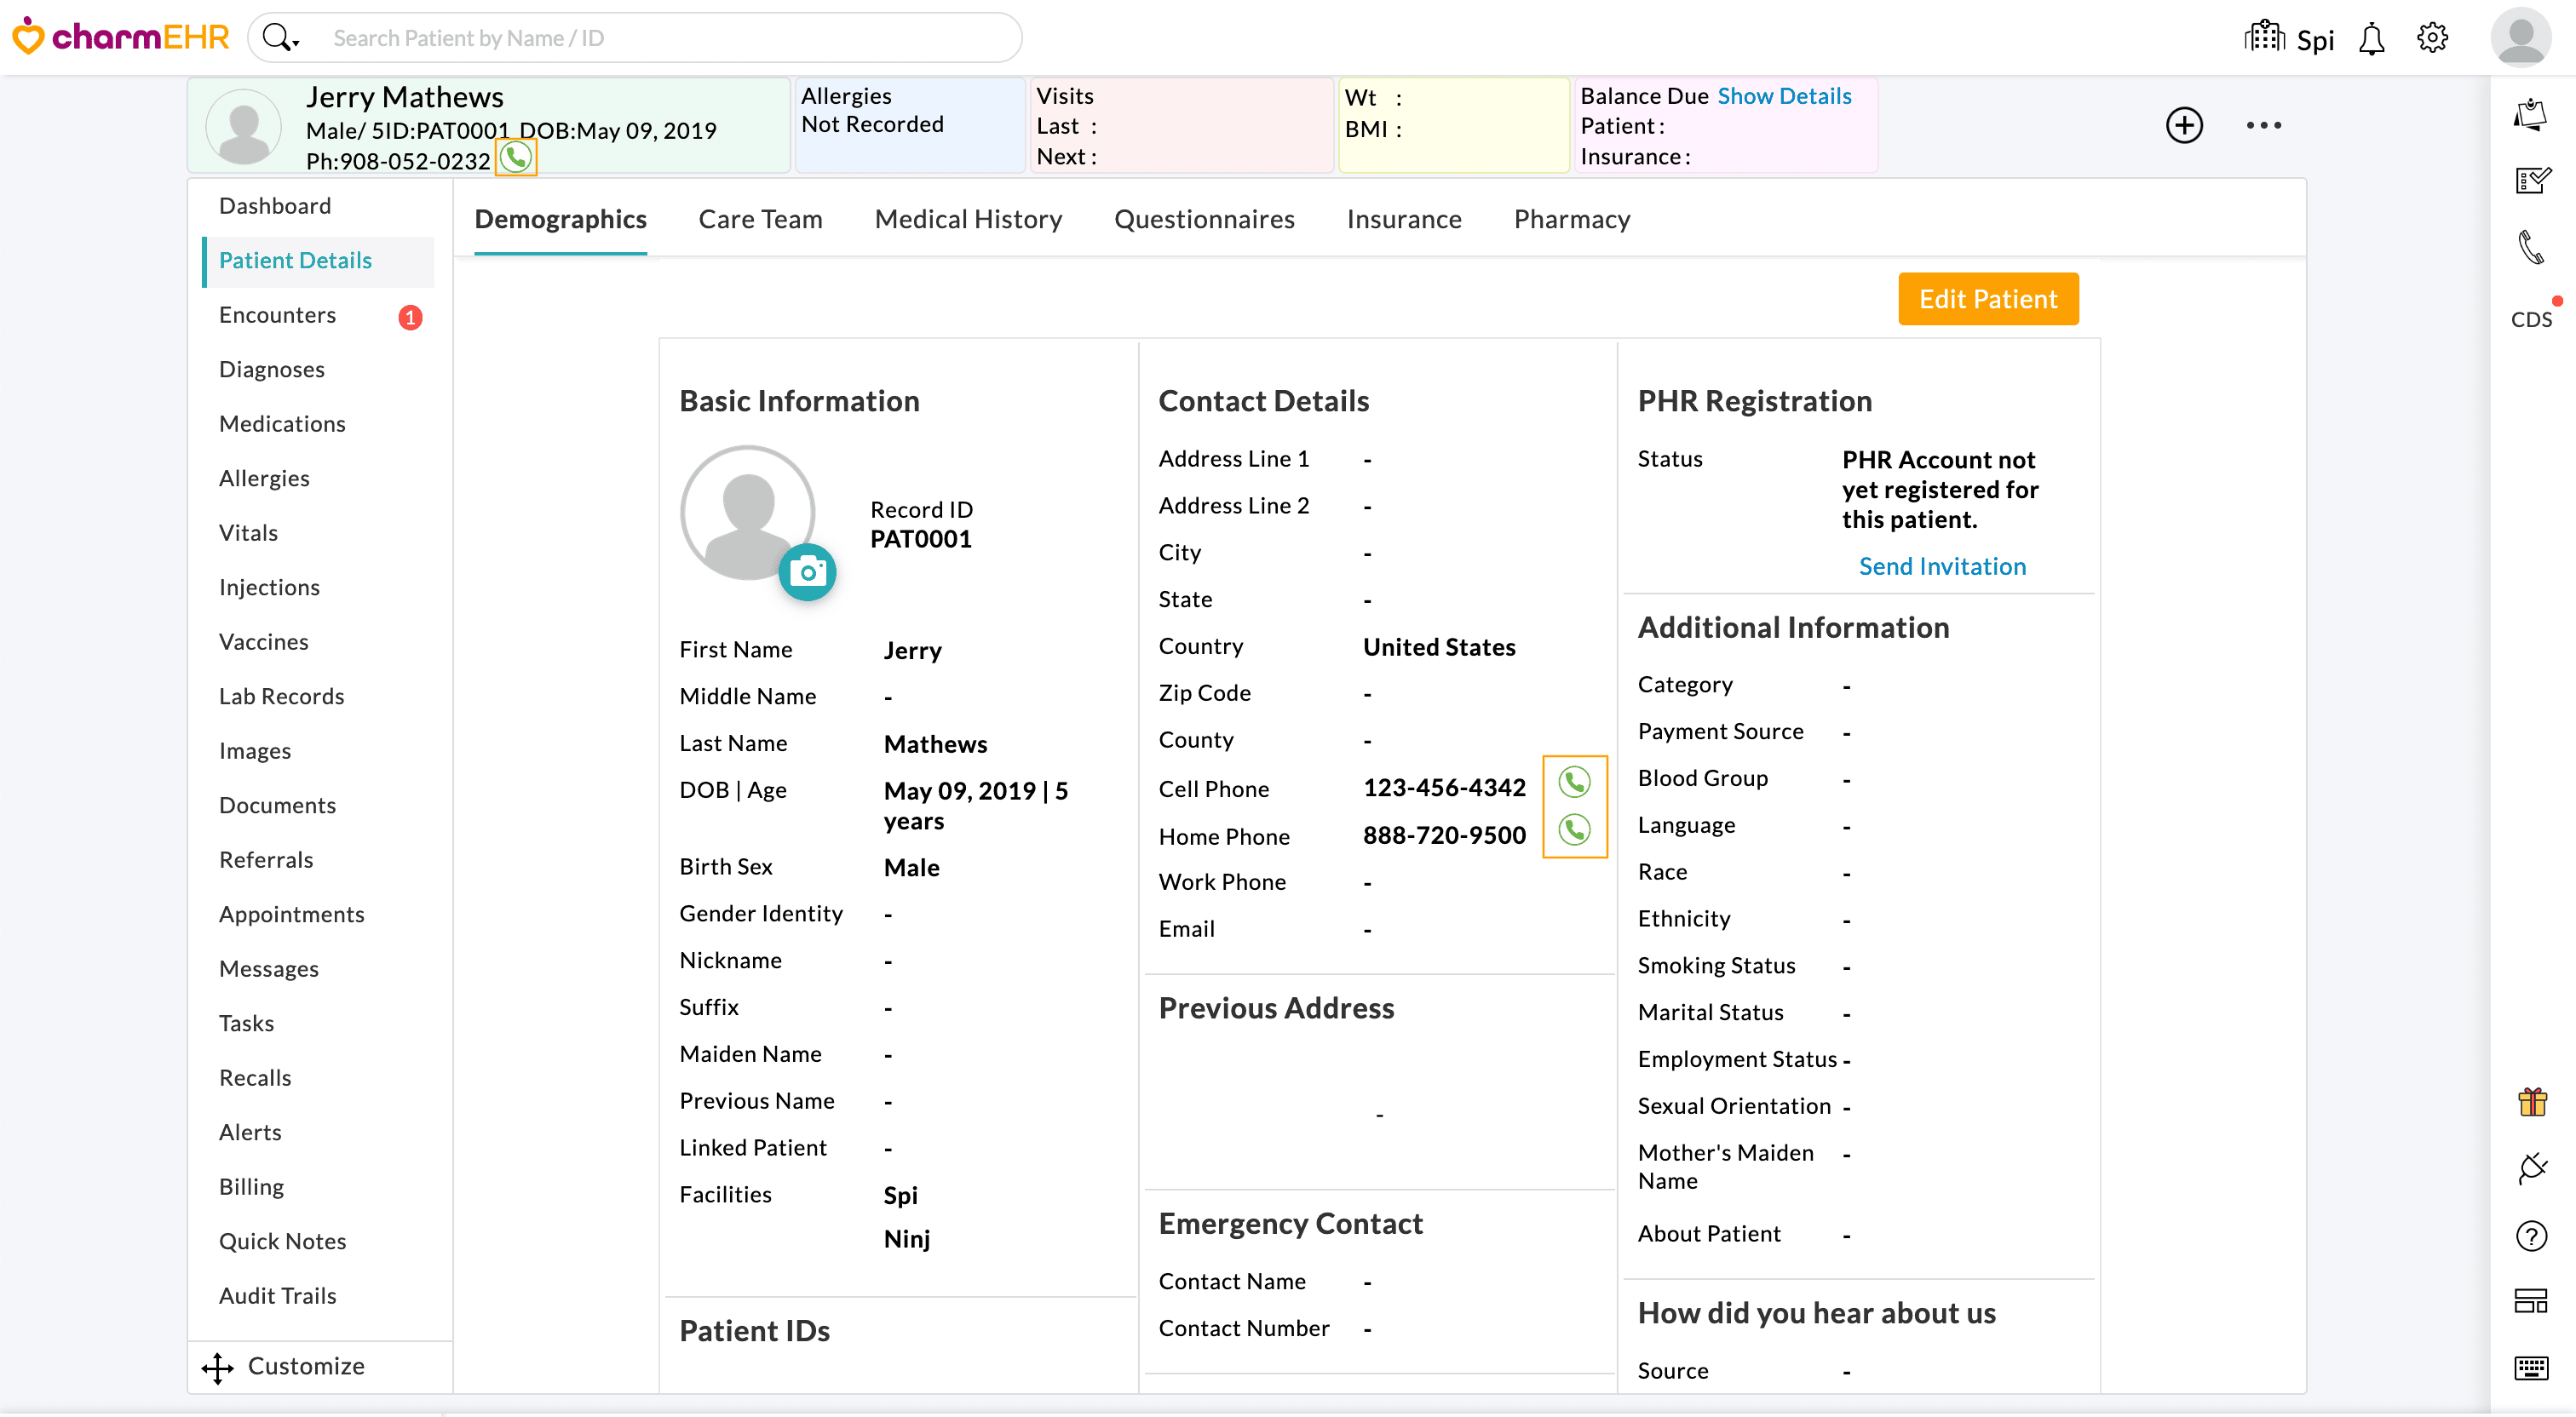
Charting 360 View

Two-Way Text Messages

Calendar > List View

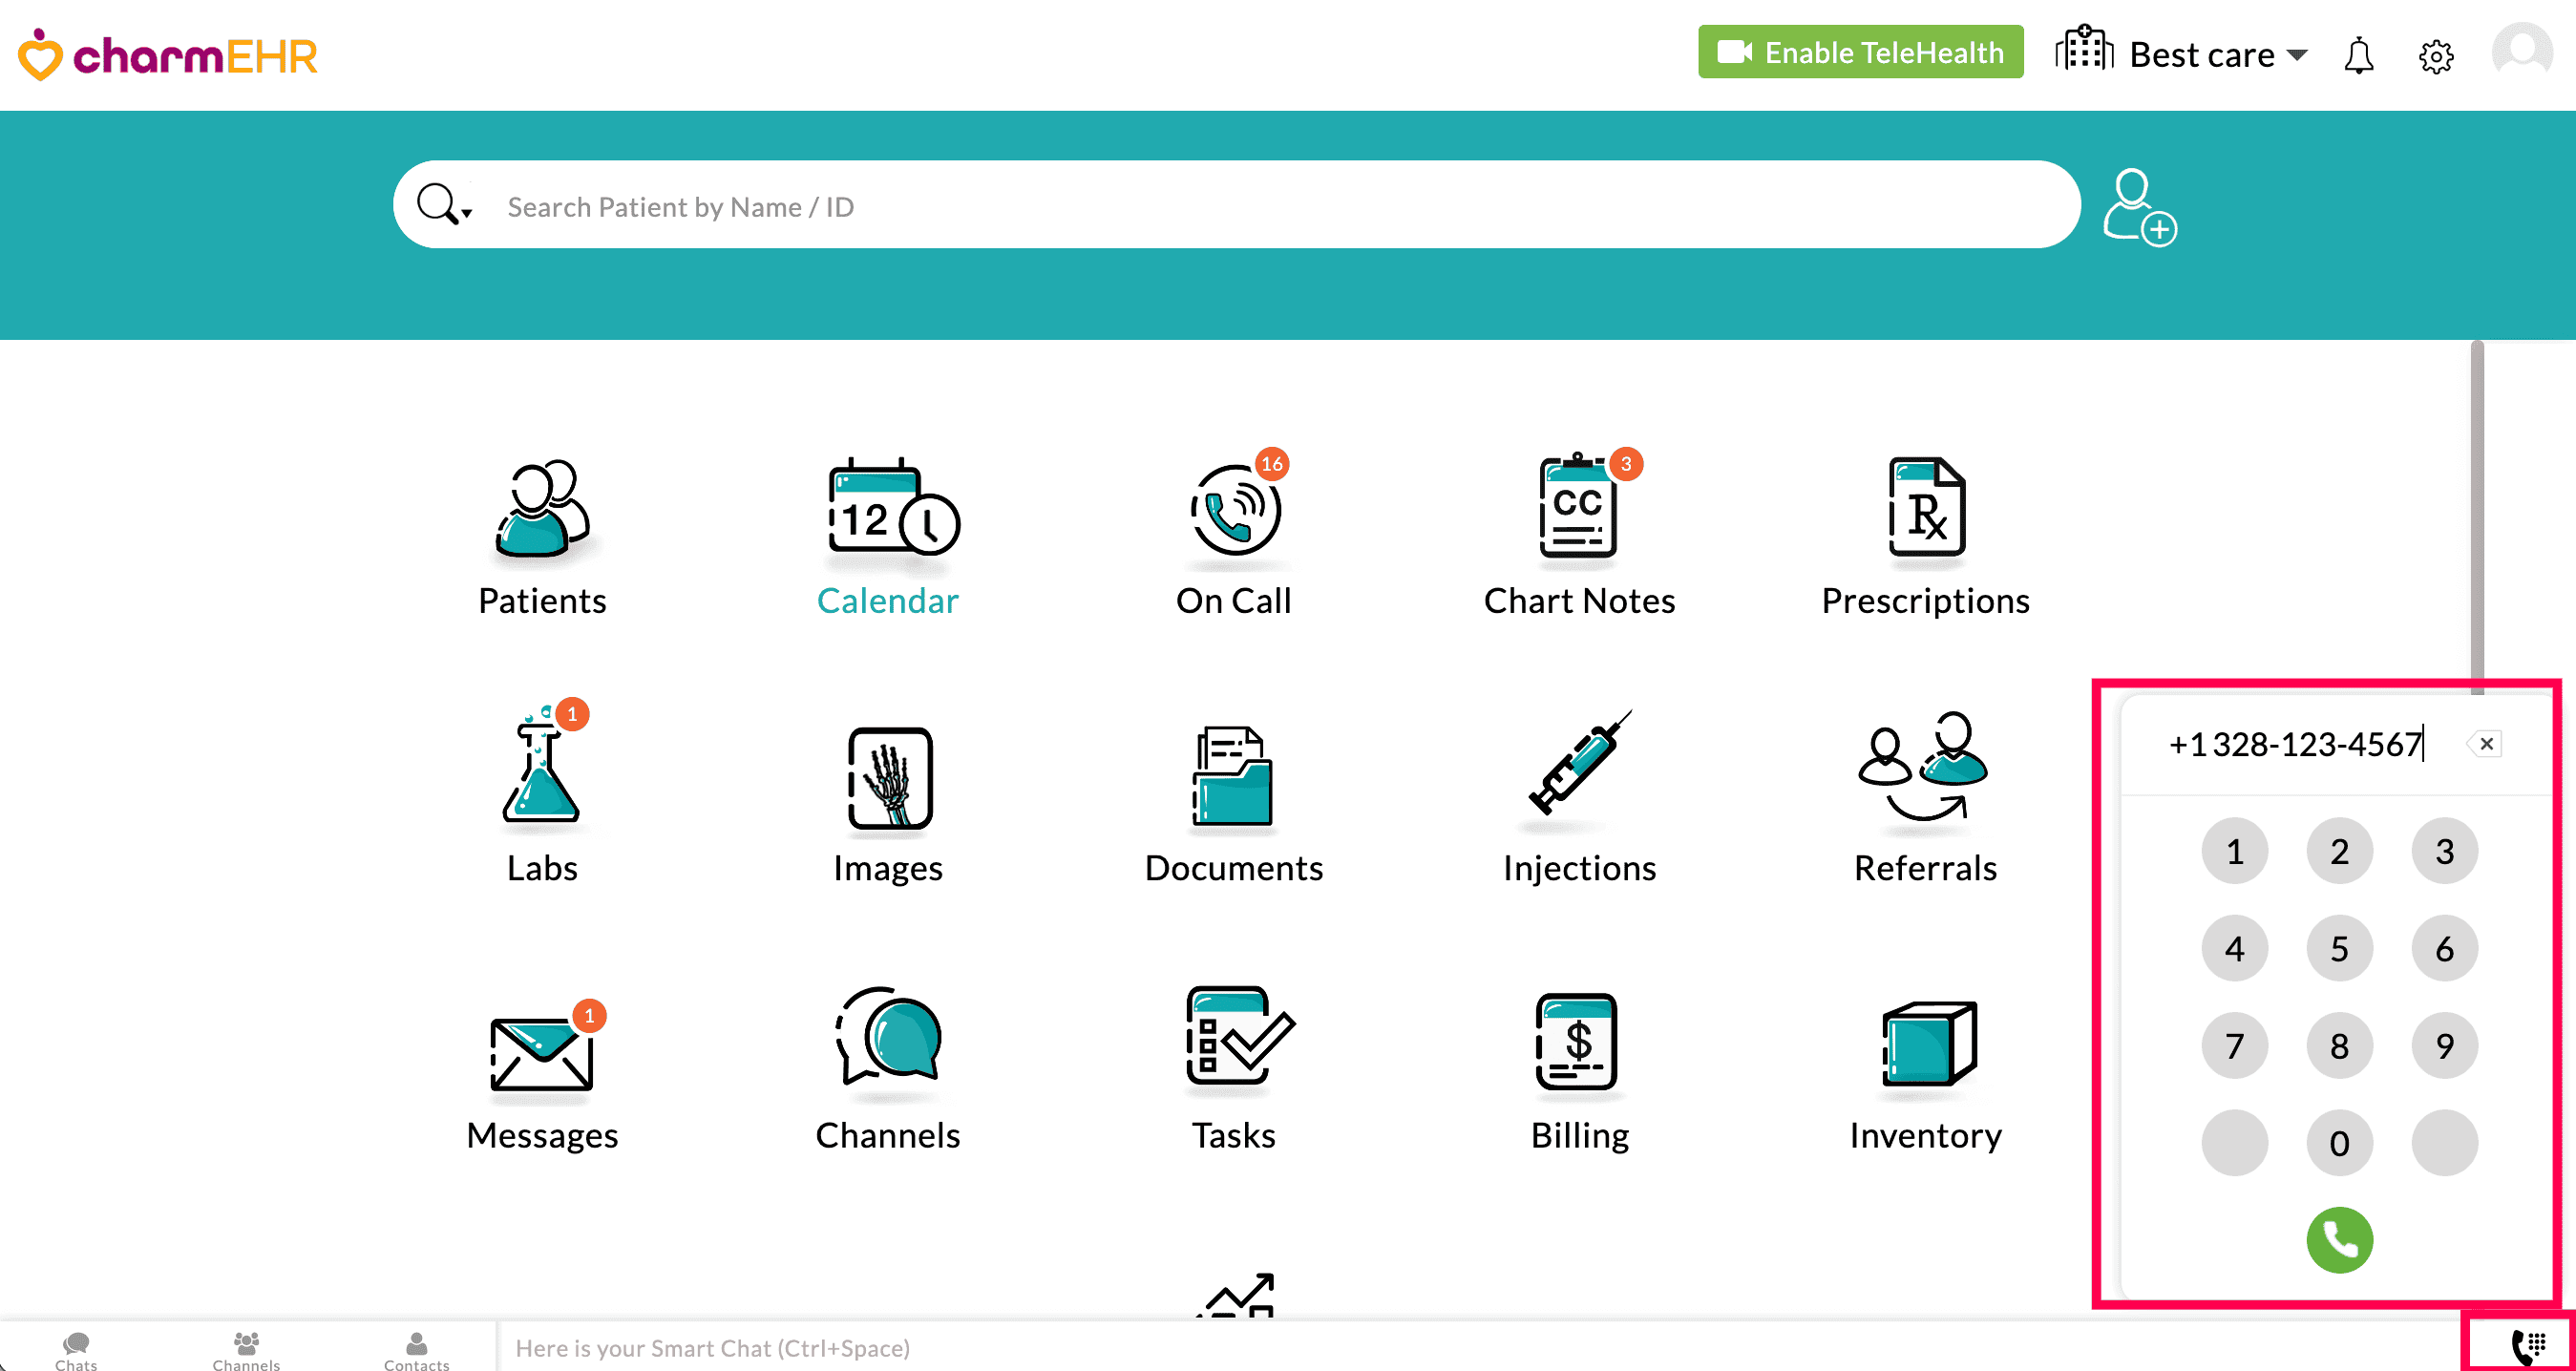
Additionally, the Practice Members can also use the Dial pad to manually enter any phone number and initiate a call directly from CharmHealth.
To access the dial pad, follow the steps below.
- Click the Dial pad icon at the bottom-right corner to open the on-screen keypad. You can quickly open the Dial pad using the keyboard shortcut Shift + D.
- Enter the desired phone number or copy and paste the phone number onto the dial pad.
- Press the 'Call' button to initiate a call.
Also, you can initiate a call by selecting a phone number anywhere within the CharmHealth EHR.
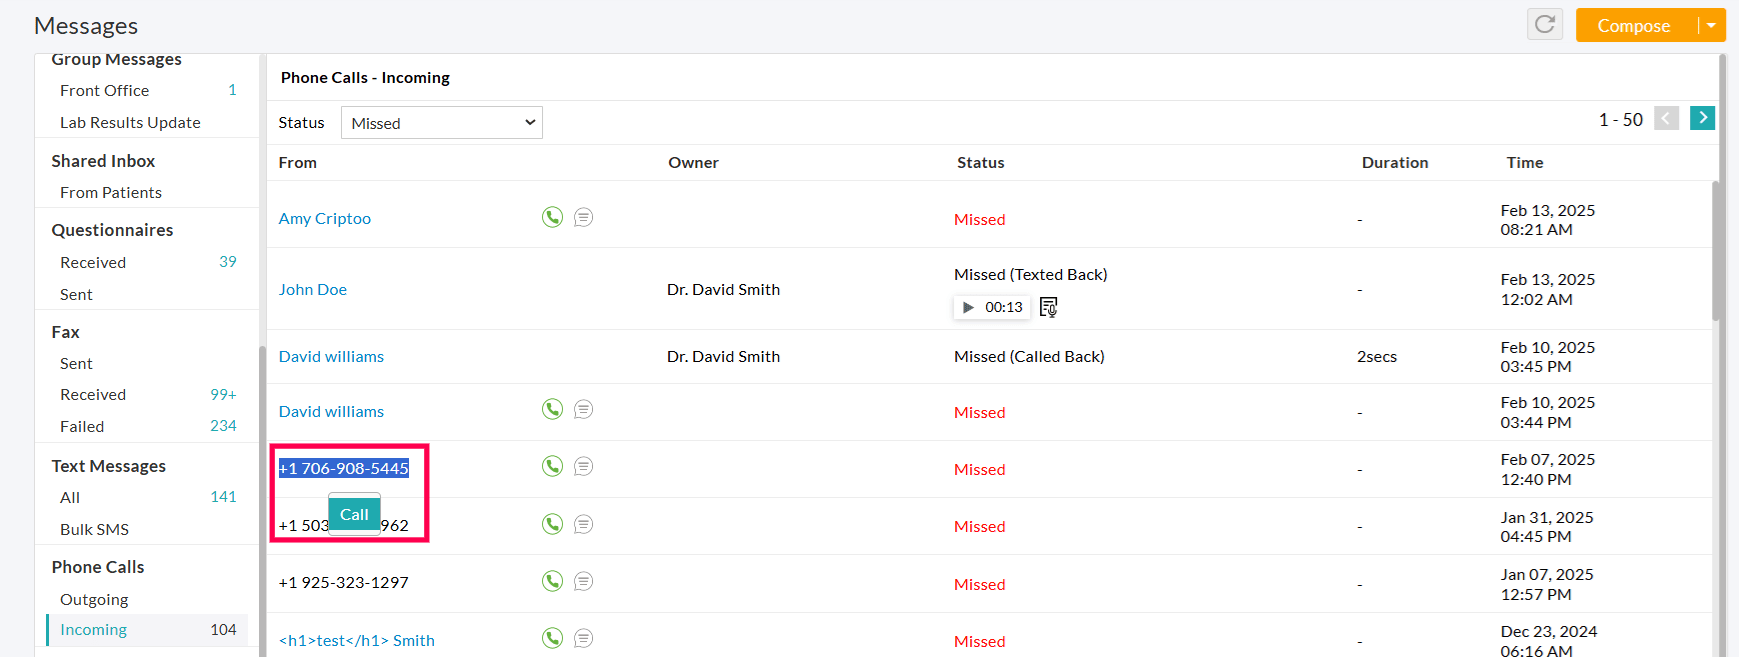
Clicking on the 'Phone' icon initiates the call; you can talk once the patient picks up the call.
If required, use the keypad icon shown on the outgoing call window to key in the required number to navigate through the IVR options.

Note: Closing or refreshing the tab from where the call is made disconnects the call automatically.
Receive Phone Calls
When patients call your practice number, members configured to receive the phone calls get a notification within their Charm account. Members can choose to either answer or decline the call.
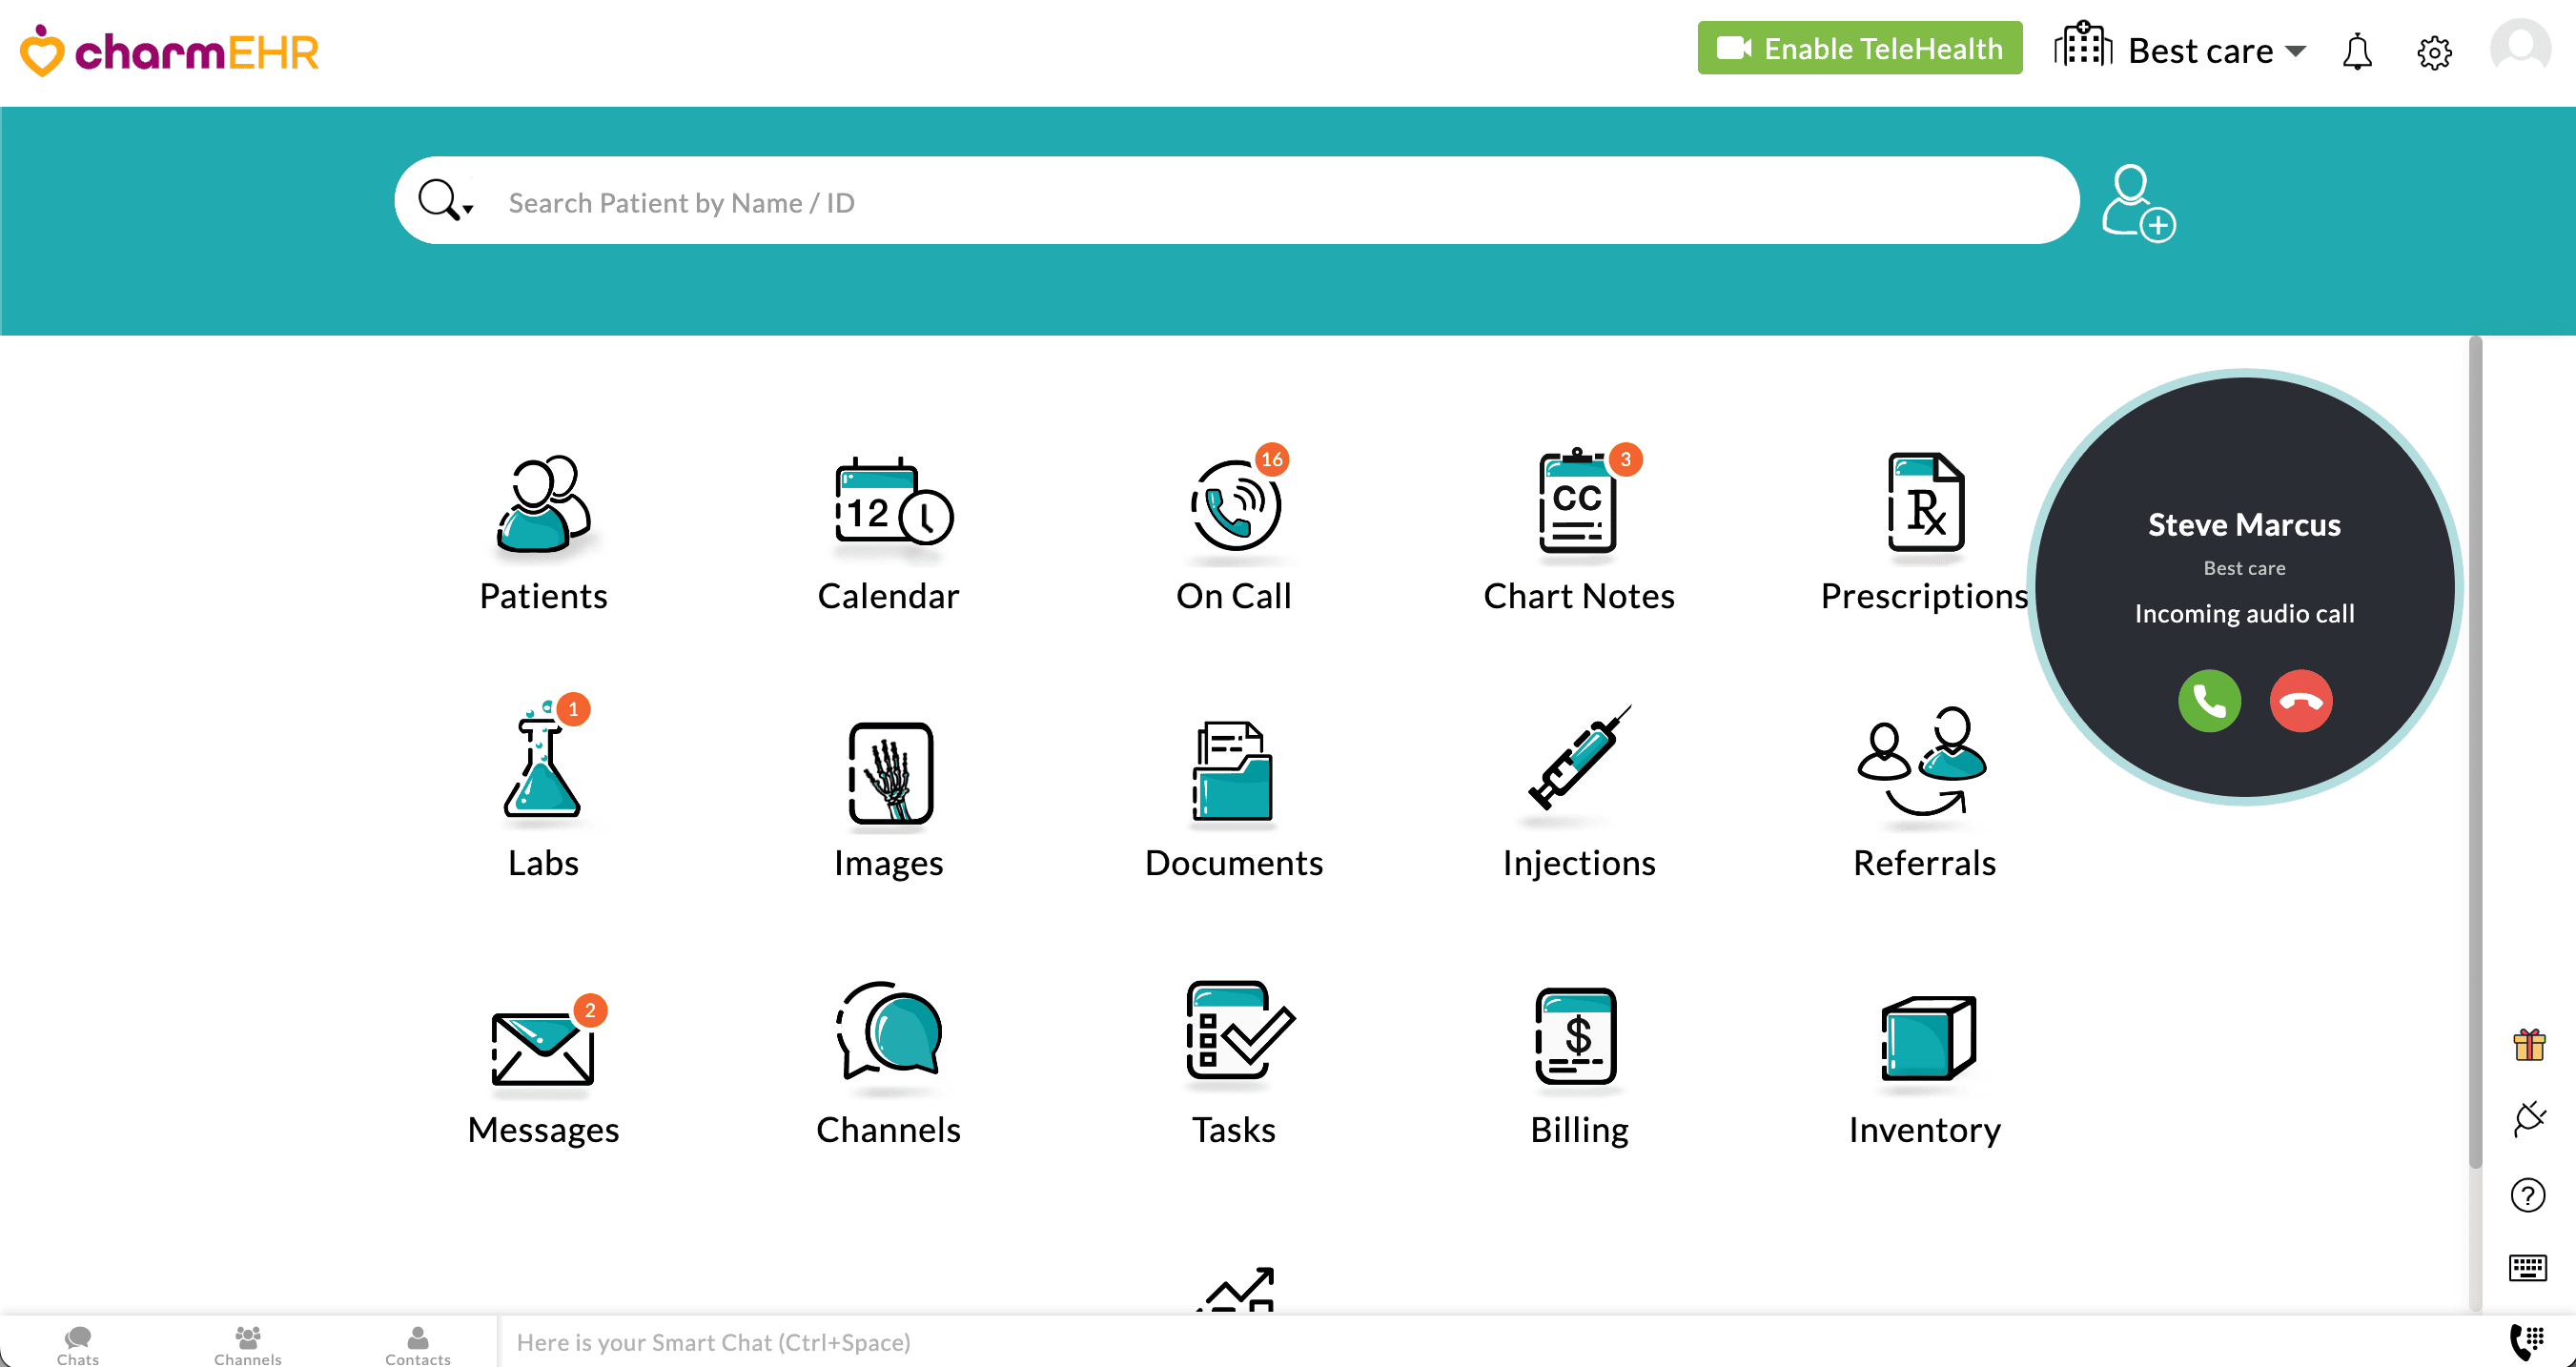
Note: If multiple practice members are online, all of them get the call notification simultaneously. As and when a member picks up the call, the notification to other members gets stopped automatically.
If the 'Forward To' option is enabled, the incoming calls are forwarded to the phone number configured.
The auto-reply message configured in the Settings page gets played in case nobody picks up the call or if no one is online. Patients can leave a voice message provided the option is enabled on the Settings page.
Record Phone Calls
Practices can enable call recording for both outgoing and incoming calls. When enabled, the phone calls are recorded and retained for a period of 90 days for auditing purposes.
Prior to recording the call, an automated voice message can be played to notify the Patient about the recording. Practices can customize this message based on their requirements.
To enable call recording, follow the steps below.
- Navigate to the 'Settings > Patient > Phone Calls' section.
- Select the 'Record Phone Calls' checkbox.
- Choose whether to record the Outgoing Calls, Incoming Calls, or both.
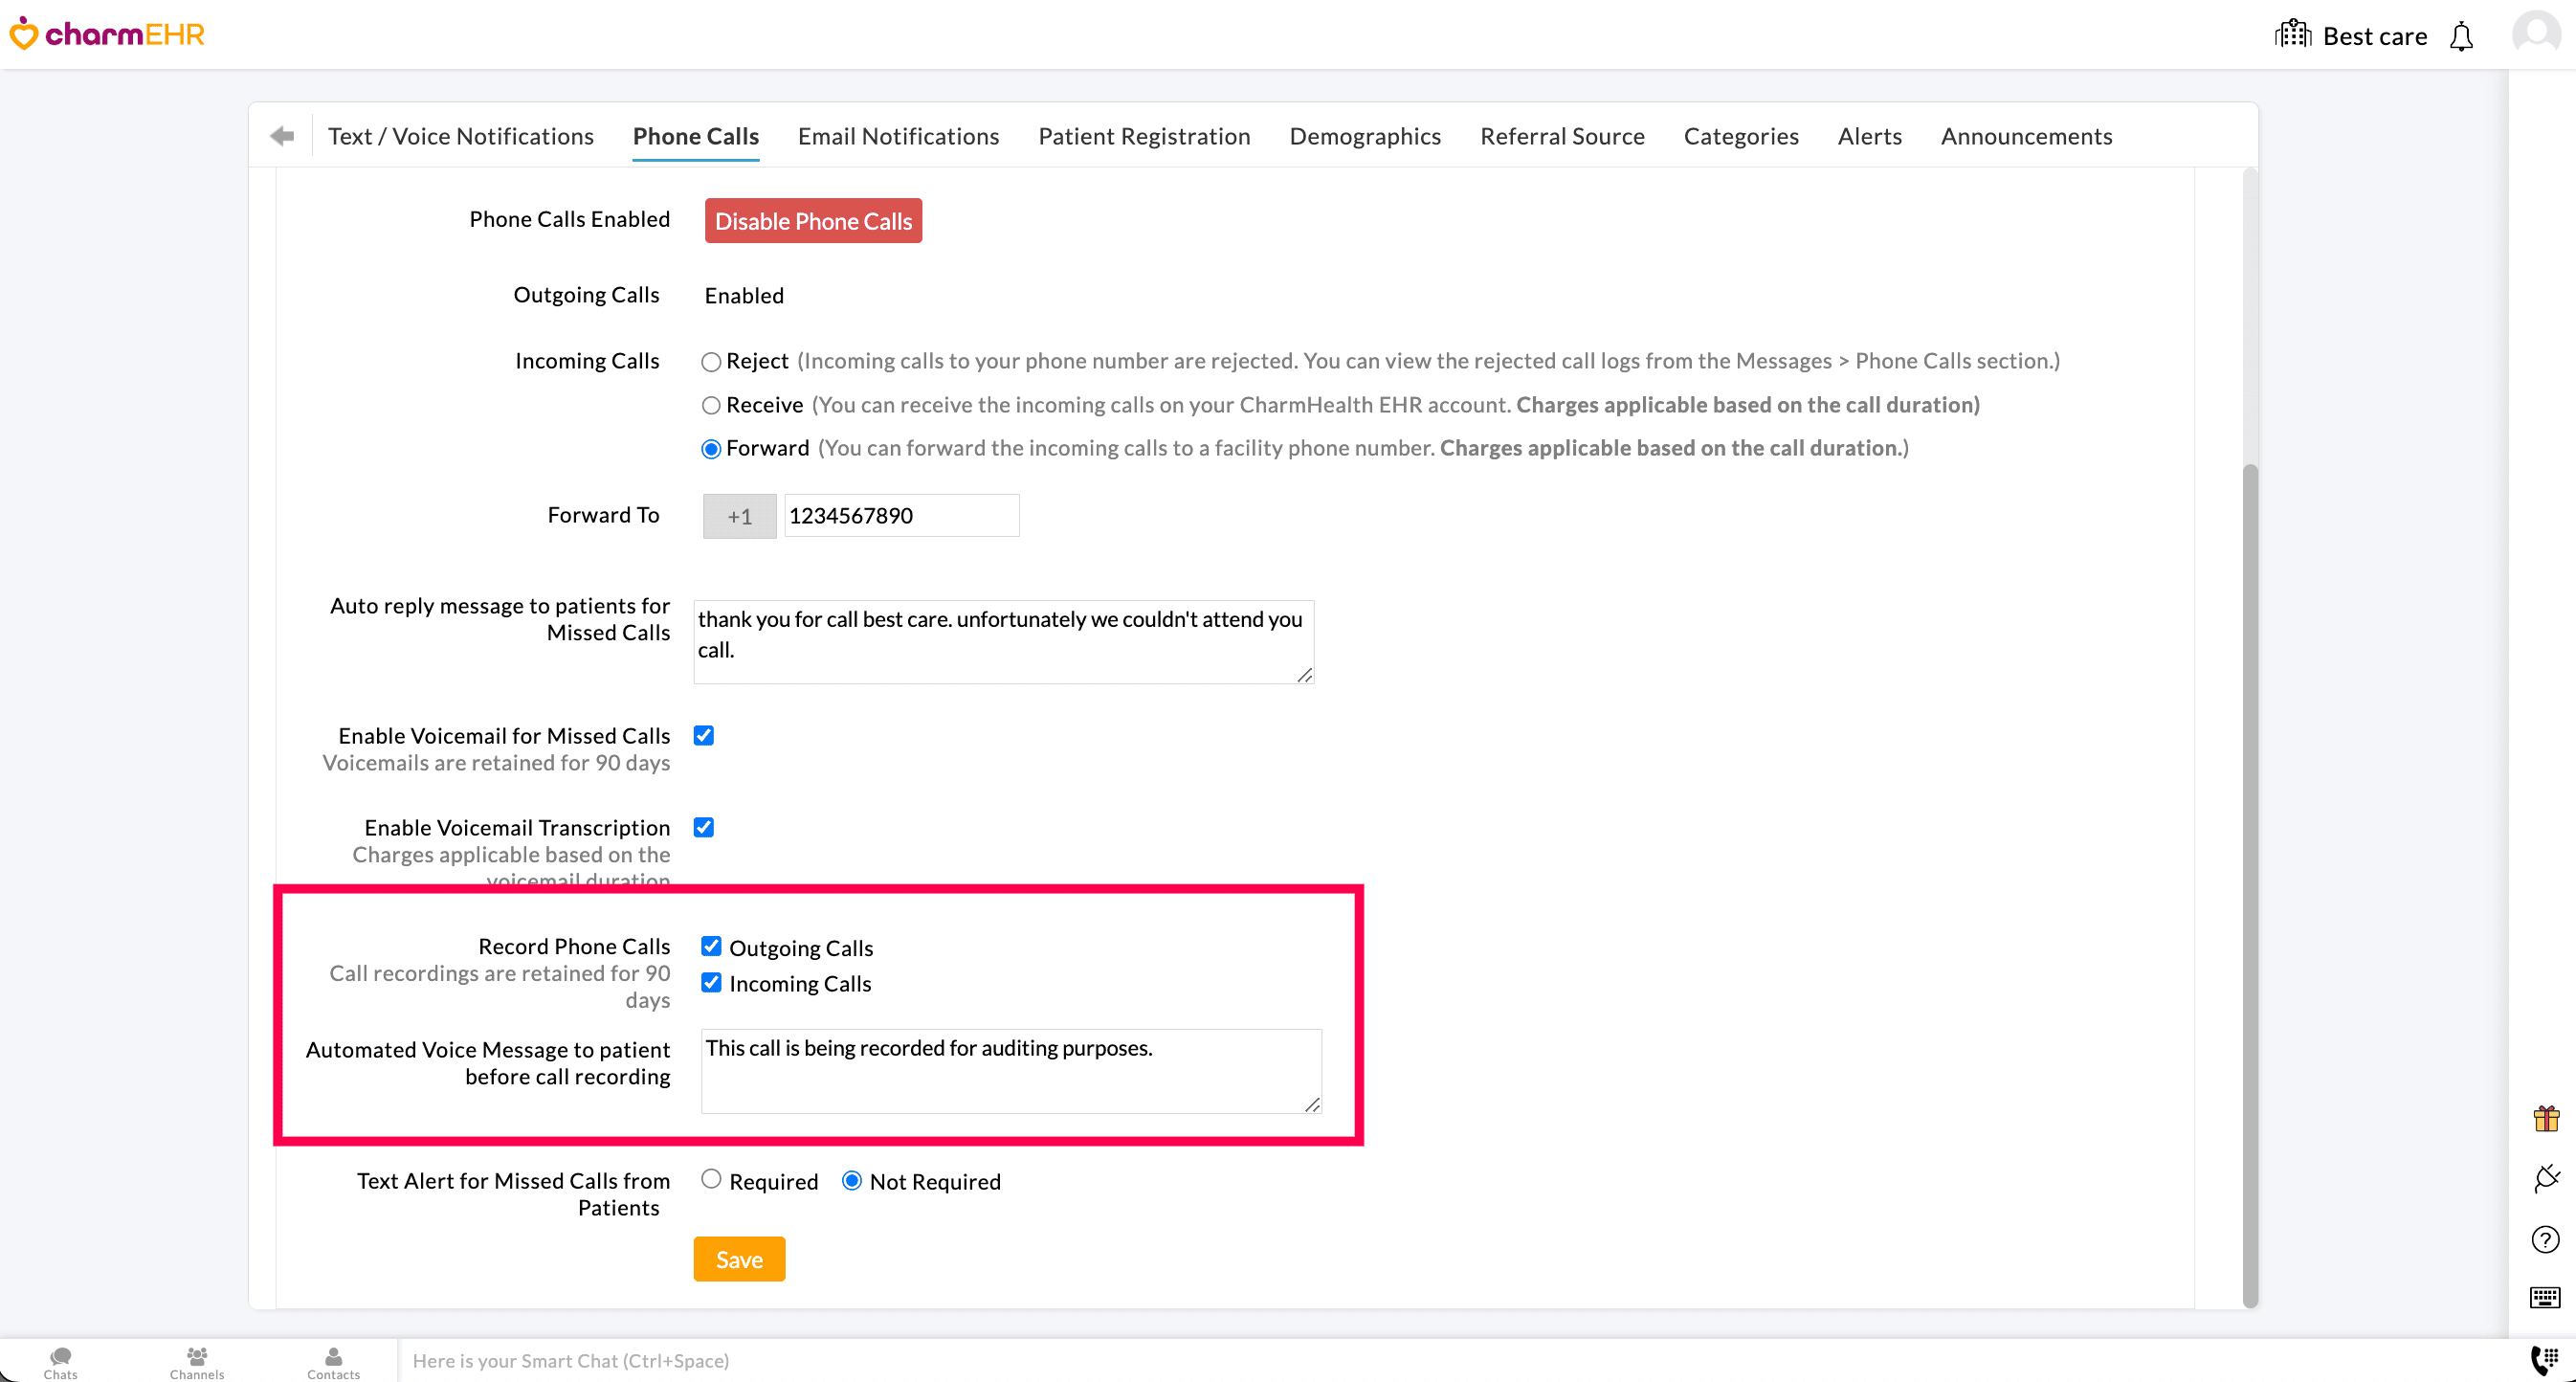
- Enter a custom automated voice message to play before call recording.
- Click on the 'Save' button to apply the changes.
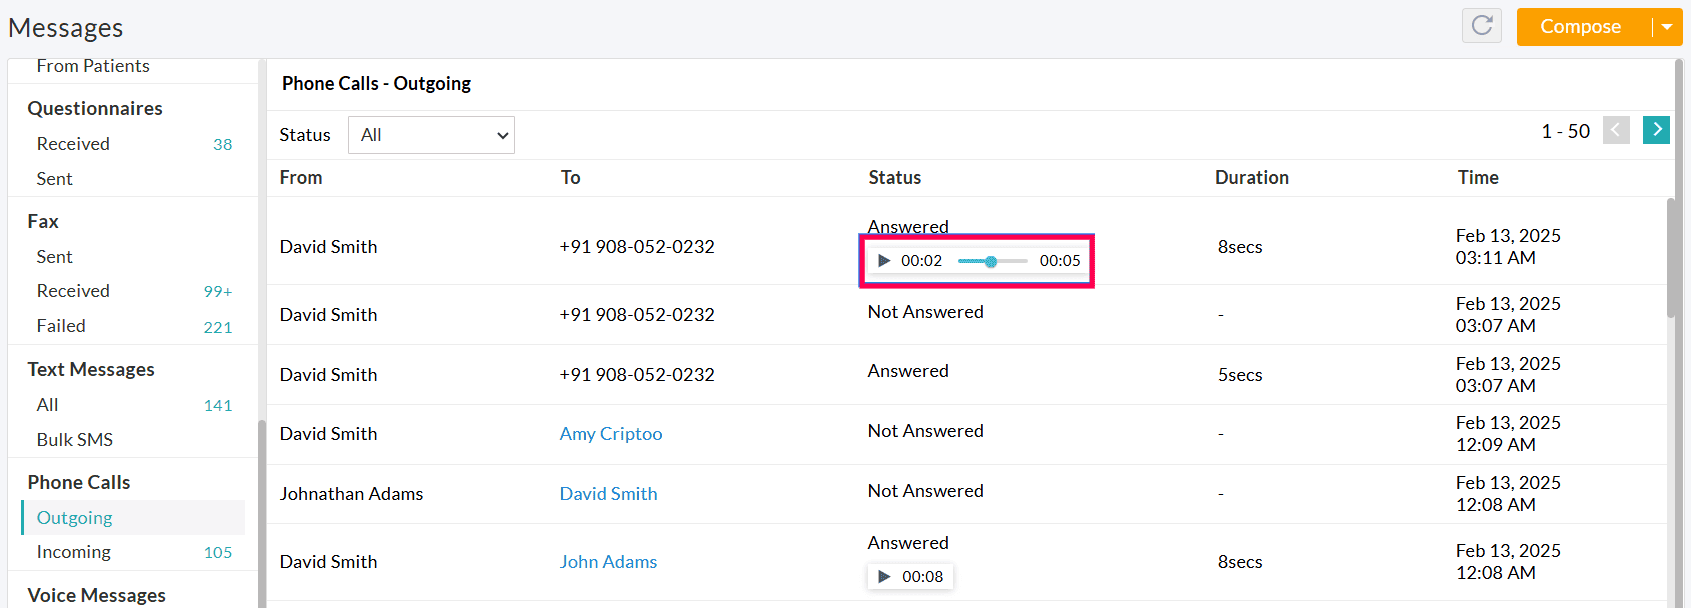
Note: The recorded calls are retained for 90 days and can be accessed from the 'Messages > Phone Calls' section.
Process Call Logs
Practice Members with the necessary role privileges can view and manage the call logs from the 'Messages > Phone Calls' section or the 'Patient Dashboard > Messages > Phone Calls' section.
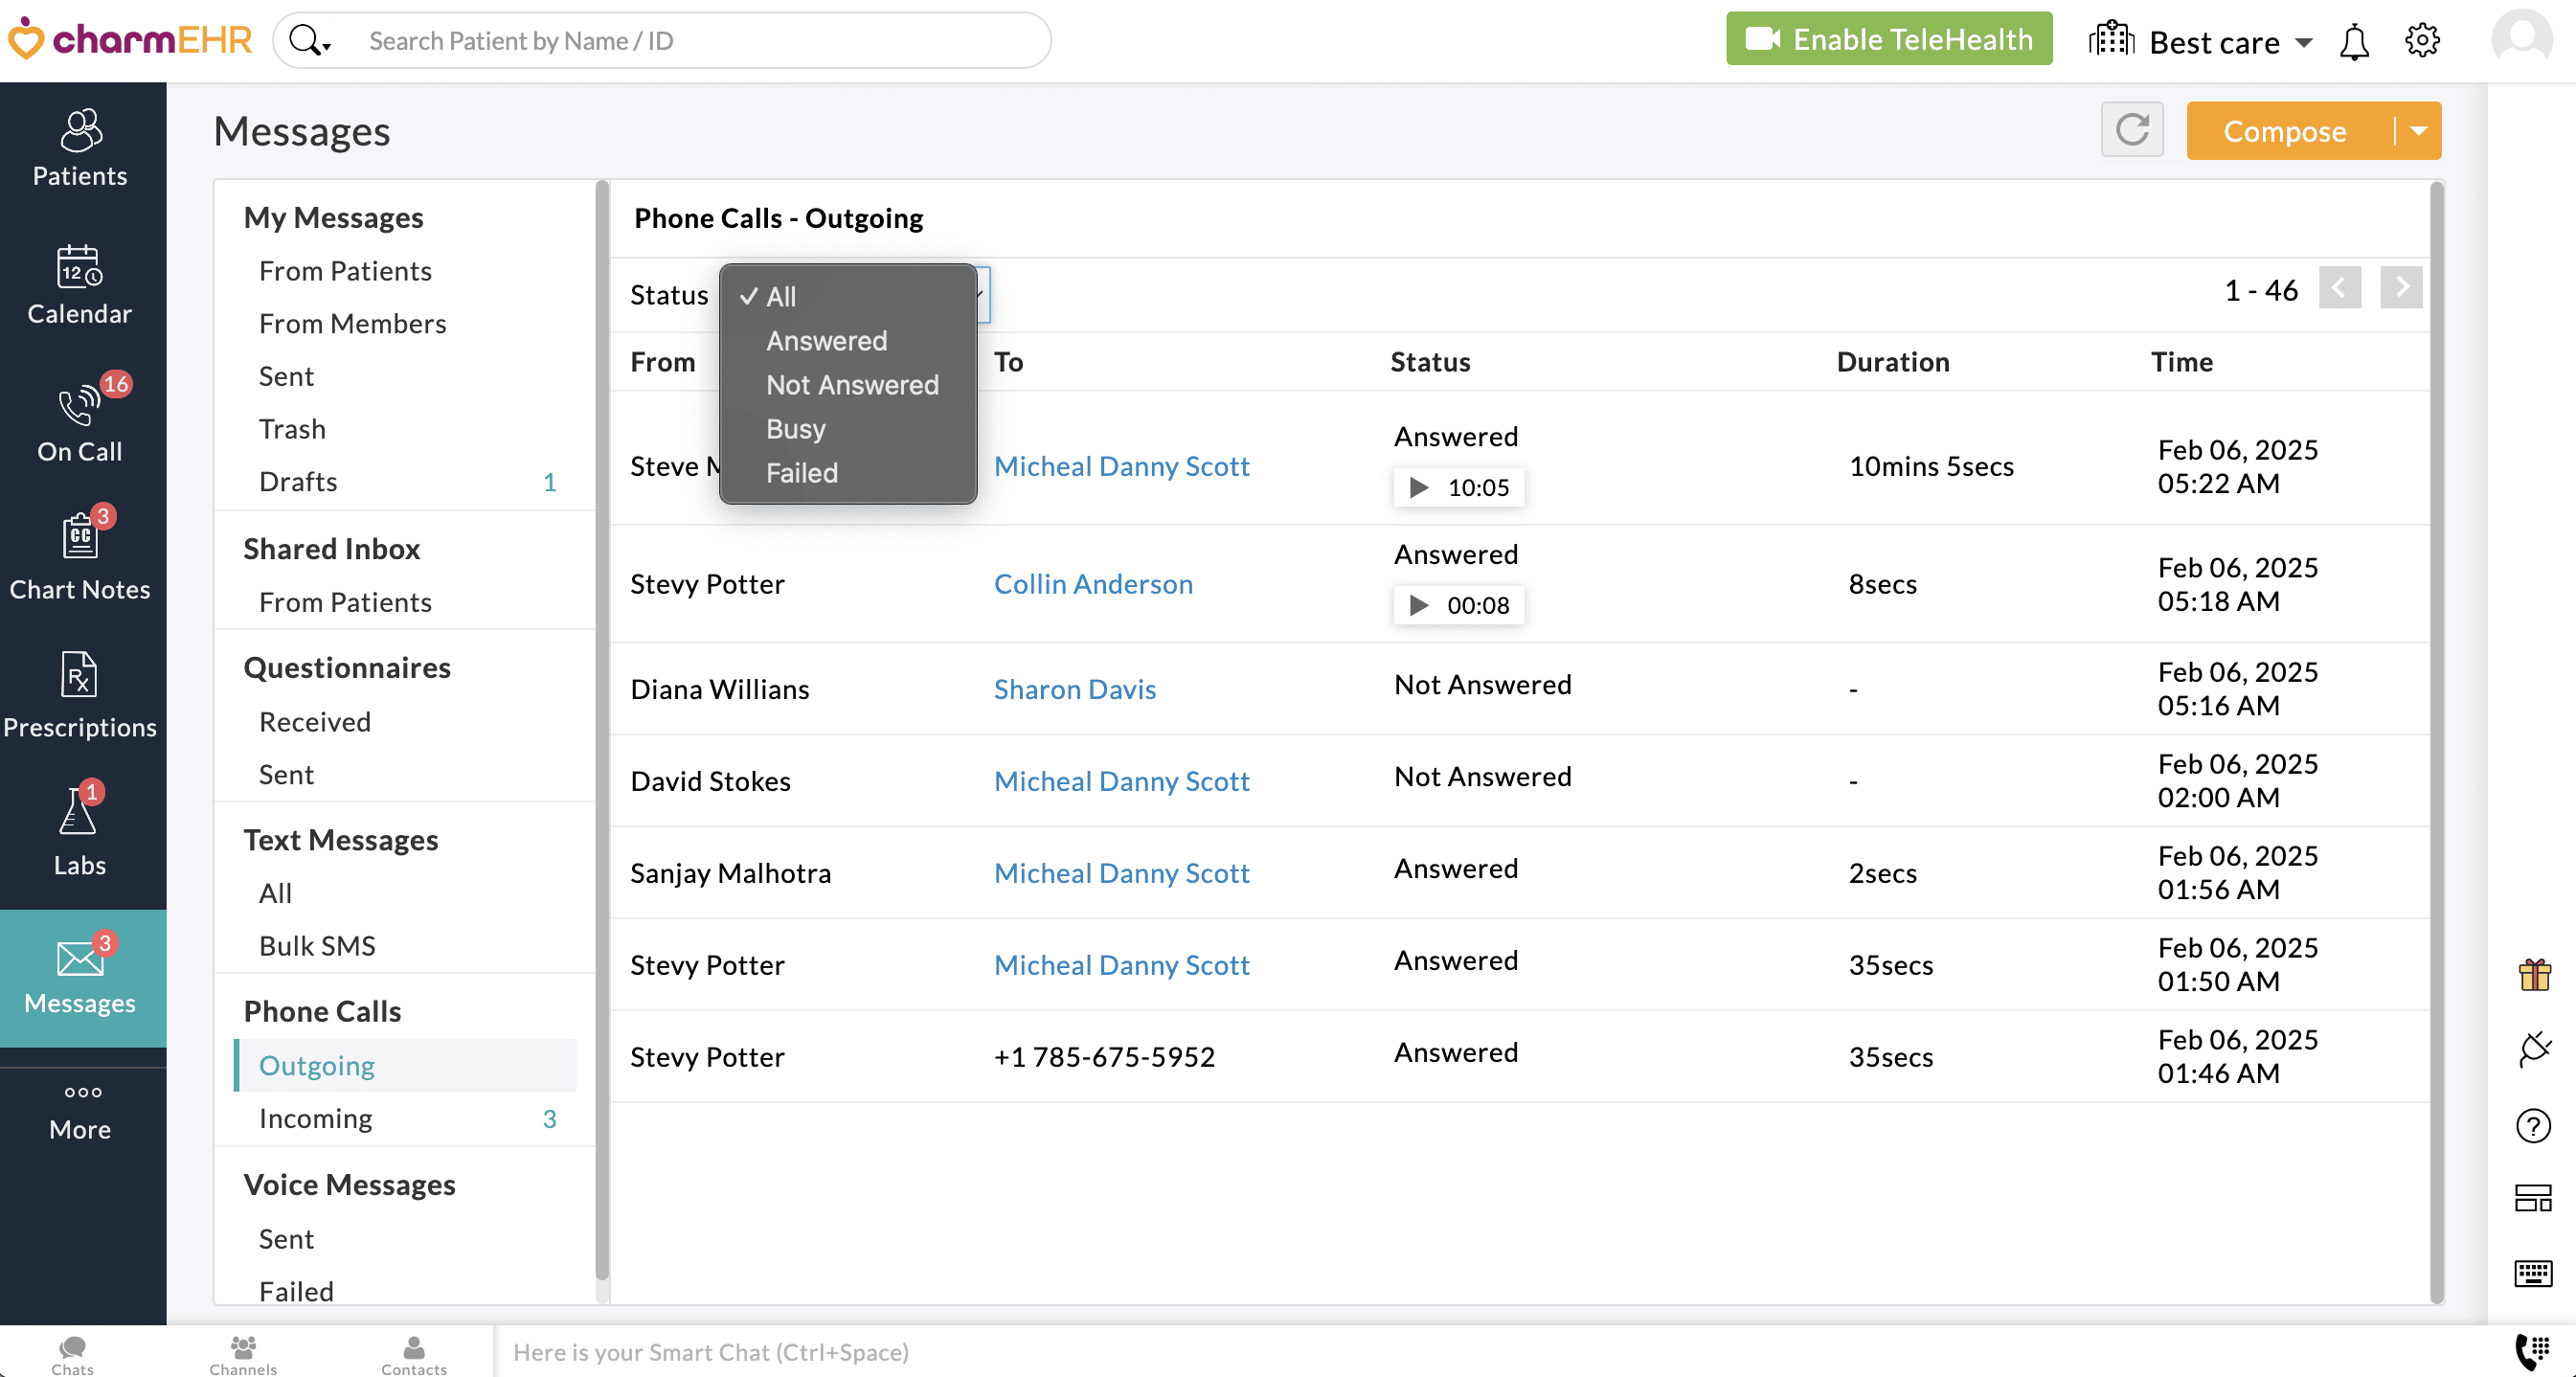
Outgoing Calls
All the outgoing calls from your practice are listed under this section. You can filter the outgoing calls by 'All', 'Answered', 'Not Answered', 'Busy', and 'Failed' statuses.
Incoming Calls
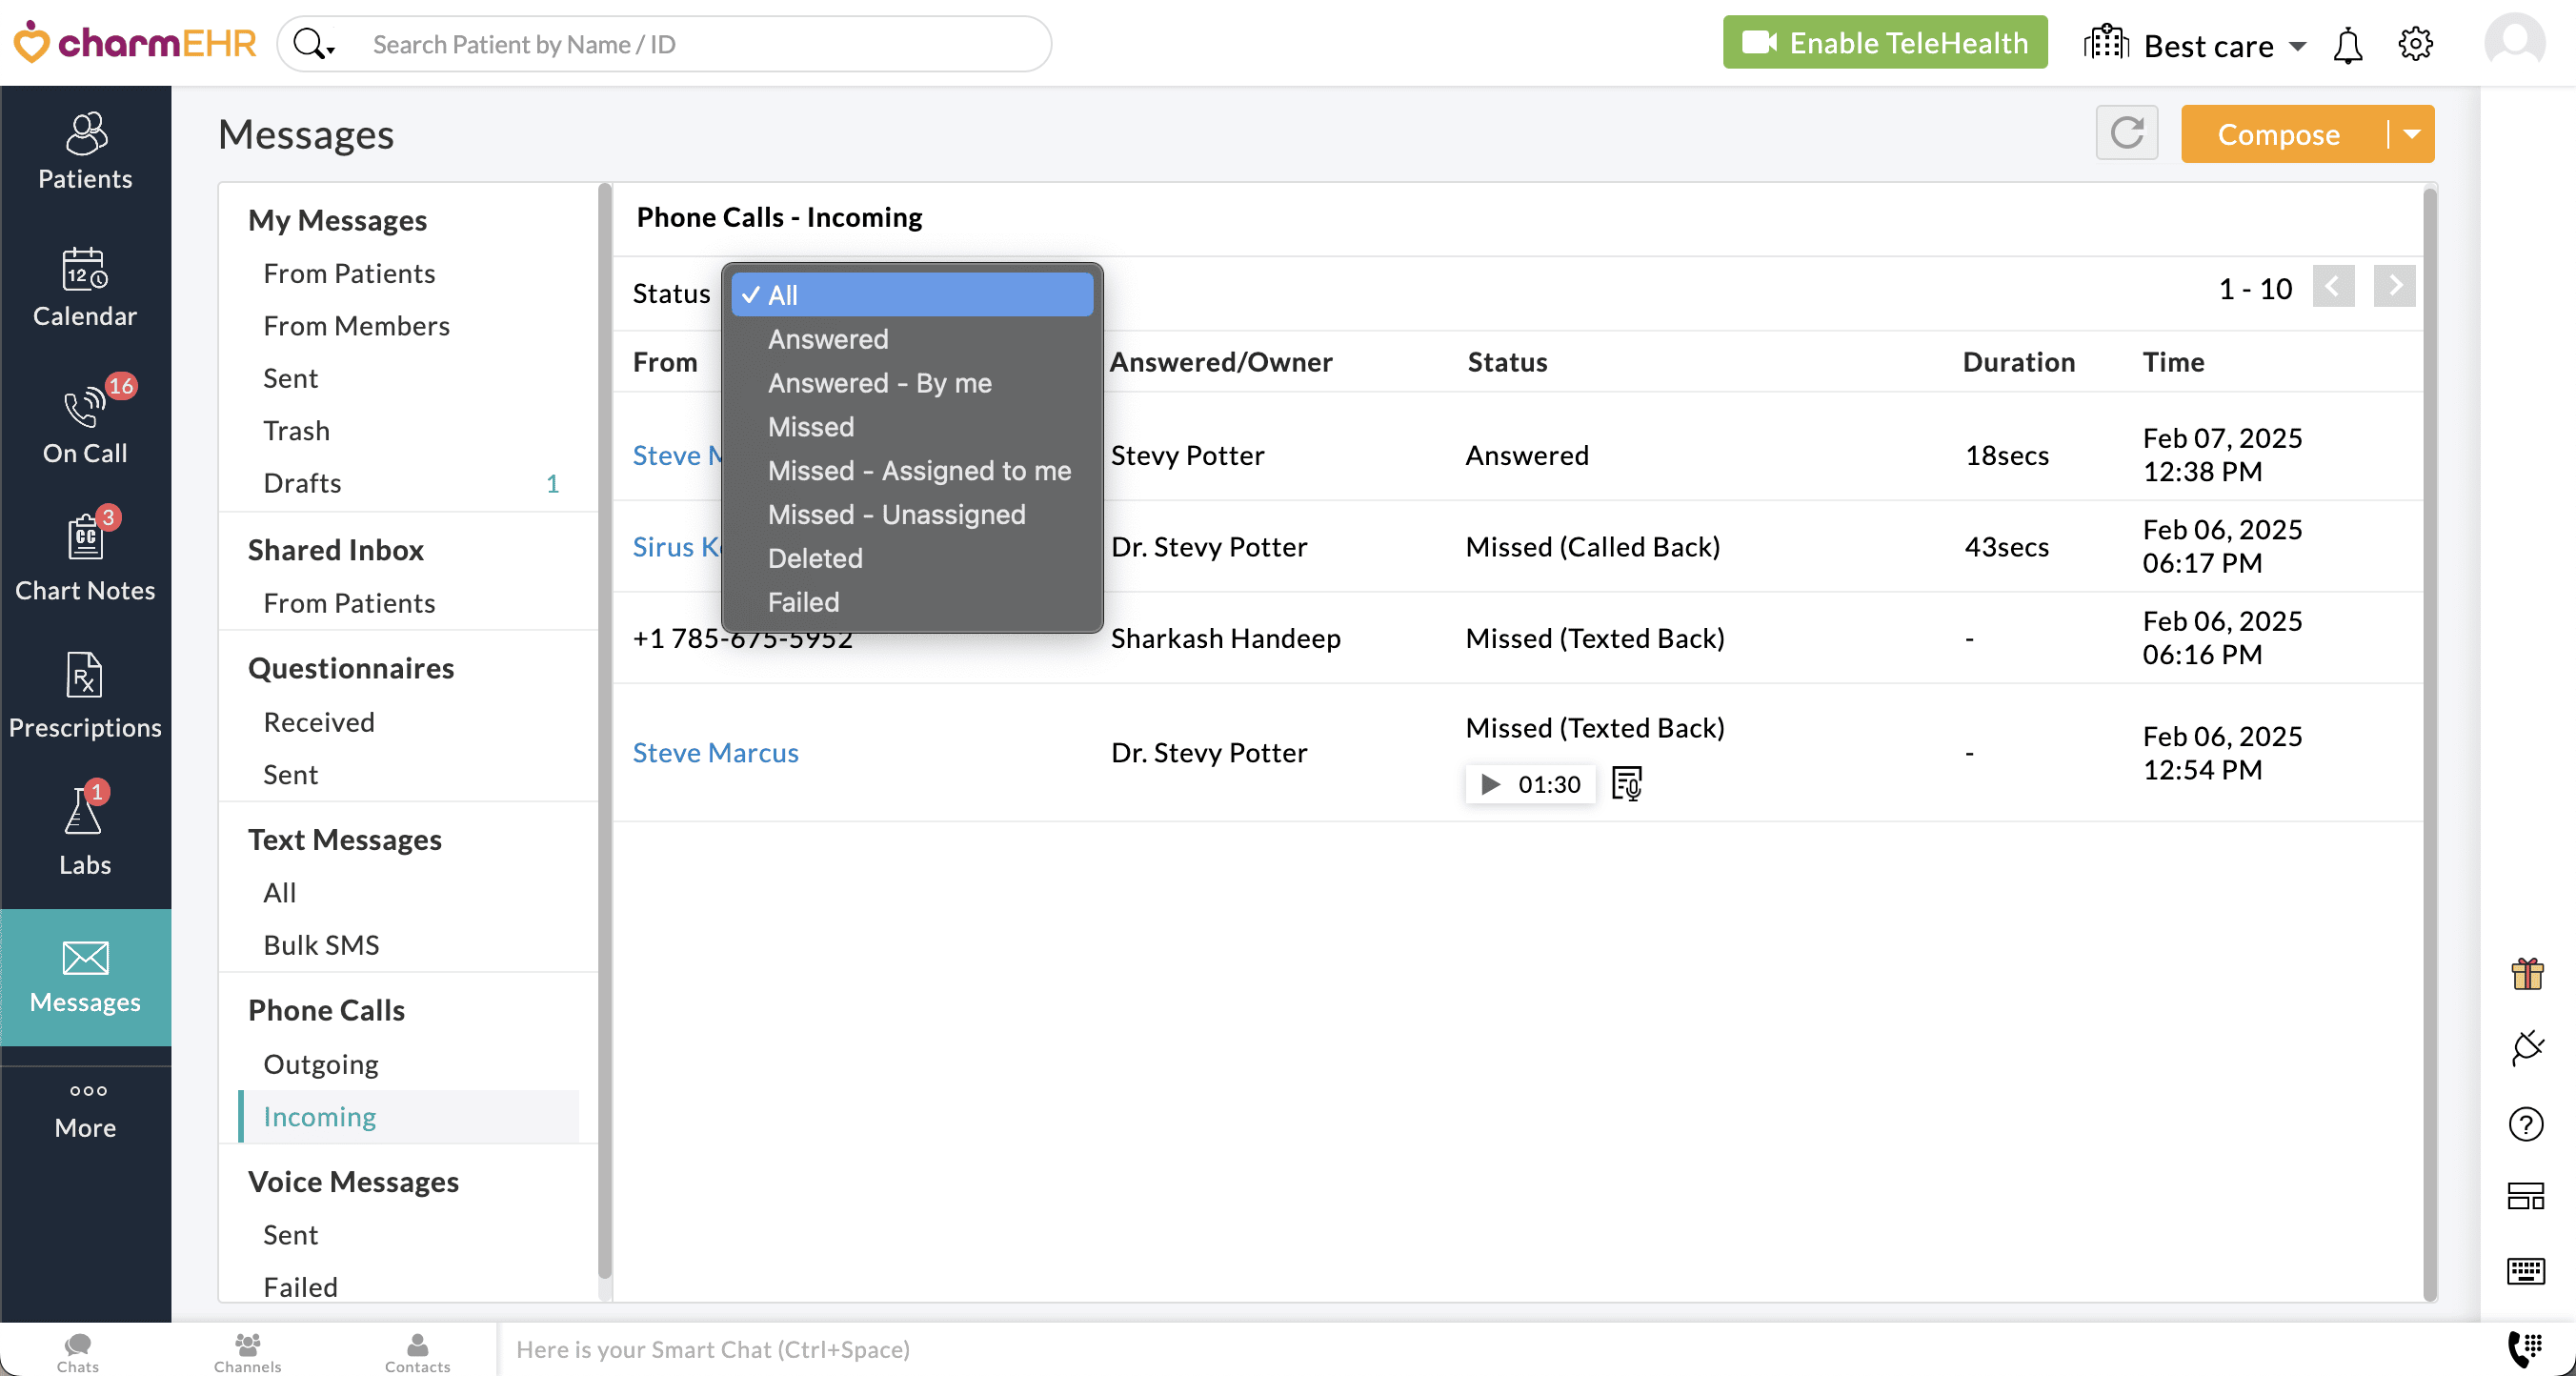
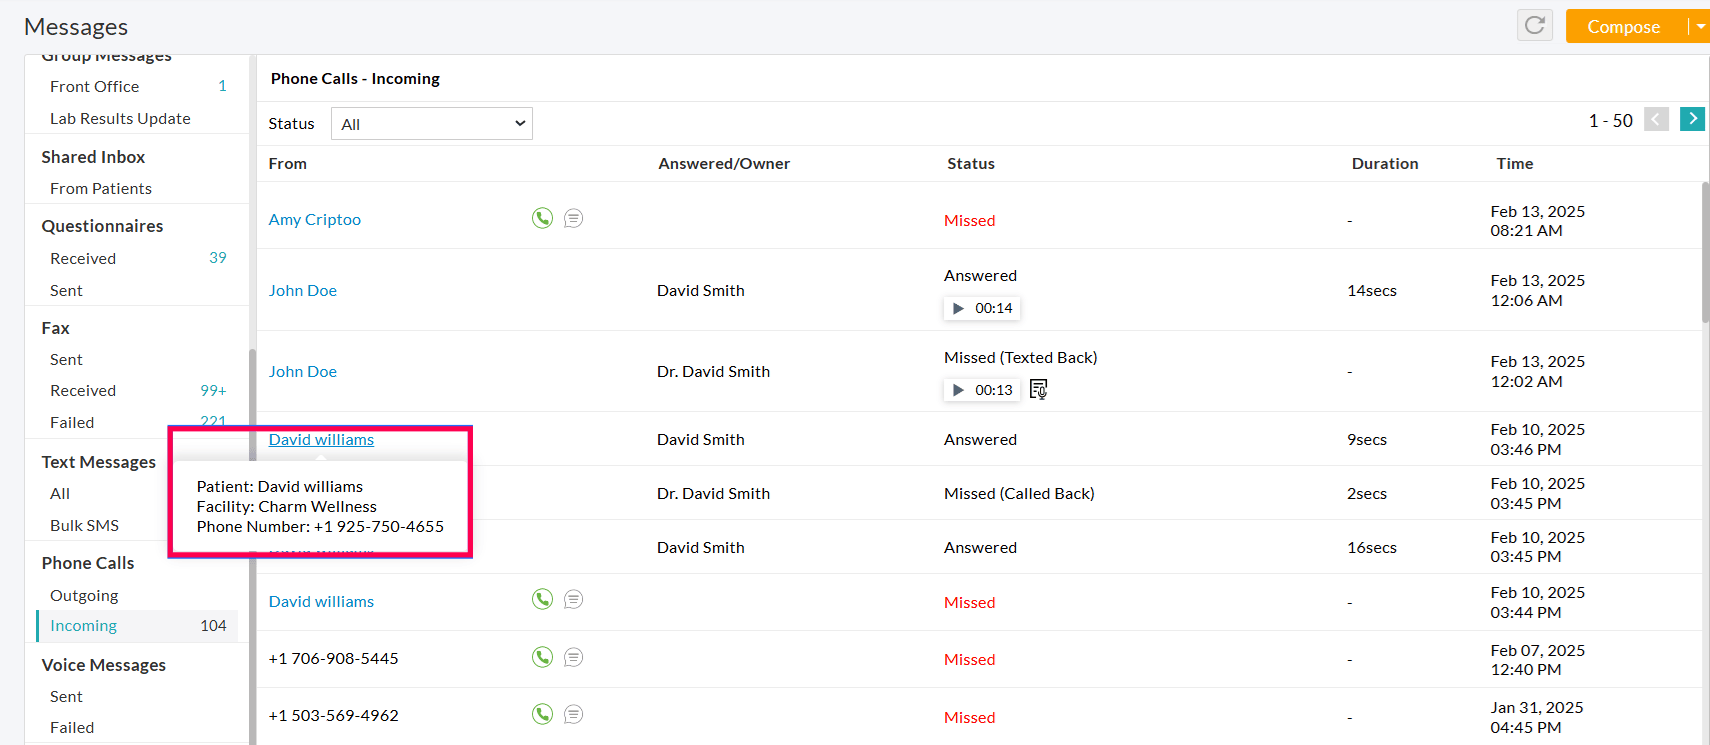
All the incoming calls to your practice number are listed in this section. The patient name gets displayed only if the phone number is registered for any of the patients in your Practice.
Hovering over the Patient's name will show the Facility details of the Patient.
You can filter the calls by 'All', 'Answered', 'Answered By Me', 'Missed', 'Missed - Assigned to Me', 'Missed - Unassigned', 'Deleted', and 'Failed' statuses.
Missed Calls
For missed calls, you can 'Assign Owner', 'Listen to Voicemails', 'Call Back', or 'Text Back' using the following steps:
- Assign Members: Members with the required role privileges can use the drop-down box to assign a Practice Member for handling a missed call.
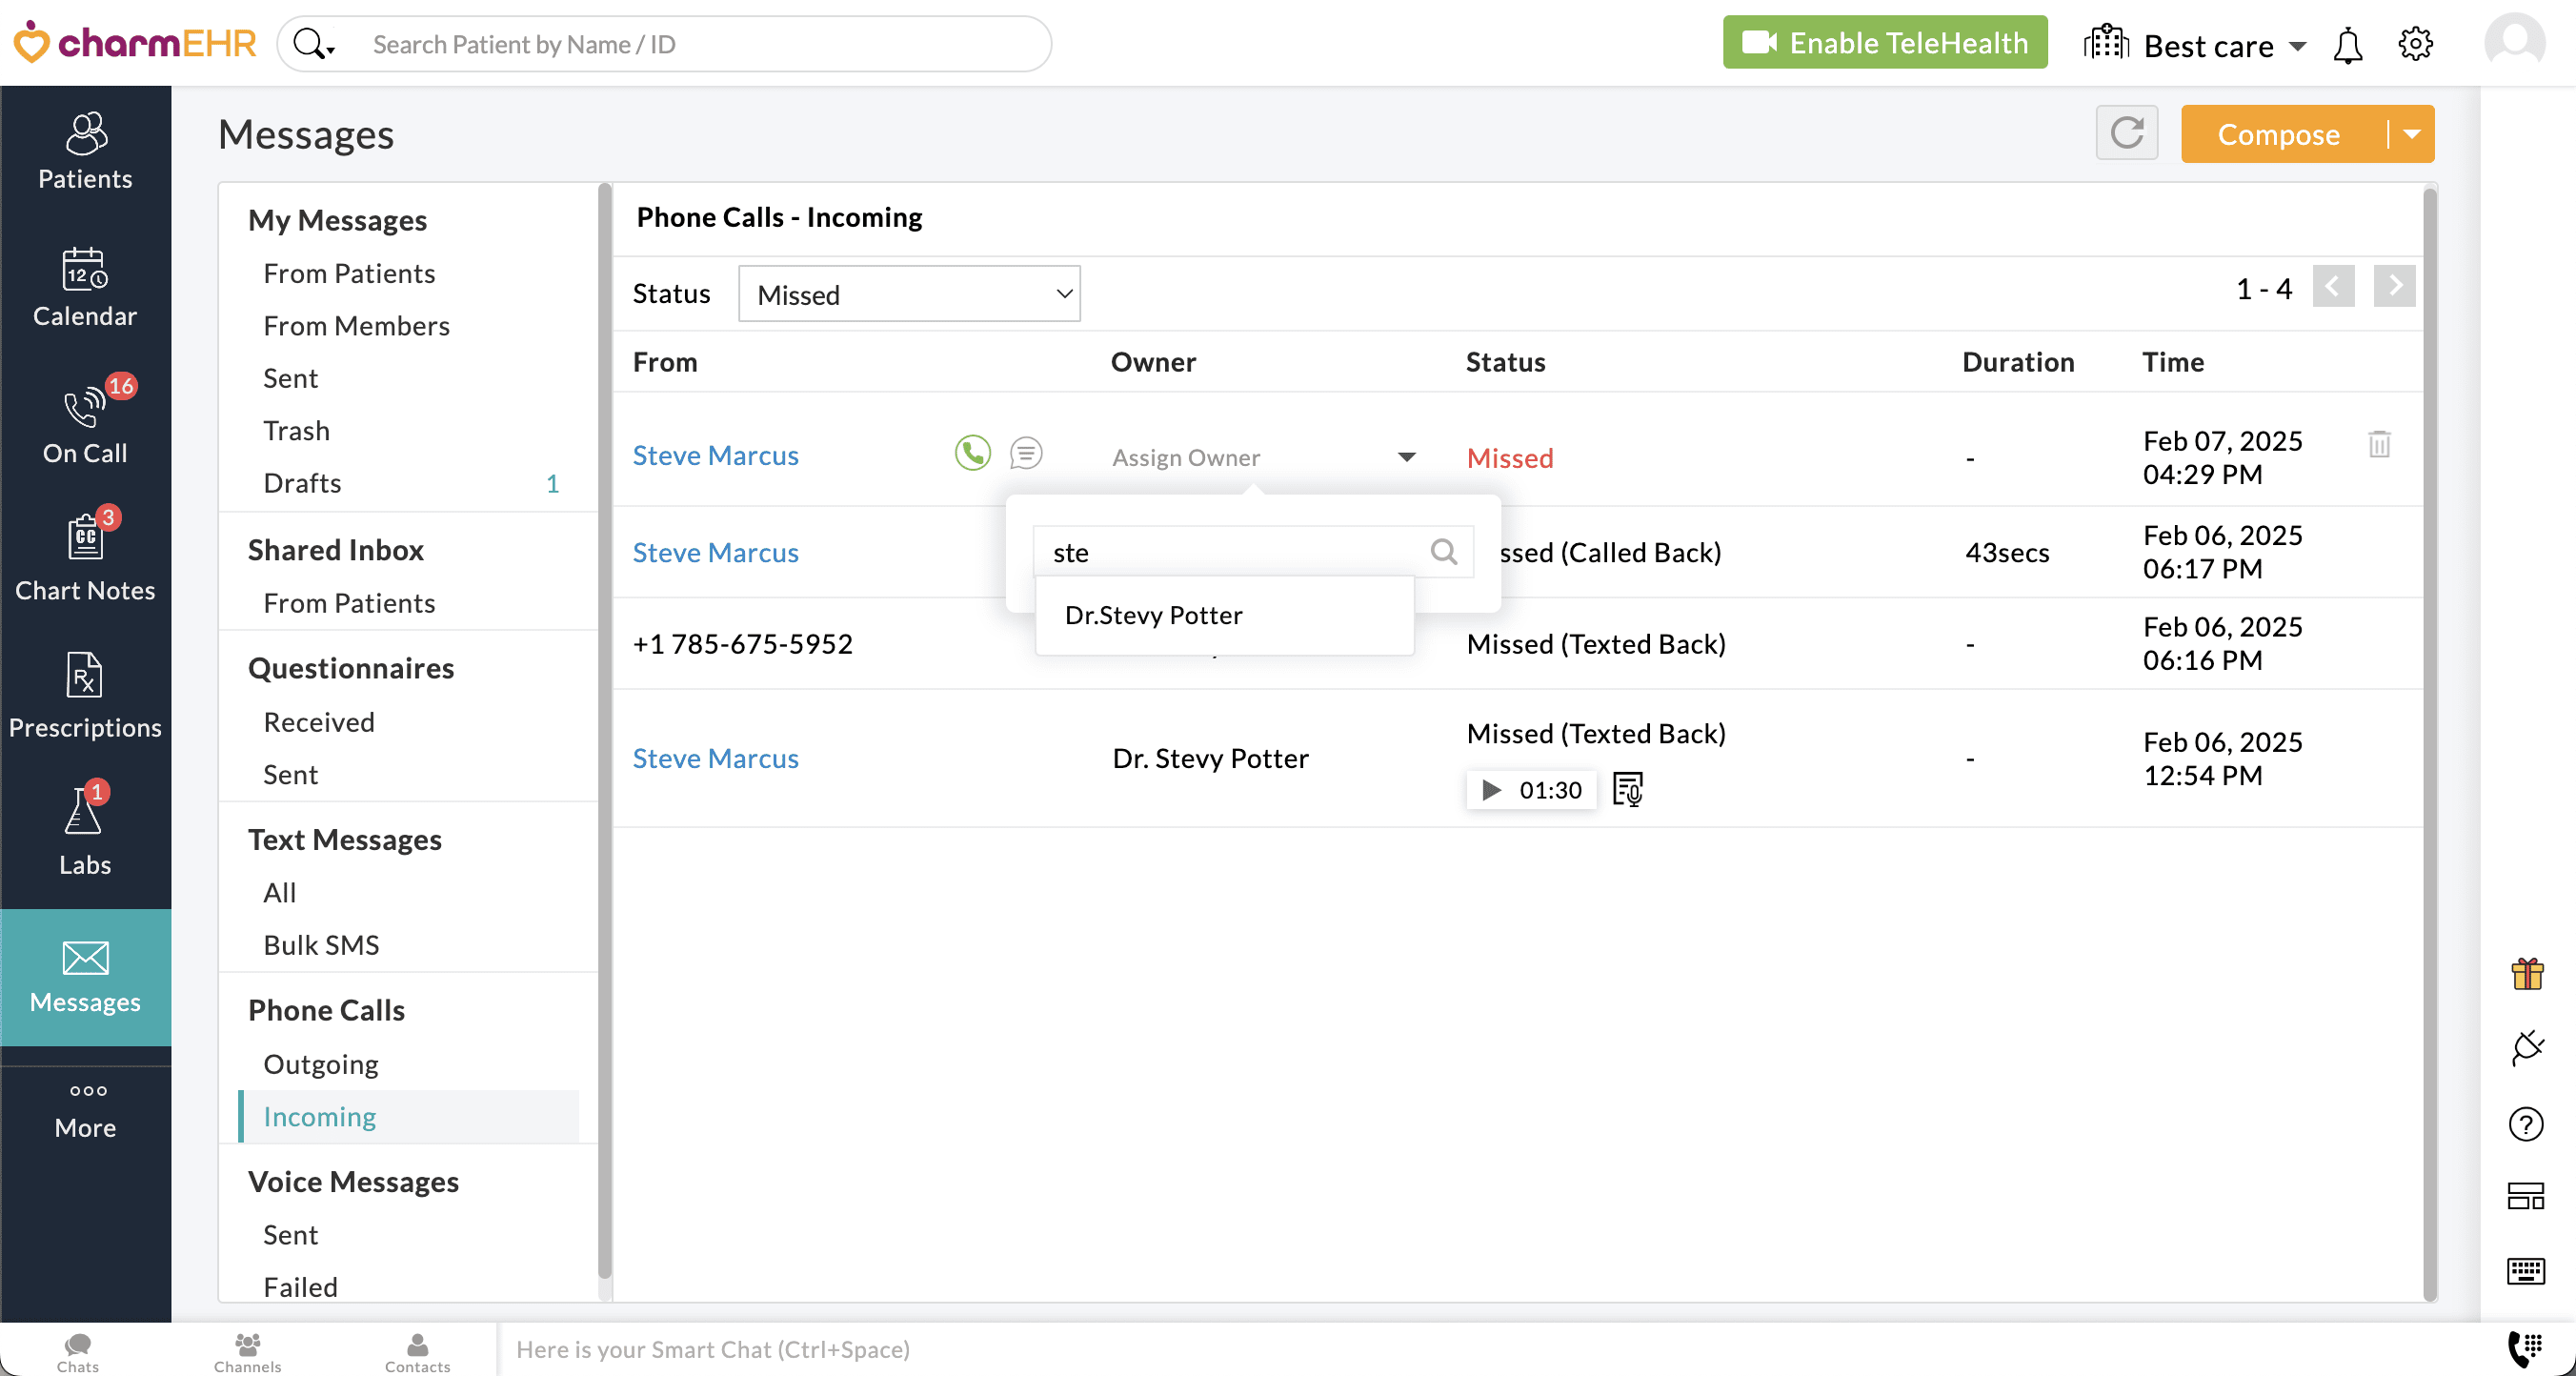
Note - Unassigned missed calls get auto-assigned to the Practice Members who take action on them.
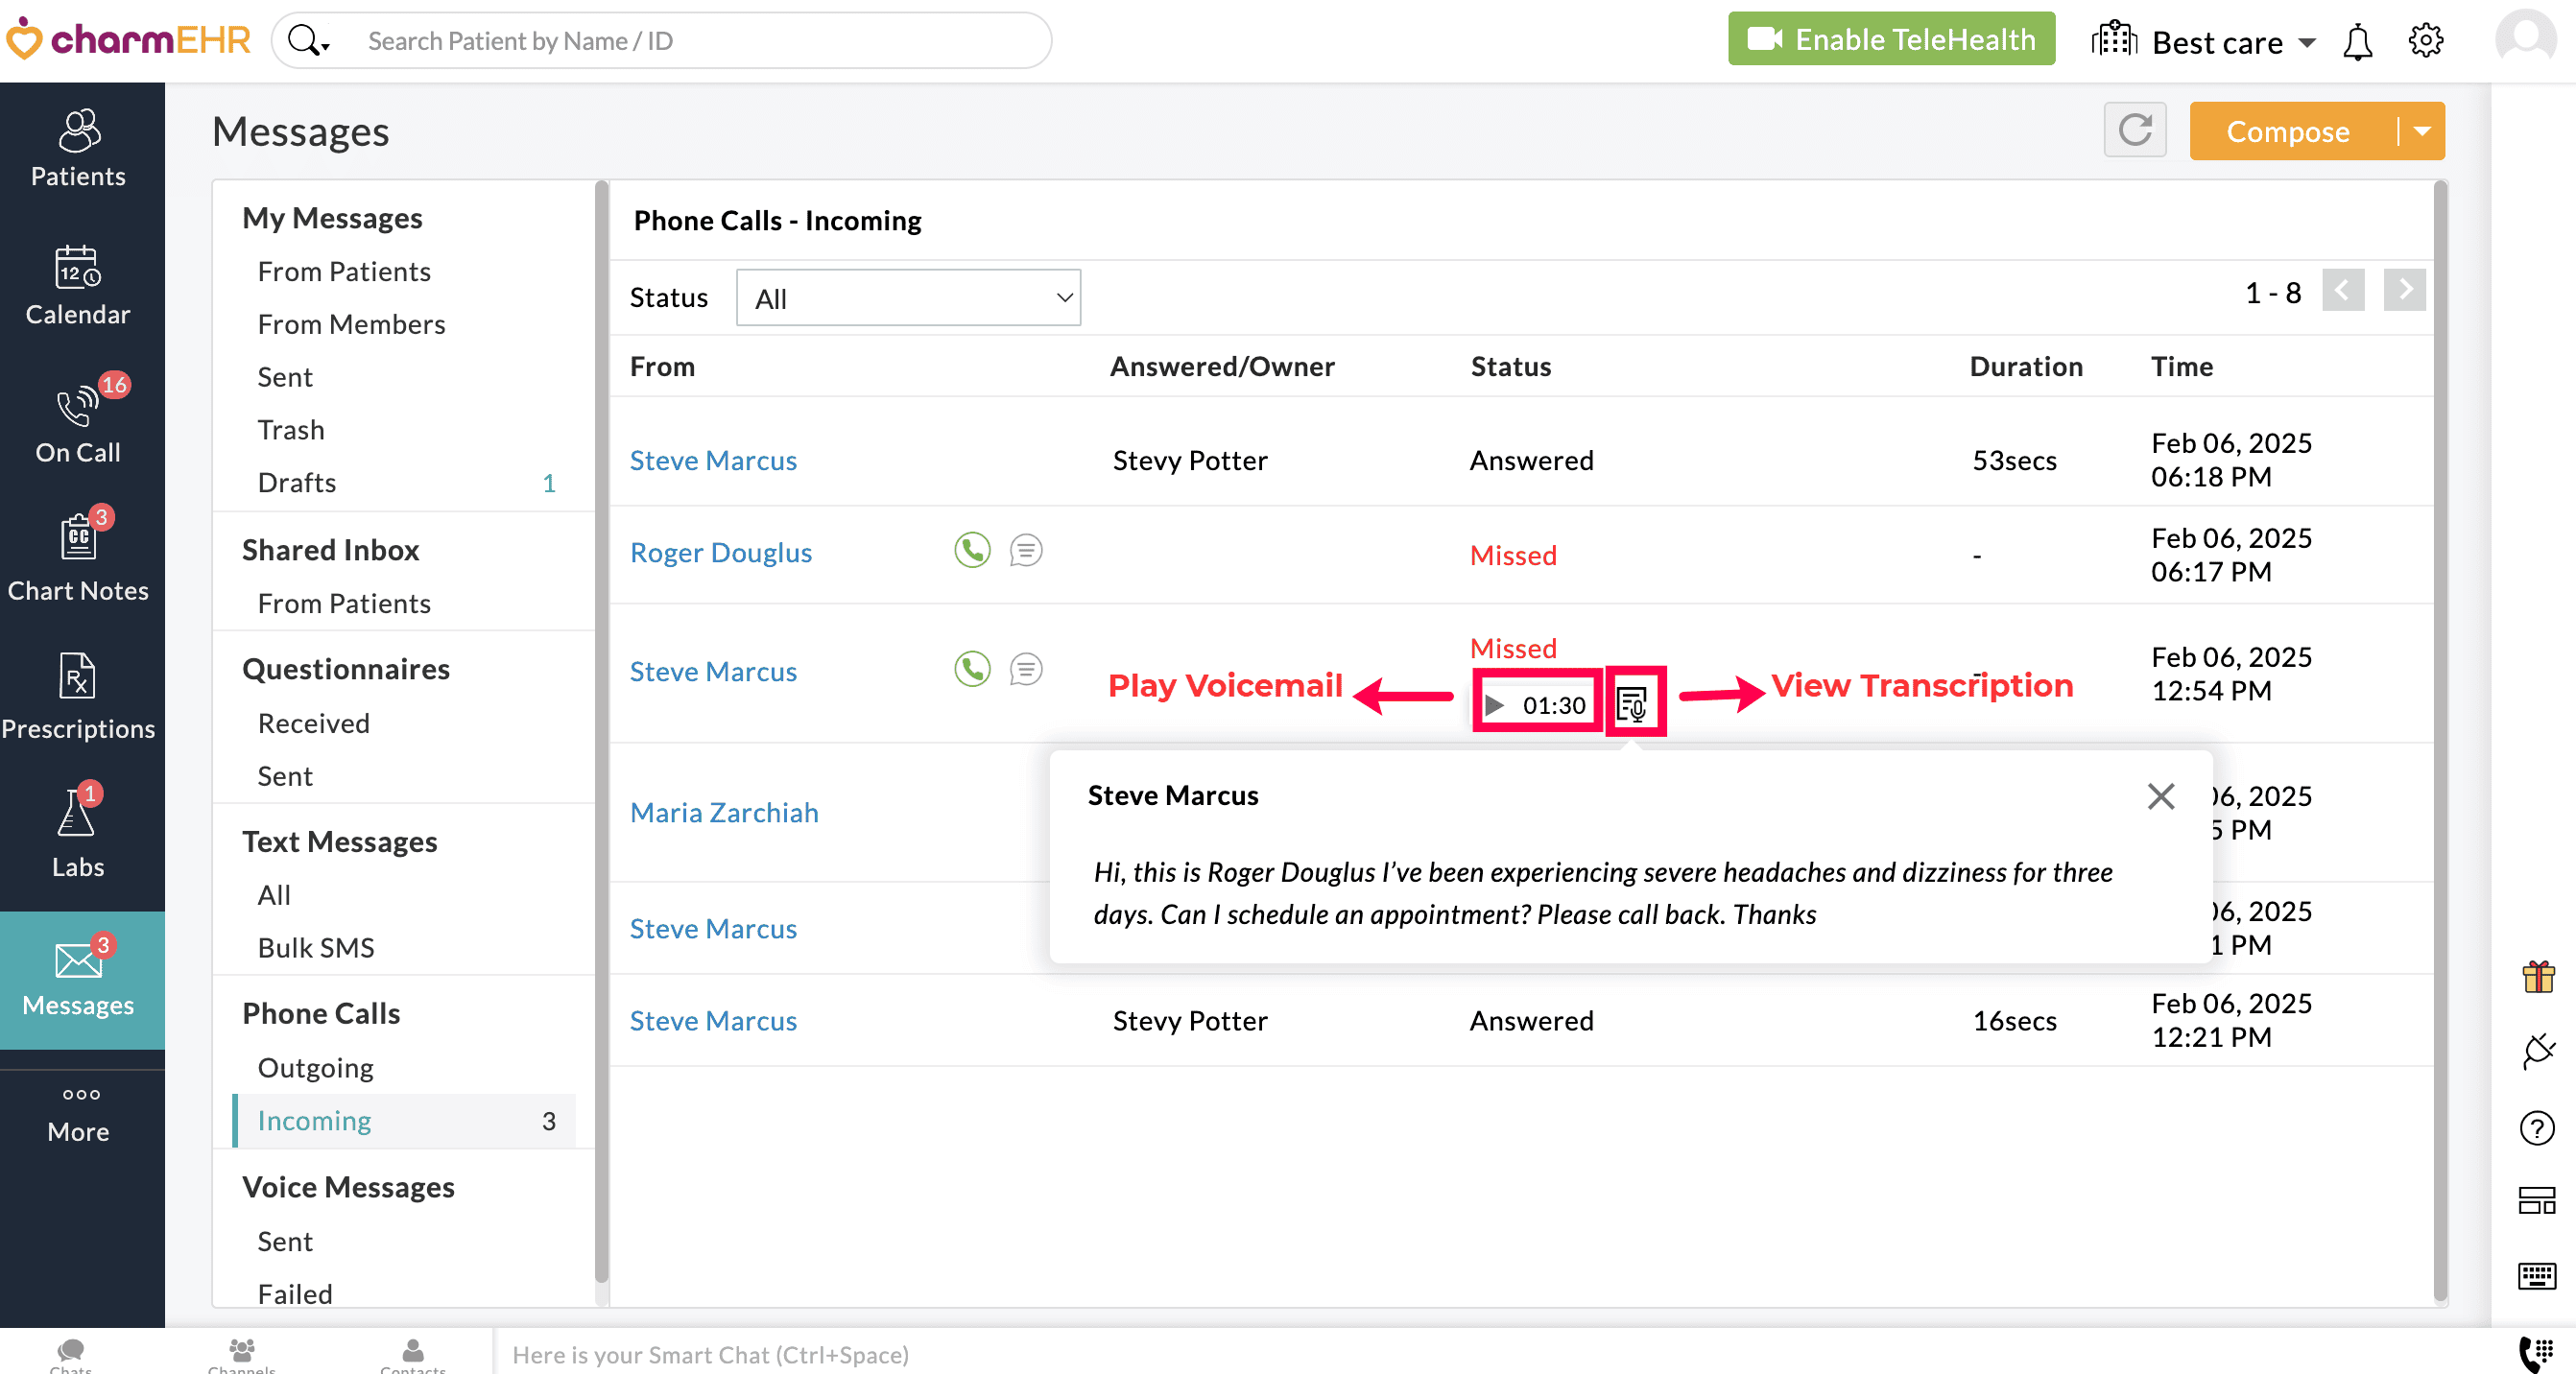
- Listen to Voicemails: Patients can leave voice messages if that option is enabled on the Settings page. Click on the 'Play' button to listen to the voicemails. (The voice mails are stored for a period of 90 days only.)
- View Voicemail Transcriptions: To view the transcribed voicemail, click on the 'Transcription' icon next to the voicemail if the option to view the Voicemail transcription is enabled on the Settings page.
- Initiate Callbacks: Click the 'Phone Calls' icon next to a patient's name to return their call.
- Text Back: Click on the 'Message' icon to send a text reply to the phone number.
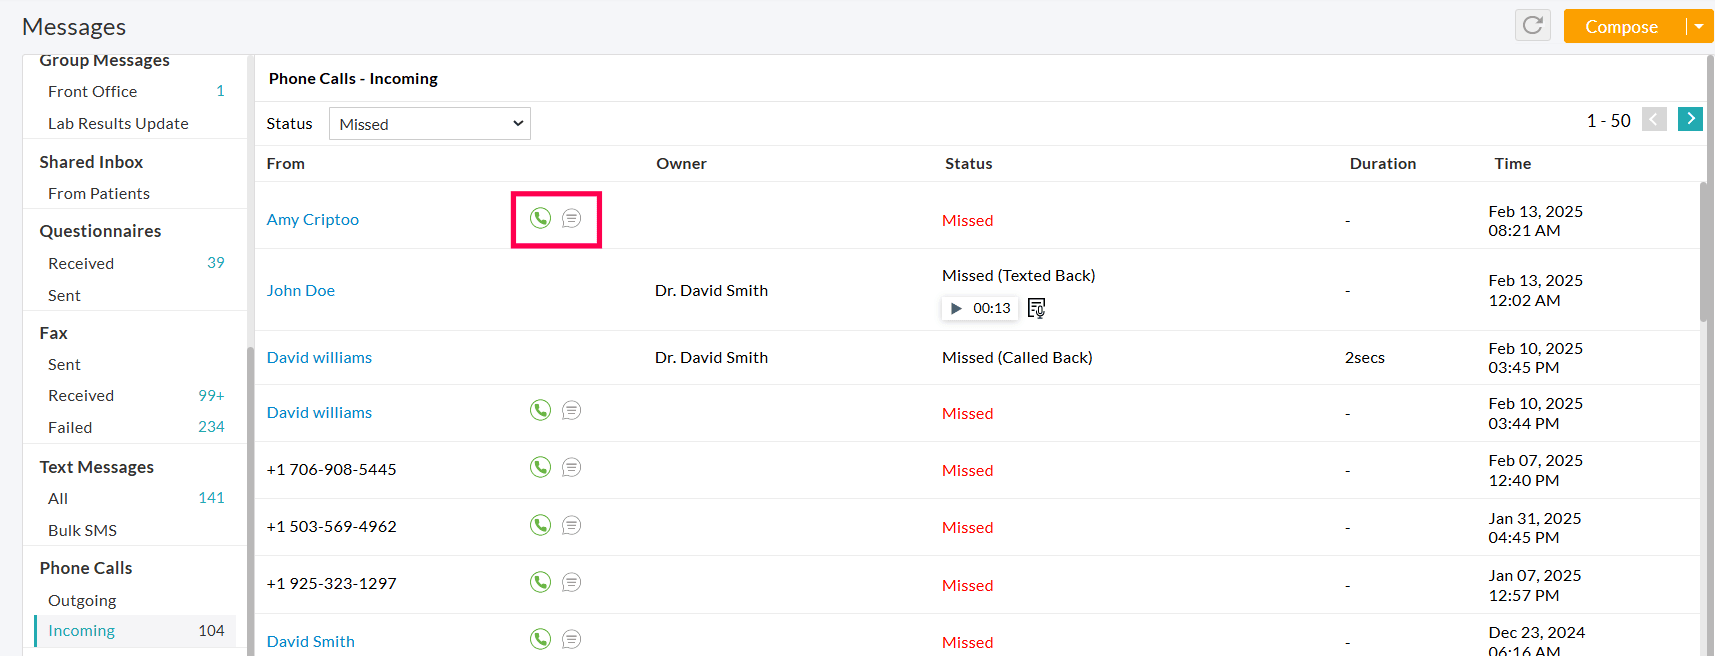
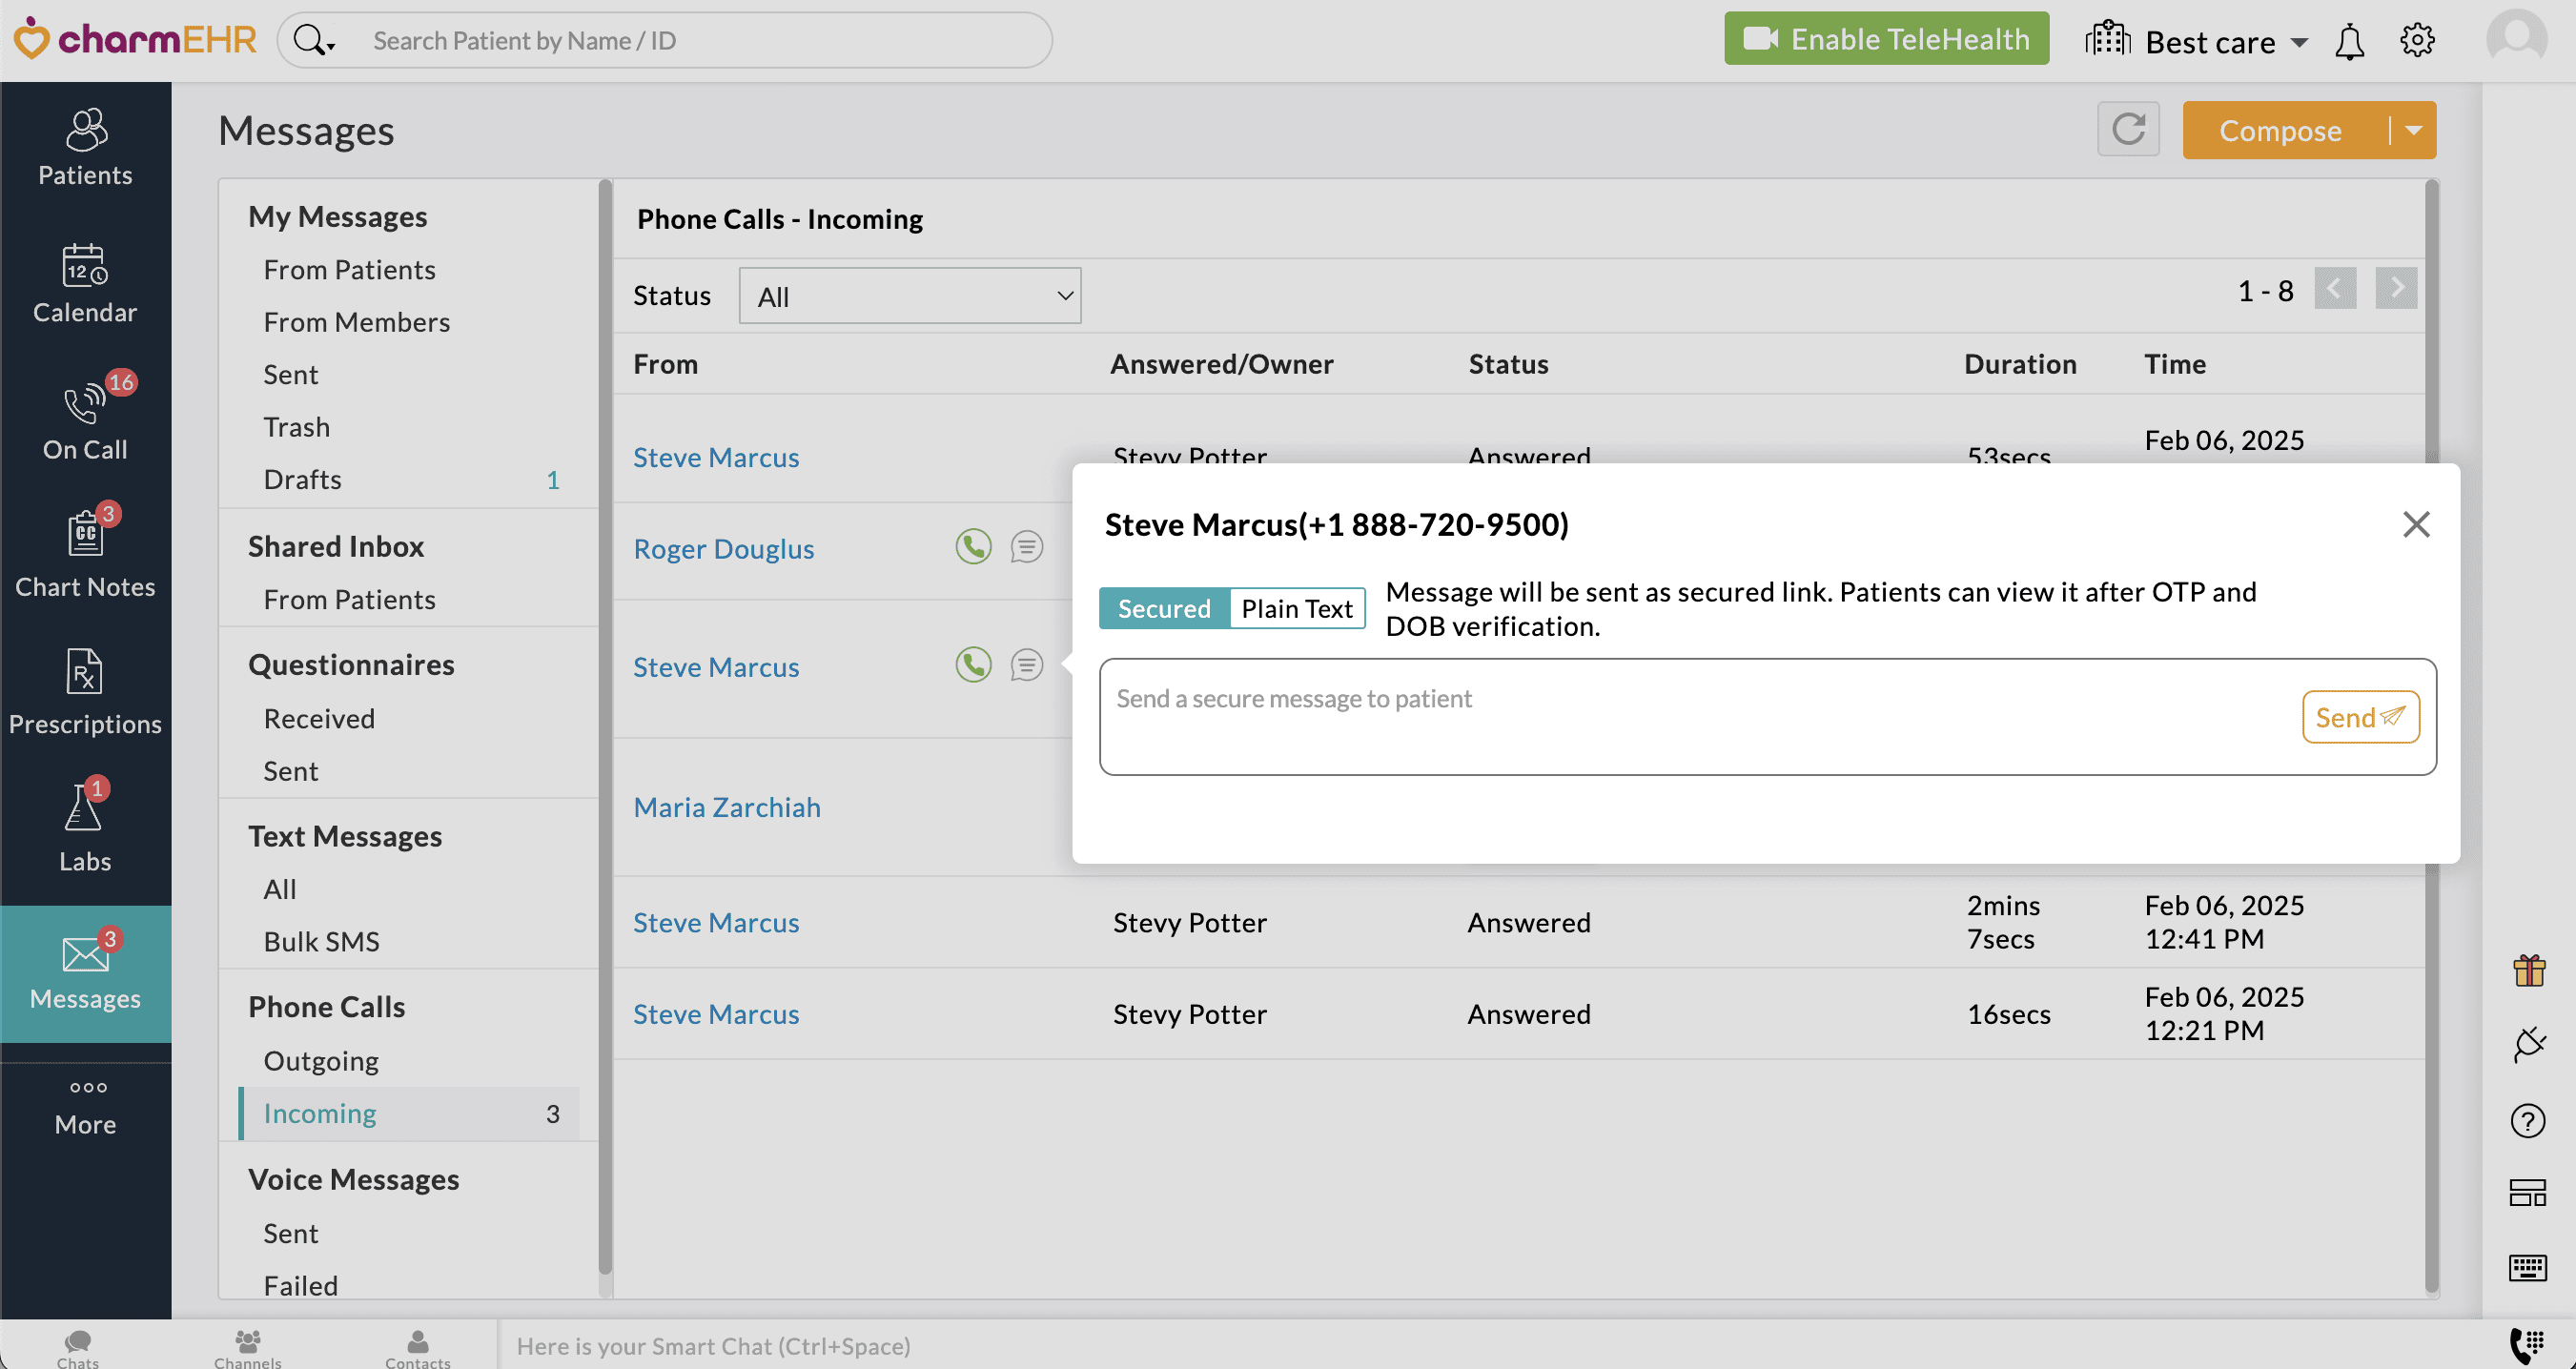
Note - The Text Back feature is available for Practice that has enabled Two-Way Text feature.
- Status Updates:
- The 'Missed' status changes to 'Missed (Texted Back)' as soon as a text reply is sent. Hovering over the 'Message' icon shows the text message sent to the Patient. You can also view the message in the 'Messages > Two-Way Text' section.
- The 'Missed' status changes to 'Missed (Called Back)' as soon as you make a phone call to the patient and the patient attends the call.
- If the patient does not attend the call, the status remains as 'Missed' for your future reference.
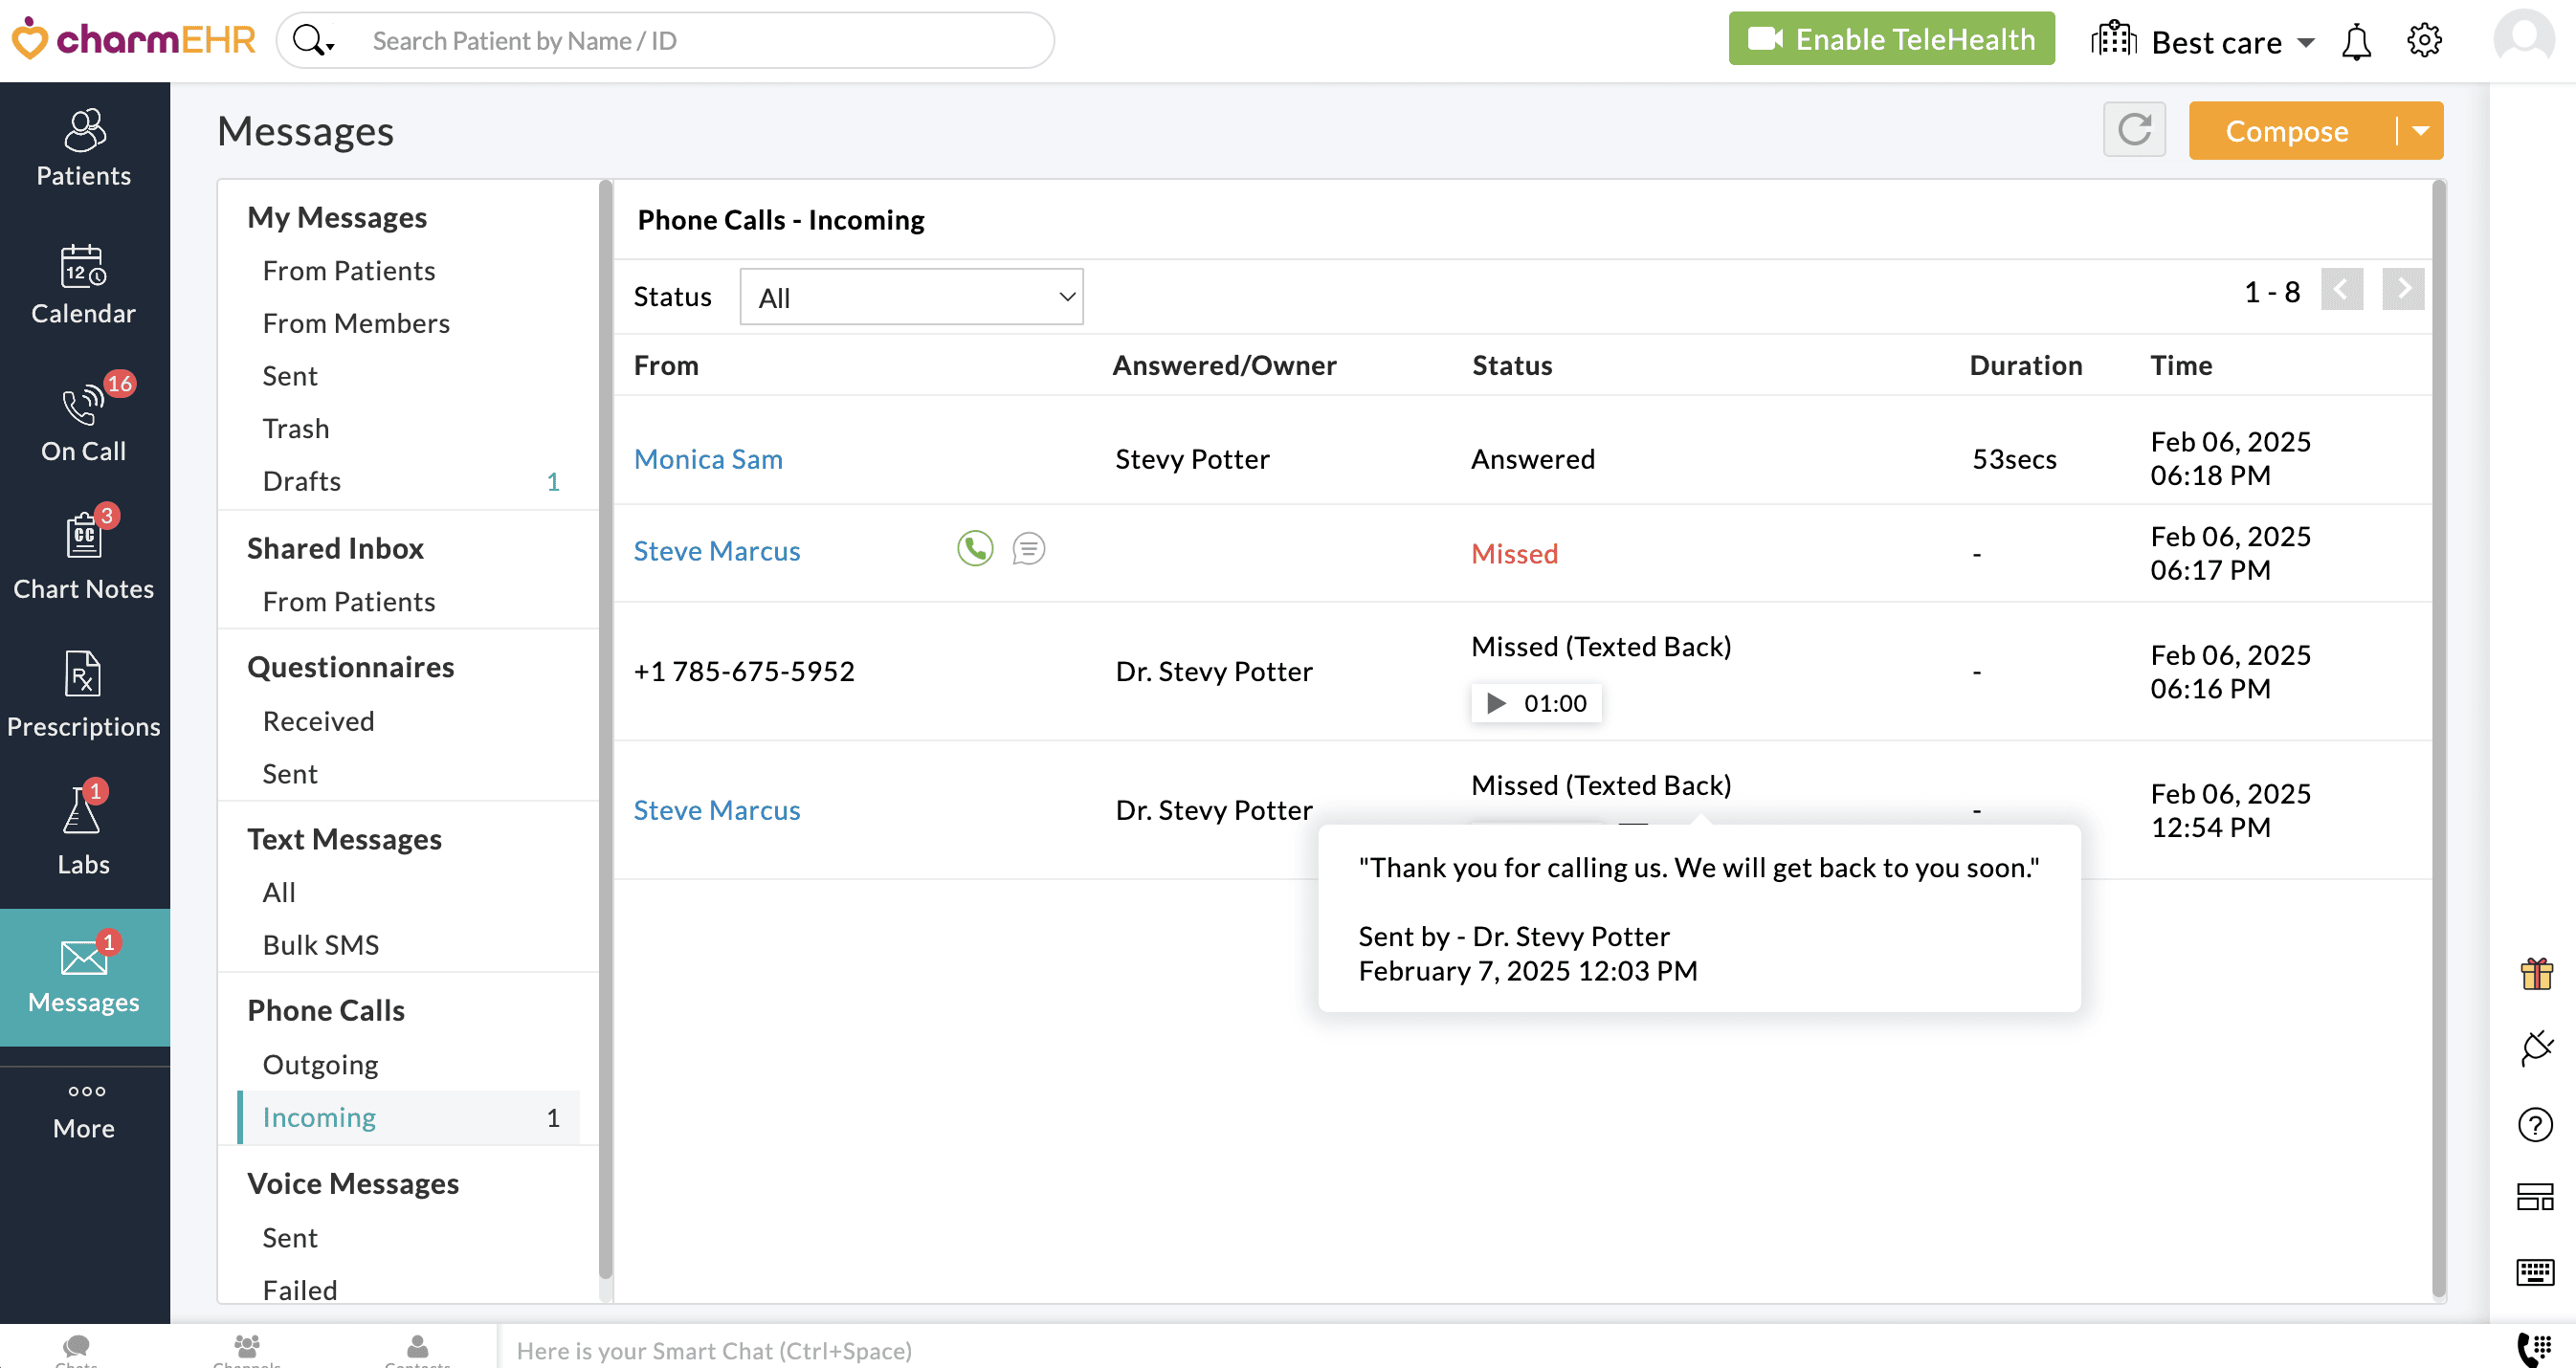
Note: If you have enabled the 'Receive' option for incoming calls in the Settings page, you can view the Practice Member who answered the incoming call.
Also, hovering over a call log displays the 'Bin' icon, which you can use to delete the missed call log if required.
Role Privileges
Practice Admin and Office Managers can enable or disable the phone call-related actions for practice members using role privileges.
Follow the steps below to turn on/off the privileges.
- Go to the 'Settings > Facility > Roles' section
- Edit the role and enable/disable the required privileges under the 'Messages > Phone calls' section.
- Click on the 'Save' button.
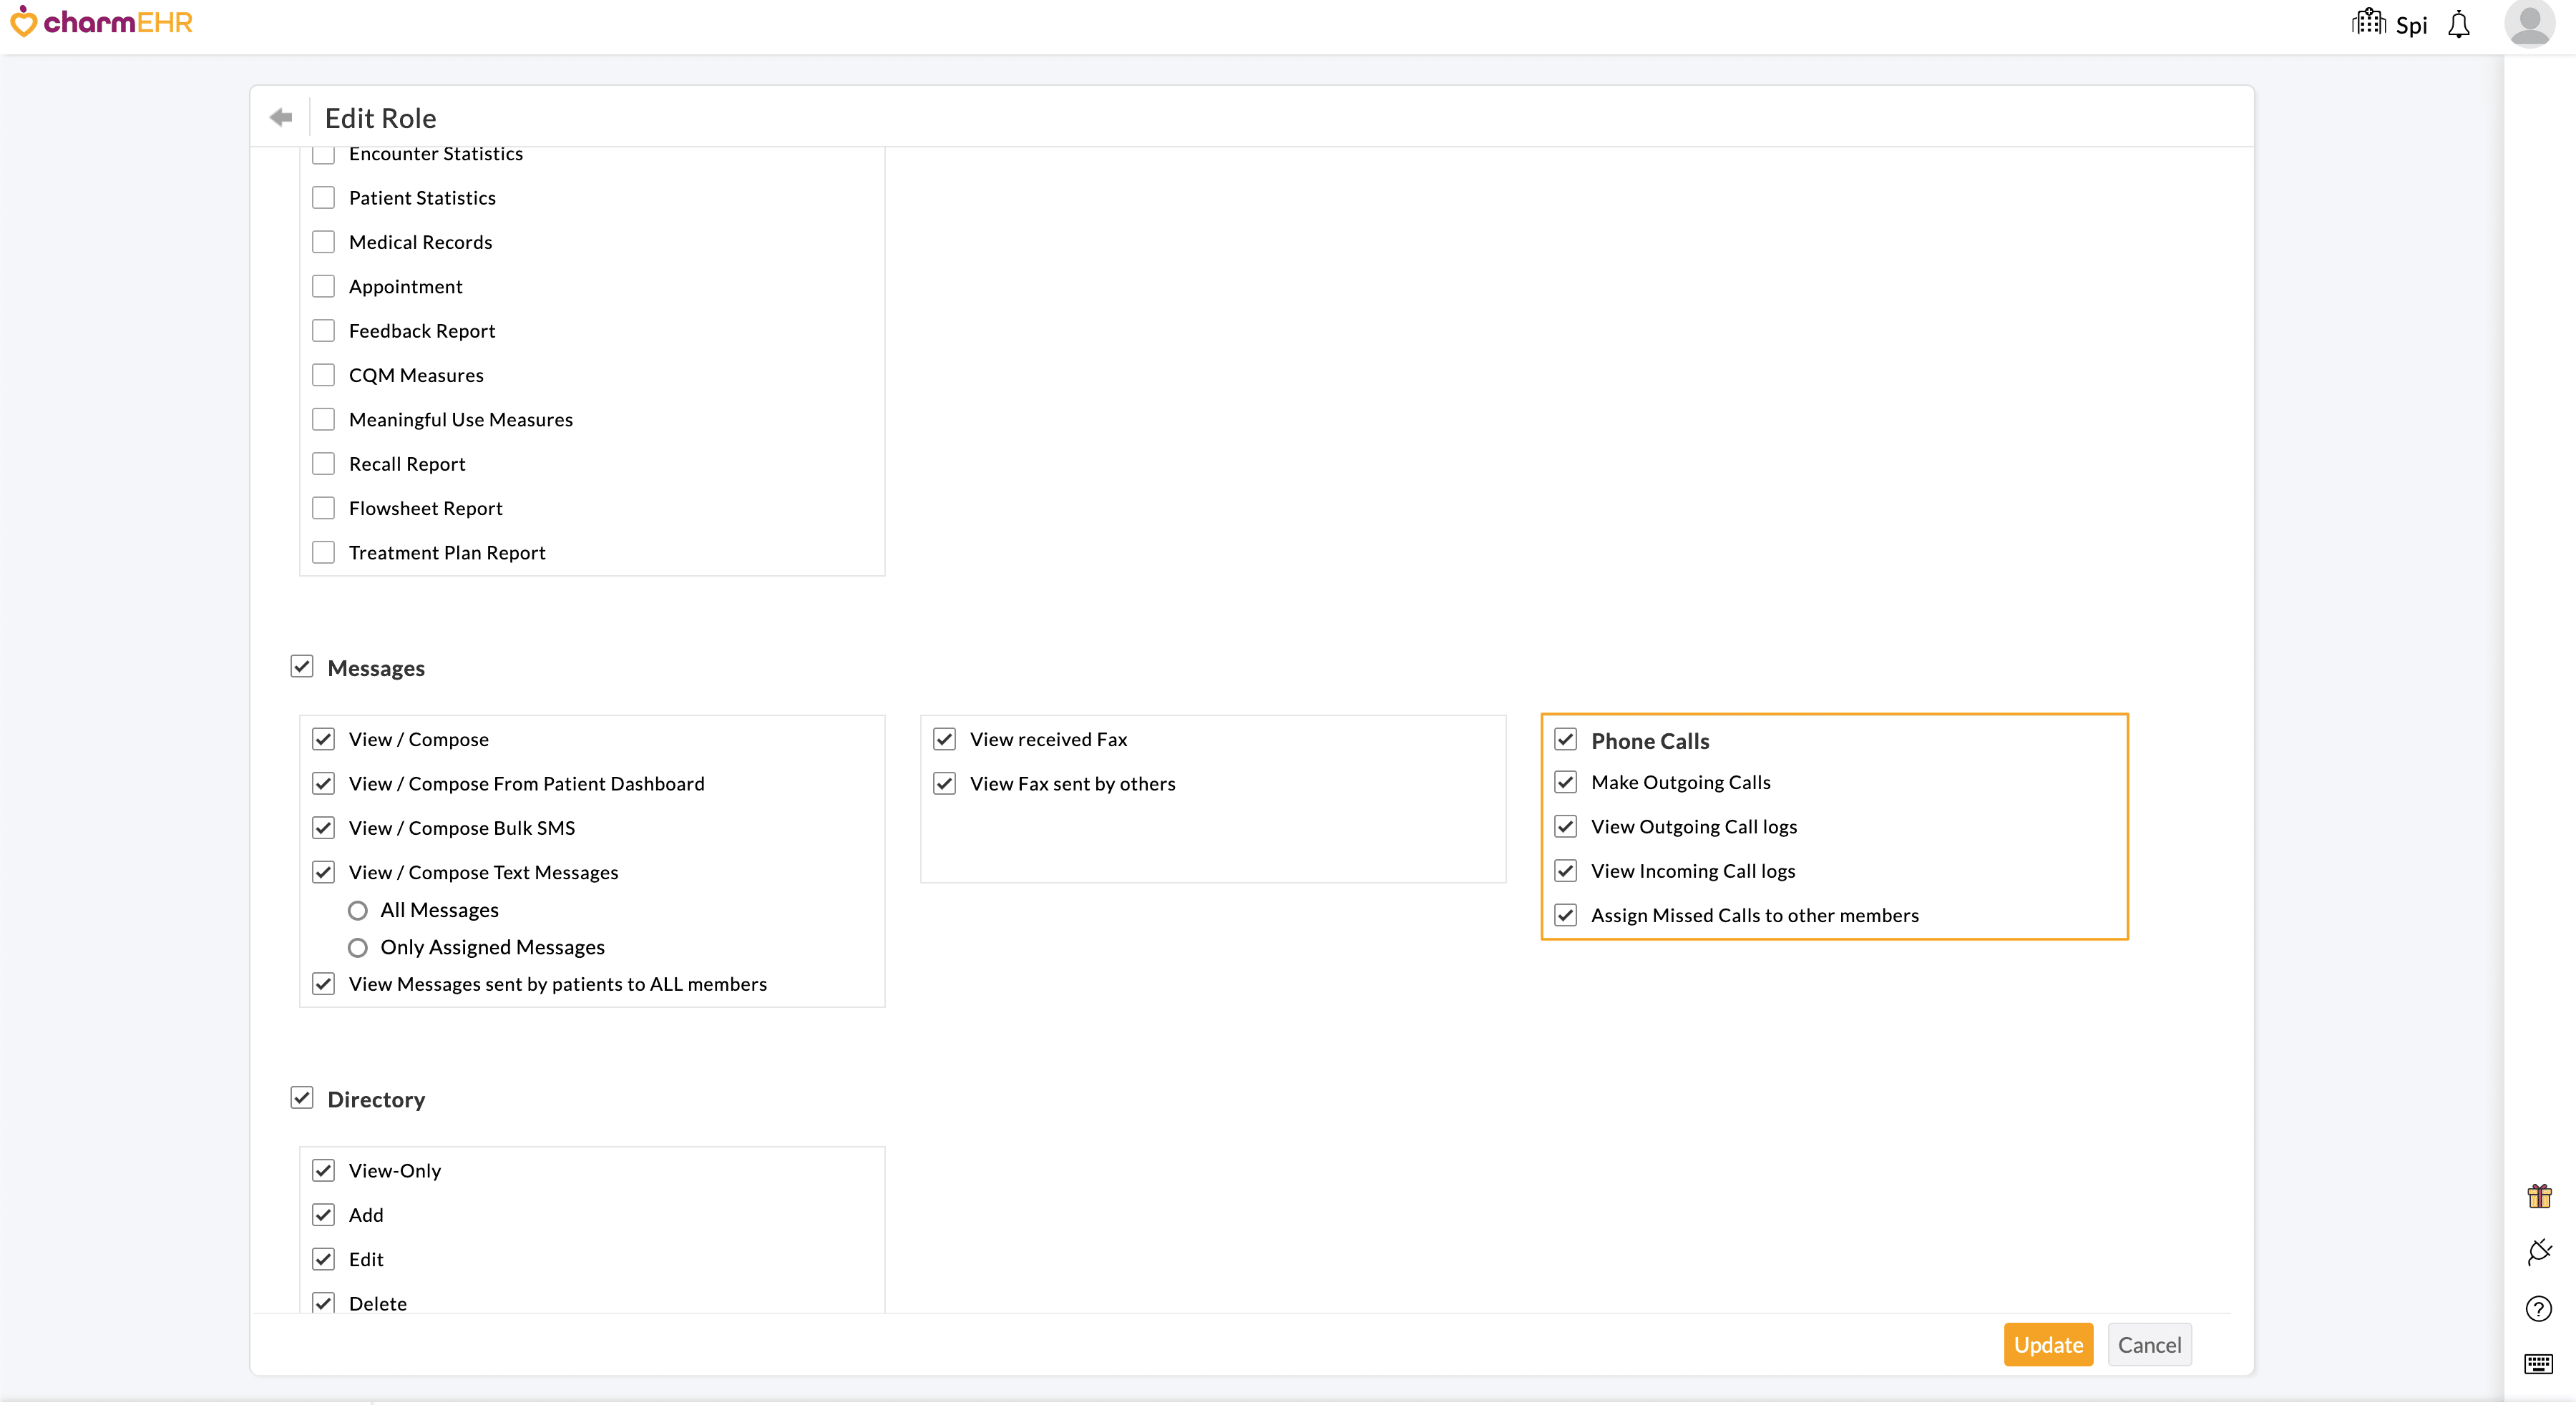
Note: Even if the 'Make Outgoing Calls' option is enabled, members can make calls only if they have the role privilege to access the sections that include the Phone Calls option.