Scanner
The CharmHealth Scanner Integration allows practices to scan and upload the documents directly to the Patient Chart. The user-friendly tool is designed to enhance efficiency and streamline your workflow. It empowers the front office staff to digitize essential patient documents such as insurance cards, photo IDs, and medical records accurately.
Subscribe to the Scanner Integration
- Login to your CharmHealth EHR account
- Go to the 'Settings > Facility > Scanner' section.
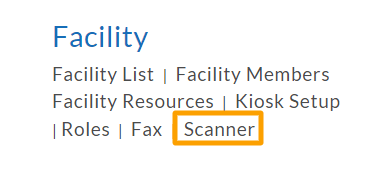
Alternatively, you can click on the 'Plug' icon in the EHR dashboard to enable this feature from the Add-Ons page.

- Choose either the Monthly or Yearly plan.
- Click on the 'Subscribe' button.
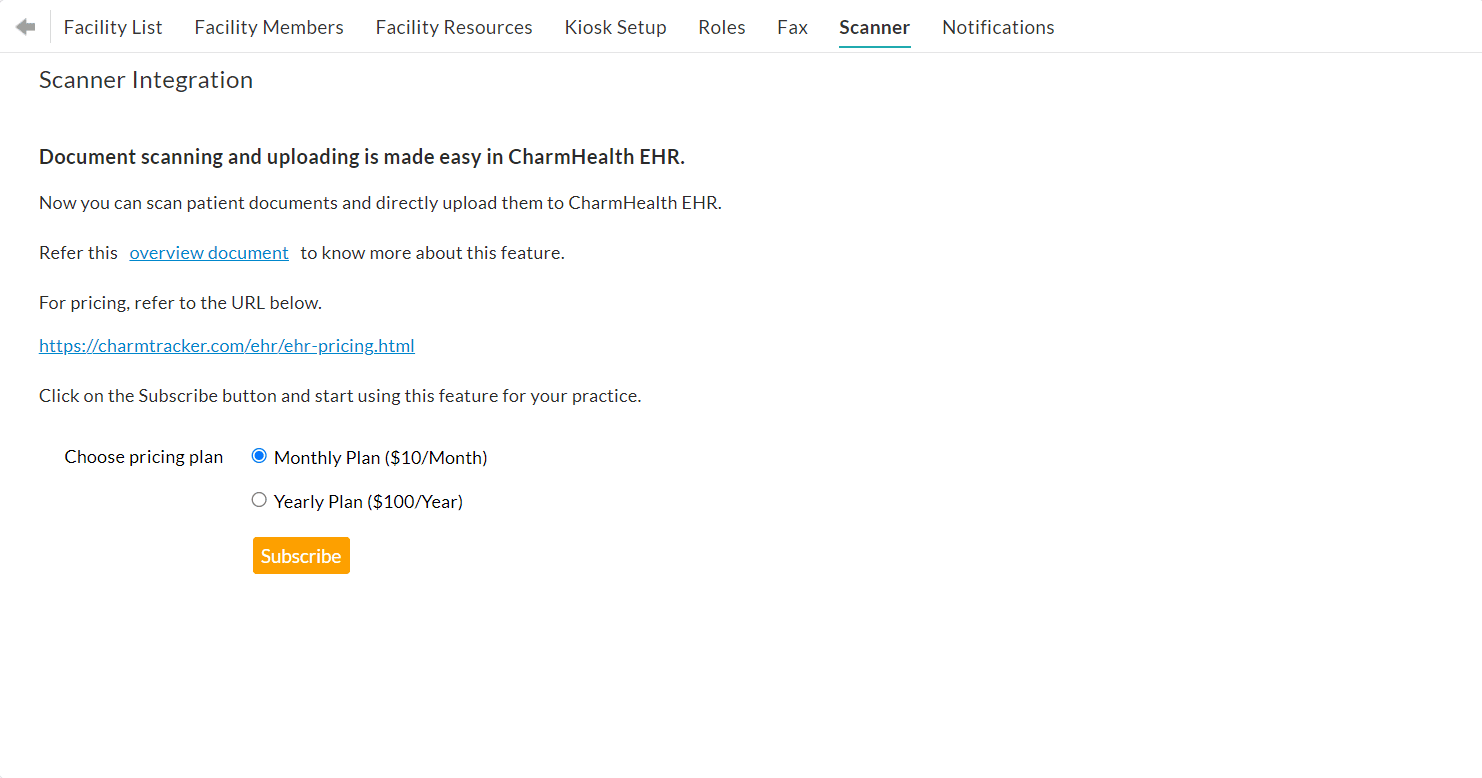
- If there is an existing card on file in your CharmHealth account, it will be used for the Scanner subscription. If not, you will be prompted to enter the card details.
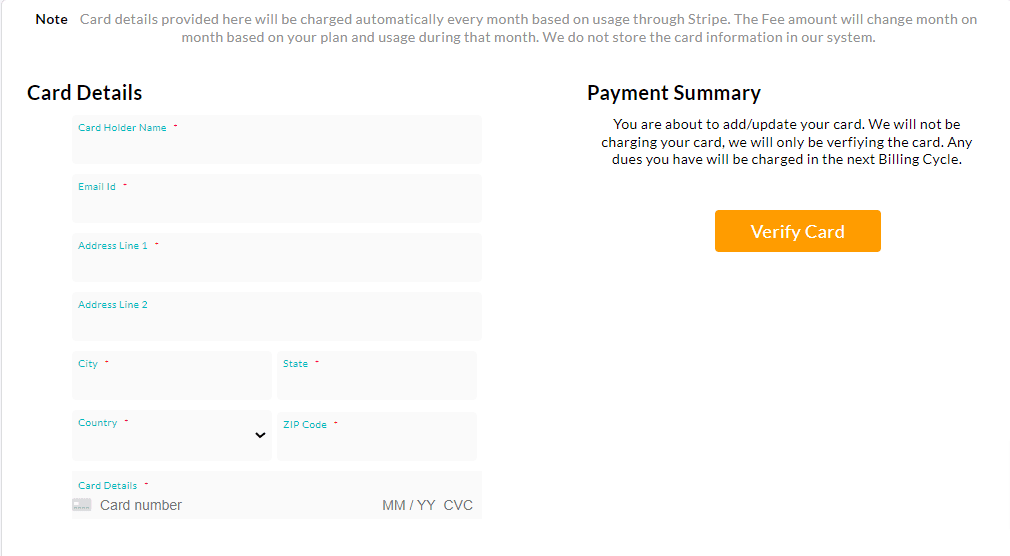
- Click on the 'Verify Card' button.
- Once subscribed, you can choose the Default File Format as PNG, PDF, or JPEG based on the Practice requirement. (You will also have the option to choose a file format while scanning documents.)
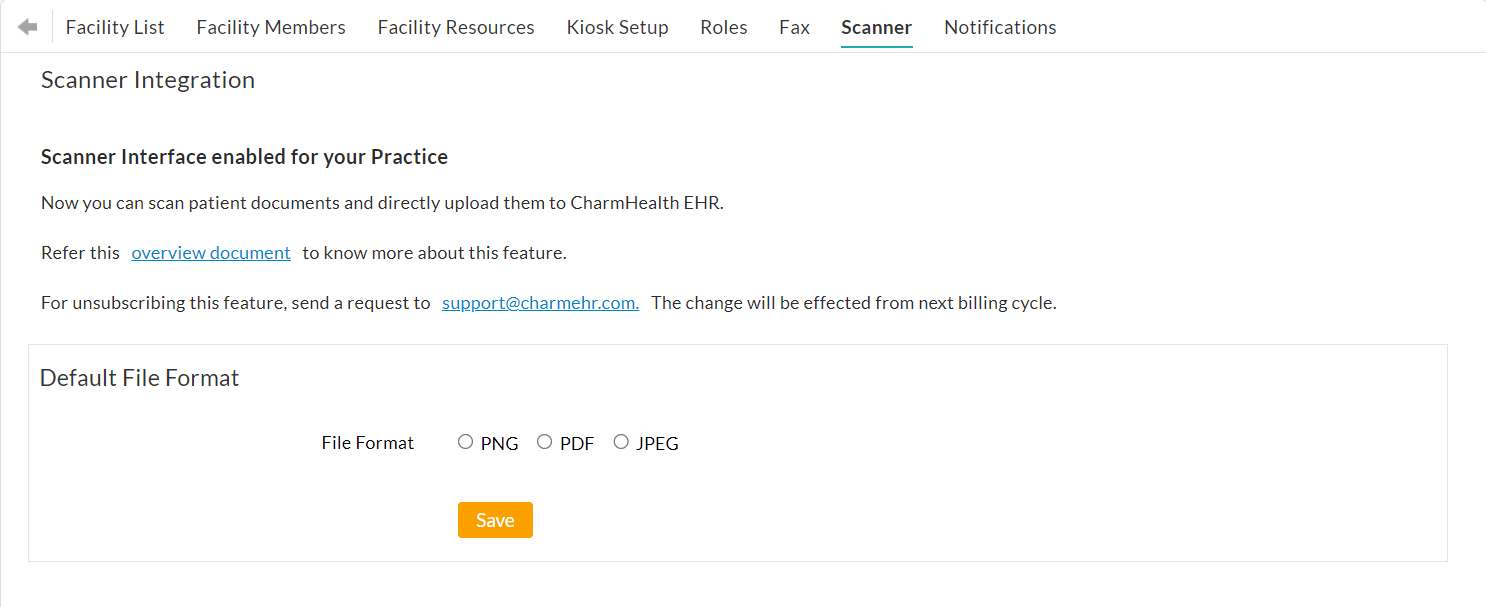
- Then, click on the 'Save' button.
Supported Hardware and Software
CharmHealth EHR Scanner interface can integrate with TWAIN-compatible scanners in Windows OS and ICA or Twain-compatible scanners in Mac OS. Typically, most scanners are TWAIN compliant, but you can confirm this by checking the specifications of your scanner or reaching out to the manufacturer for verification.
Learn how to check if your scanner is Twain-compliant here.
Learn how to check if your scanner is ICA-compliant here.
Supported OS
- Mac OSX 10.6 and above
- Windows 95, 98, ME, 2000, NT, XP, 2003, Vista, 7, 8, 2008, 2012 and 10
Supported Browsers
- IE v10 and v11
- Firefox v27 and above
- Chrome v27 and above
- Safari v7 and above
Access the Scanner Interface
The Scanner Interface can be accessed from different sections within the CharmHealth EHR dashboard.
- Calendar
- Insurance
- Past Encounters
- Labs/Images
- Documents
- Driving License
Calendar
Go to the 'Calendar > List View' section and click on the 'Scan' link available against each appointment.

Insurance
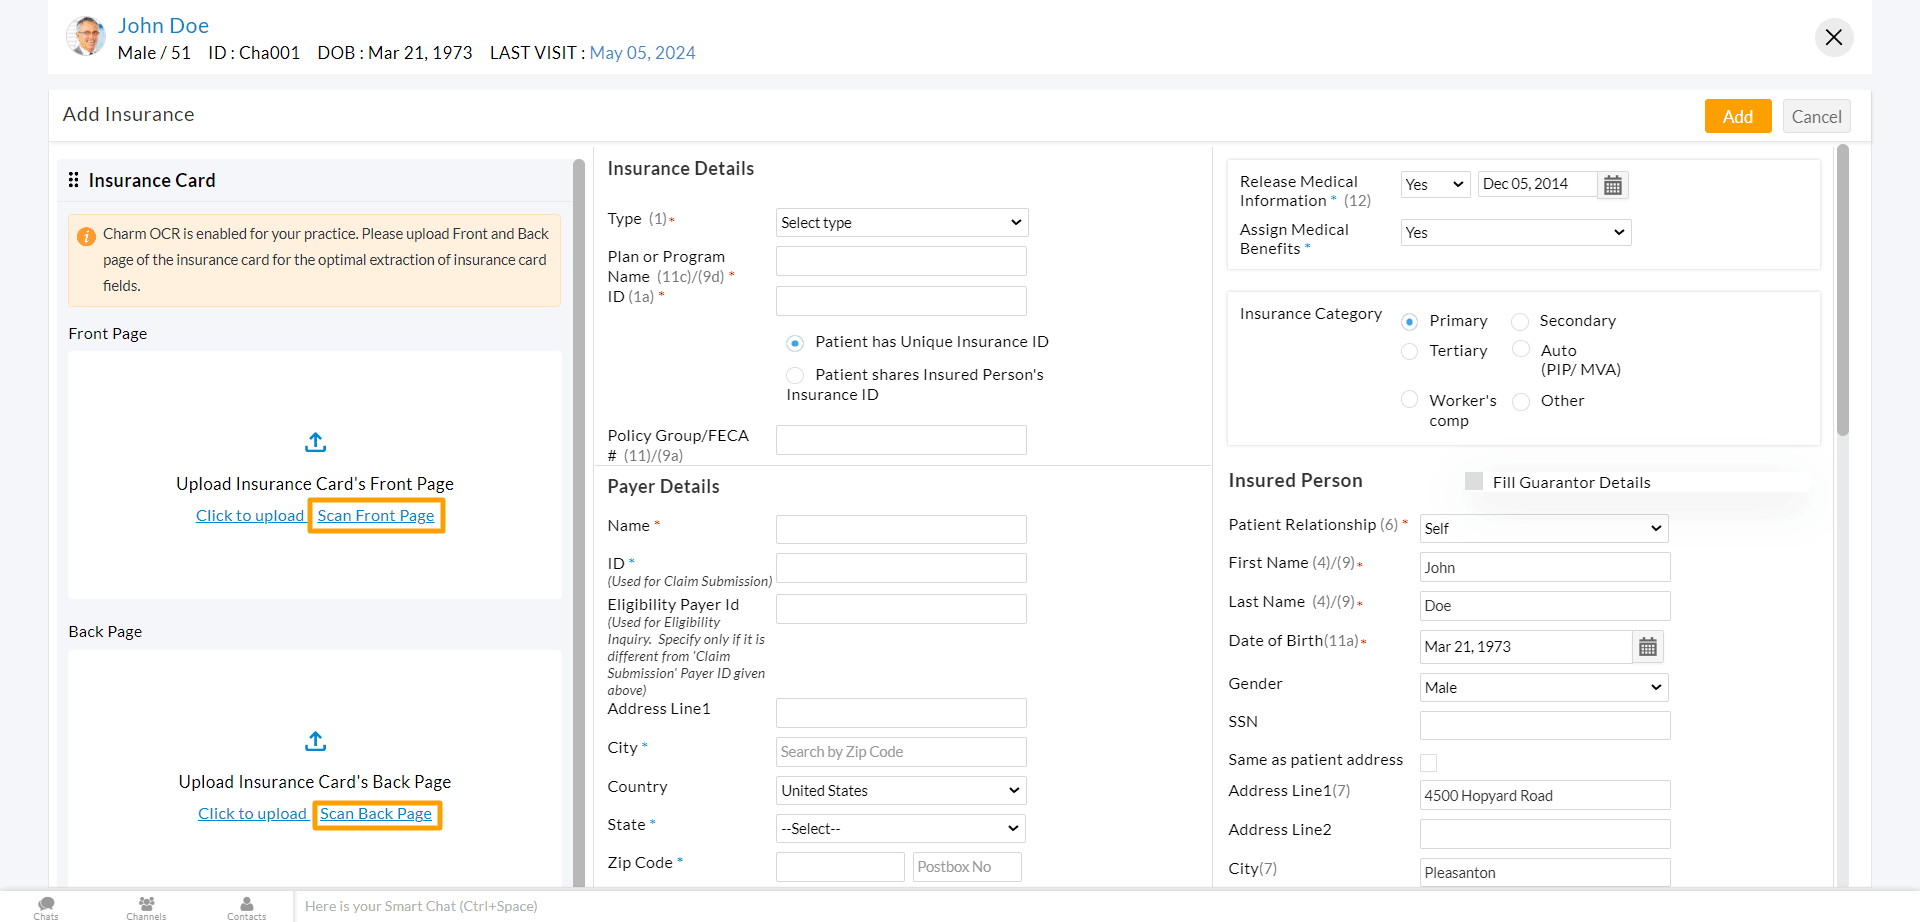
The Insurance Card Reader feature auto-populates patient insurance information from scanned insurance cards.To use this feature, go to the 'Patient Dashboard > Patient Details > Insurance' section. Click on the '+Insurance' button here.

Then, click on the 'Scan Front Page' and 'Scan Back Page' links to scan the front and backside of a Patient's insurance card separately. Learn more about how our Insurance Card Reader feature works here.
Past Encounter
Go to the 'Patient Dashboard > Encounters' section. Click on the 'More Options' icon (3 dots) and choose 'Scan Document'. This will allow you to scan the past paper charts and upload them for the patient.

Labs/Images
To scan and upload lab results, go to the 'Patient Dashboard > Lab Records' section and click on the 'Scan Lab Result' button.

Similarly, click on the '+Scan Image' button in the Images section to scan and upload images.

Documents
To scan any other patient documents, navigate to the 'Patient Dashboard > Documents' section. Click on the 'Import' drop-down button and choose the 'Scan Document' option.

Driving License
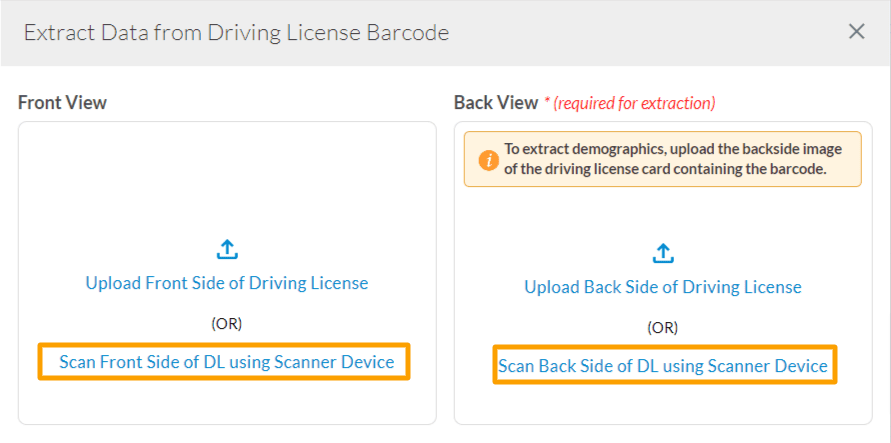
The Driving License Reader feature helps in extracting the patient demographics from the Driving License within the New/Add Patient registration workflow. Go to the 'Patient Registration Page' and click on the 'Extract Data from Driving License' link.

Scan the Front and Back pages of the Patient's driving license to extract patient data. Learn more about our Driving License Reader feature here.
Scanner Functionalities
The Scanner Interface allows you to Scan, Edit, and Upload patient documents. Clicking on the 'Scan' link available in various section within CharmHealth EHR opens the Scanner Interface in a new tab as shown in the image below.
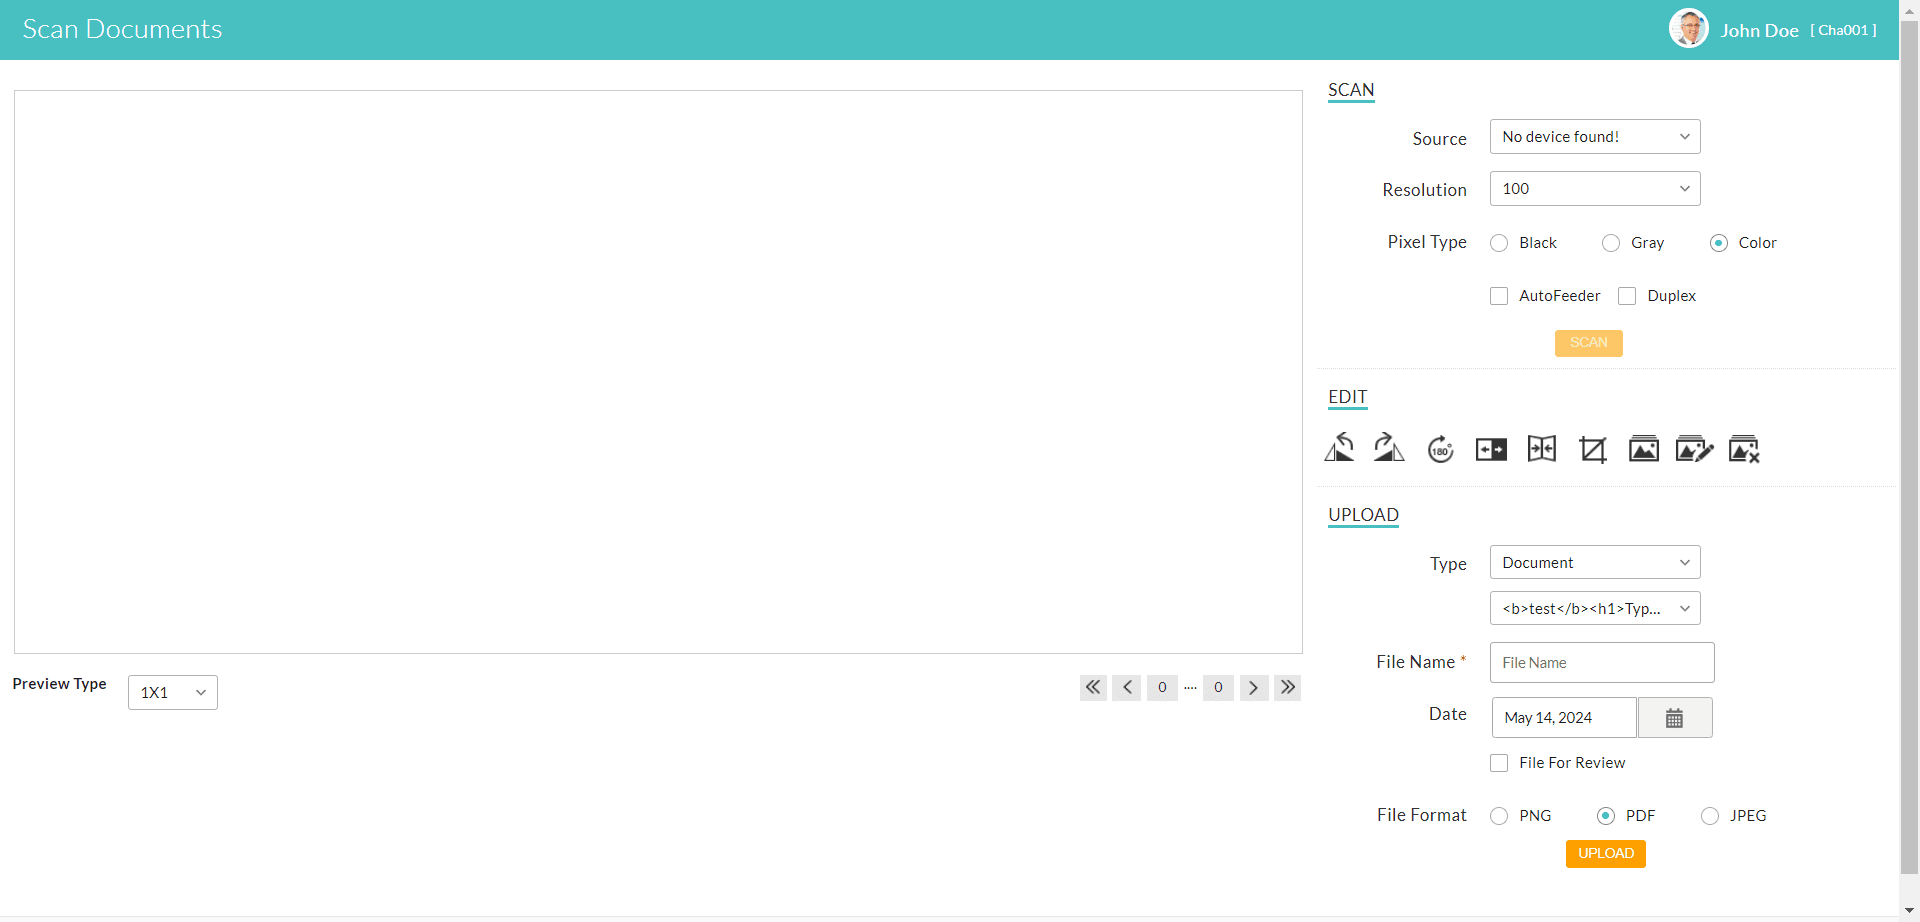
The Patient Name and ID are displayed for your reference on the top right corner.
Scan
In this section, the 'Source' drop-down menu displays all the scanners connected to your computer. Simply select a scanner to begin scanning. Likewise, choose the desired 'Resolution' and 'Pixel Type' for the document.
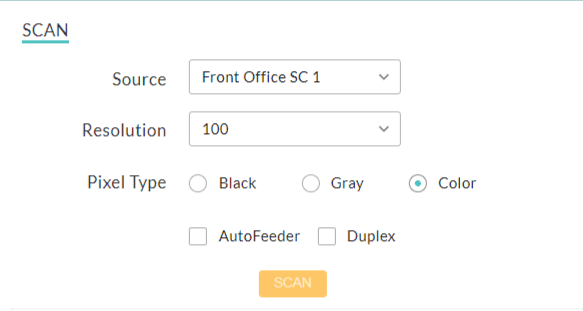
Enabling the 'AutoFeeder' checkbox allows you to scan documents in bulk and enabling the 'Duplex' option allows you to scan both the front and back sides of the document.
Edit
Once you have scanned the patient document, the Edit section allows you to edit single or multiple images at a time. You can rotate, flip, crop, adjust image size, edit a chosen image, or delete the selected images quickly.

Upload
The Upload section offers different options depending on the EHR section from where you invoked the Scan interface.
Calendar
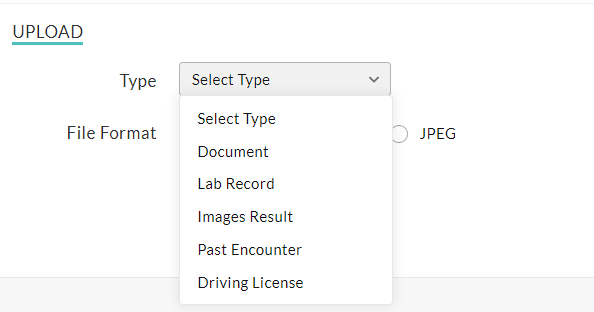
If invoked from the Calendar section, you can select any 'Type' from the drop-down list to proceed.
Past Encounters
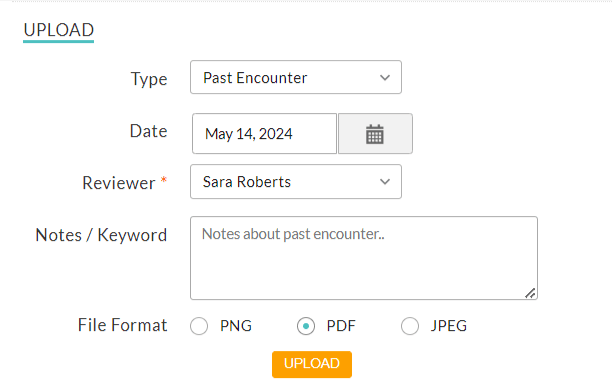
If invoked from the Past Encounter section, choose the Encounter Date and Reviewer. Include any note or keyword if needed and click on the 'Upload' button.
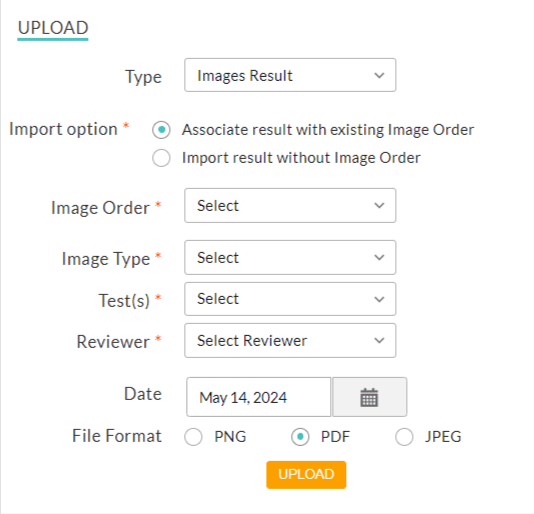
Lab Records/Image Results
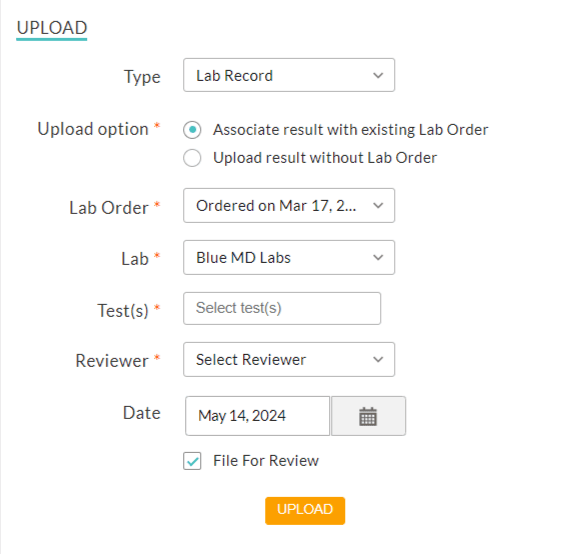
If invoked from the Lab Records section, choose an Upload Option, Order Date, Order and Test Type, Reviewer, and Result Data. Choose the 'File for Review' checkbox if you need it reviewed before clicking on the Upload button.
Documents
If invoked from the Documents section, choose the document Type, enter the File Name, and Date. Enable the File for Review checkbox if needed, and click on the Upload button.
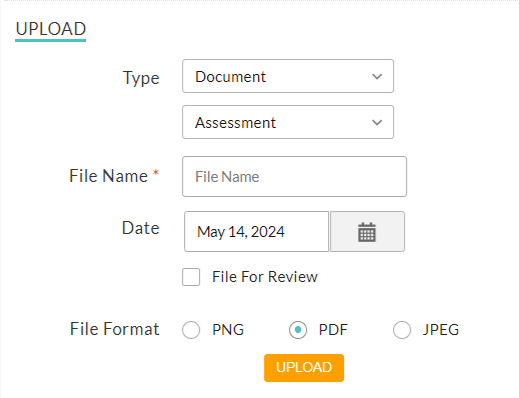
Note - The Default File Format configured in the Settings page is selected by default; you can choose a different format if required.
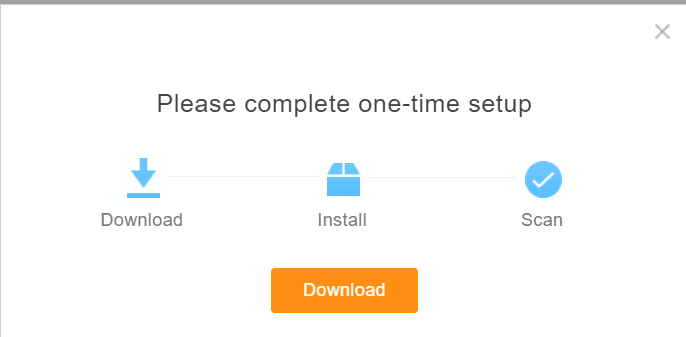
On clicking the Upload button, the initial scanning process requires you to install the Scanner Plug-in as a one-time setup. Our interface will recommend a plugin compatible with your operating system and browser. Click on the 'Download' button in the pop-up box to proceed.
